Christmas Thumbprint Cookies
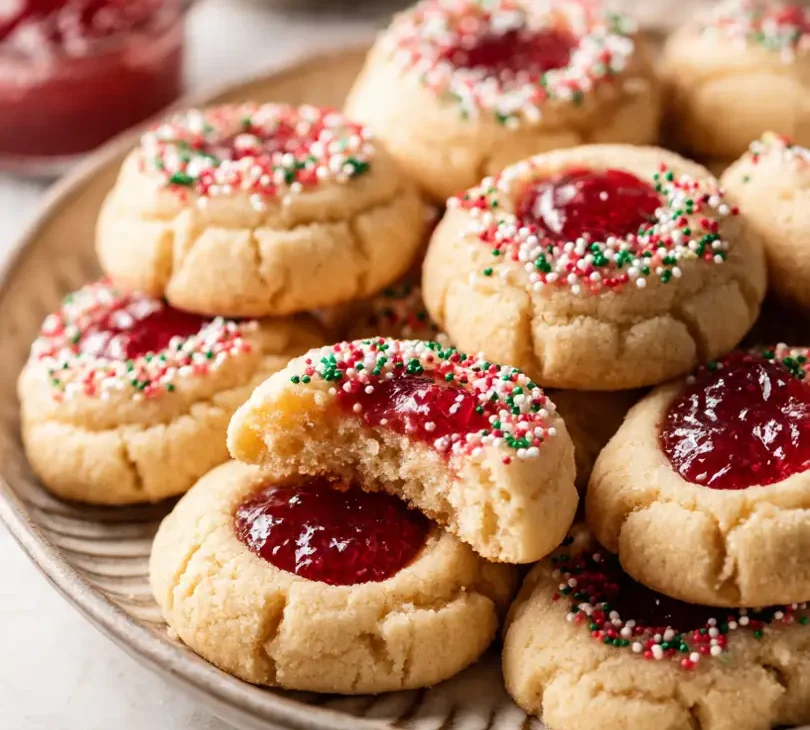
The holiday season is the perfect time to fill your kitchen with the sweet scent of freshly baked cookies. Christmas thumbprint cookies are a festive treat that’s as delightful to make as they are to eat. With their buttery dough and jam-filled centers, they bring a cheerful pop of color to any cookie platter, and they’re a favorite for sharing with family, friends, and neighbors.
What makes these cookies so special is how simple they are to prepare. You don’t need any complicated techniques or fancy ingredients — just a few basics you probably already have in your pantry. That’s why these cookies are often considered one of the best Christmas cookie recipes around. The soft, tender dough pairs perfectly with your choice of jam, giving each bite a satisfying mix of sweet and slightly tart flavors.
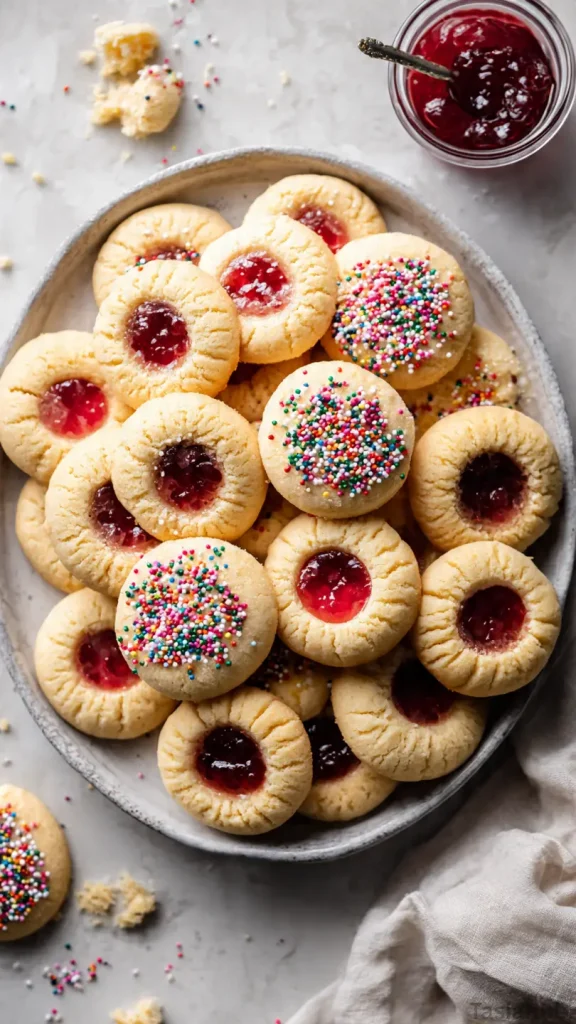
These easy holiday cookies are also wonderfully versatile. While traditional recipes call for raspberry or strawberry jam, you can experiment with apricot, cherry, or even chocolate spreads to make them your own. Their charming thumbprint design adds a personal touch to every batch, making them ideal for holiday gift-giving or festive cookie exchanges.
Another reason these simple Christmas cookies are so loved is how kid-friendly they are. Little hands can help roll the dough into balls, press their thumbprints, and add the jam. It’s a fun holiday activity that turns baking into a memory-making experience. Whether you’re an experienced baker or just getting started, this recipe is approachable and rewarding.
Why You’ll Love It
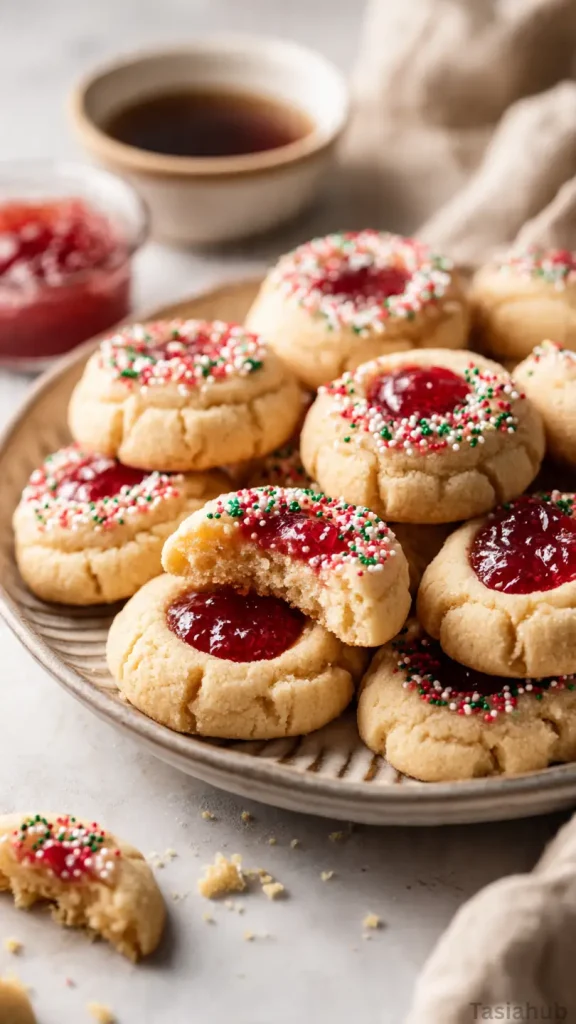
- Perfectly Soft and Chewy: Each bite melts in your mouth while still holding just enough shape to show off the jam-filled center. It’s the kind of texture that keeps you coming back for “just one more.”
- Quick and Stress-Free: These simple Xmas cookies come together in no time, making them ideal for busy holiday schedules. Even if you’re juggling gift wrapping and decorating, you can still pull off a batch of these delicious treats.
- Customizable Flavors: From classic raspberry to chocolate-hazelnut spread, you can switch up the jam or filling to match your holiday mood. Every batch can be uniquely yours.
- Kid-Friendly Fun: The thumbprint process is perfect for little hands. Kids can help press the centers and add jam, turning baking into a joyful holiday activity.
- Beautiful Holiday Presentation: With their colorful jam centers and golden edges, these cookies make any cookie platter feel extra festive. They’re as charming to look at as they are to eat.
Ingredient List
For the Cookies:
- 1 cup (2 sticks) unsalted butter, softened
- 2/3 cup granulated sugar
- 1/2 teaspoon vanilla extract
- 1/4 teaspoon almond extract (optional, but adds a nice depth)
- 2 cups all-purpose flour
- 1/4 teaspoon salt
For the Filling:
- 1/3 cup jam (raspberry, strawberry, apricot, or your favorite)
- Optional: 1/4 cup finely chopped nuts or sprinkles for topping
Ingredient Notes
- I always use unsalted butter—it gives these cookies the perfect buttery flavor without being too salty.
- Vanilla extract is a must! It really brings out the warmth in these simple Christmas cookies.
- Don’t skip the almond extract if you have it on hand; it adds a subtle, cozy nutty flavor that pairs beautifully with the jam.
- Jam choice matters: I love raspberry for the classic look and tartness, but apricot is a fun twist. Use what makes your holiday heart happy!
- If you like a little crunch, sprinkle some finely chopped nuts on top after baking—they make the cookies look fancy without any extra effort.
Kitchen Equipment Needed
- Mixing Bowl: For combining the butter, sugar, and flour—my favorite is a large glass bowl because it’s easy to see everything come together.
- Hand Mixer or Stand Mixer: Makes creaming the butter and sugar effortless. I usually grab my hand mixer for quick batches.
- Measuring Cups and Spoons: Essential for getting your ingredients just right. Accuracy = perfect cookies every time!
- Baking Sheet: For baking the cookies evenly; I line mine with parchment paper to prevent sticking and make cleanup a breeze.
- Cooling Rack: Lets your cookies cool completely without getting soggy bottoms.
- Teaspoon or Small Spoon: For filling the thumbprints with jam neatly. I like using a teaspoon for precision.
- Cookie Scoop (Optional): Helps make uniformly sized cookie balls; I swear by mine for consistent results.
Instructions
1. Preheat and Prep
- Preheat your oven to 350°F (175°C).
- Line a baking sheet with parchment paper or a silicone baking mat. This prevents sticking and makes cleanup a breeze.
- Pro Tip: If you want perfectly round cookies, chill the dough for 10–15 minutes before shaping—it helps hold the shape while baking.
2. Cream the Butter and Sugar
- In a large mixing bowl, add the softened butter and granulated sugar.
- Use a hand mixer or stand mixer to beat on medium speed until light and fluffy, about 2–3 minutes.
- Pro Tip: Scrape down the sides of the bowl once or twice to make sure everything is evenly combined.
3. Add Extracts
- Mix in the vanilla extract and almond extract (if using) until fully incorporated.
- The aroma here is amazing and really starts that holiday feeling!
4. Combine Dry Ingredients
- In a separate bowl, whisk together the all-purpose flour and salt.
- Gradually add the dry ingredients to the butter mixture on low speed. Mix until just combined. Avoid overmixing—overworked dough can make cookies tough.
5. Shape the Cookies
- Scoop out about 1 tablespoon of dough and roll it into a smooth ball.
- Place the dough balls on the prepared baking sheet about 2 inches apart.
- Use your thumb (or the back of a teaspoon) to gently press an indentation into the center of each ball.
6. Fill the Thumbprints
- Spoon a small amount of your favorite jam into each indentation. Don’t overfill, or it may spill while baking.
- Optional: Sprinkle chopped nuts or festive sprinkles over the jam for extra holiday flair.
7. Bake the Cookies
- Bake in the preheated oven for 12–15 minutes, or until the edges are lightly golden.
- Pro Tip: Keep an eye on them in the last 2 minutes—overbaking can dry them out, and we want soft, tender cookies.
8. Cool and Serve
- Allow the cookies to cool on the baking sheet for 5 minutes before transferring them to a cooling rack.
- Once fully cooled, store in an airtight container to keep them fresh.
Tips and Tricks for Success
- Chill the Dough: If your kitchen is warm, chilling the dough for 10–15 minutes makes it easier to shape and keeps the cookies from spreading too much.
- Uniform Sizes: Use a cookie scoop to make evenly sized cookies—this helps them bake evenly.
- Don’t Overfill with Jam: Too much jam can bubble over in the oven. A teaspoon per cookie is perfect.
- Room Temperature Butter: Softened butter blends better with sugar for that light, tender texture.
- Cool Before Storing: Let cookies cool completely before putting them in a container to avoid soggy bottoms.
- Mix Flavors: Try combining jams, or add a tiny sprinkle of sea salt over the jam for a sweet-salty twist.
Ingredient Substitutions and Variations
- Butter: You can substitute with margarine or coconut oil, but the flavor will be slightly different. Butter gives the richest taste.
- Flour: All-purpose flour works best, but you can try half whole wheat for a nuttier flavor.
- Jam: Raspberry and strawberry are classic, but apricot, cherry, or even fig preserves work beautifully.
- Almond Extract: Can be skipped or replaced with a touch of orange or lemon zest for a bright twist.
- Toppings: Nuts, sprinkles, or even mini chocolate chips can be added to jam centers for extra fun and texture.
- Gluten-Free Option: Substitute all-purpose flour with a 1:1 gluten-free baking flour blend.
Serving Suggestions
- I love serving these thumbprint cookies on a festive platter with a cup of hot cocoa—it makes for a cozy holiday afternoon treat.
- Pair them with your favorite holiday tea for a sweet little mid-morning pick-me-up.
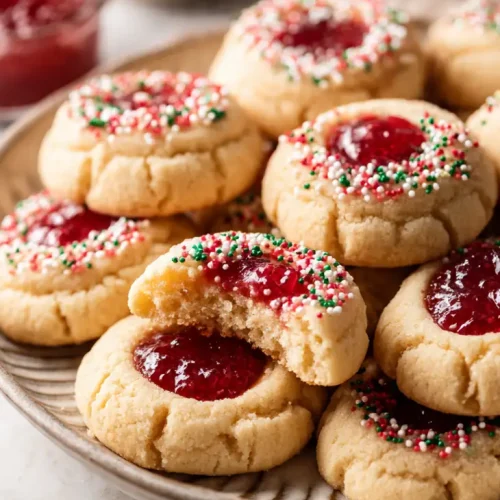
- These cookies make the perfect addition to a holiday cookie exchange or party platter—they’re colorful and always disappear fast!
- Wrap a few in a small gift box or tin for neighbors or friends—it’s such a thoughtful, homemade holiday gift.
- I like crumbling a cookie over vanilla ice cream for a quick and indulgent dessert twist—it adds texture and jammy sweetness.
Storage and Reheating Instructions
- Room Temperature: Store in an airtight container for up to 5 days. Keeps cookies soft and fresh.
- Refrigerator: Can be stored in the fridge for up to 2 weeks. Bring to room temperature before serving for best flavor.
- Freezer: Freeze baked cookies for up to 3 months. Thaw at room temperature or warm gently in the oven.
- Reheating: Warm cookies in a preheated 300°F (150°C) oven for 5 minutes to refresh their softness.
- Jam Refresh: If the jam center loses some moisture after freezing, spoon a tiny bit of fresh jam on top before serving.
Frequently Asked Questions
Can I use frozen jam for the filling?
Yes! Just let it thaw slightly so it’s easy to spoon into the thumbprints. Frozen jam works well if you’re prepping ahead.
How do I prevent the cookies from spreading too much?
Chill the dough for 10–15 minutes before baking and make sure your butter is soft, not melted. This keeps the cookies nice and round.
Can I make these cookies gluten-free?
Absolutely! Substitute all-purpose flour with a 1:1 gluten-free baking flour blend. The texture might be slightly different, but they’ll still be delicious.
Can I freeze the cookies before baking?
Yes! Shape the cookies and press the thumbprints, then freeze on a baking sheet. Once frozen, transfer to a container and bake straight from frozen—just add a couple extra minutes to the baking time.
What if I don’t have almond extract?
No problem! You can skip it or use a tiny bit of citrus zest, like orange or lemon, to give a bright, festive twist.
How should I store leftover cookies?
Keep them in an airtight container at room temperature for up to 5 days, or freeze for longer storage. Warm gently before serving if needed.
Did you try this recipe? Let me know in the comments how it turned out! I’d love to hear about your favorite jam flavor or any fun twists you added to make these the best thumbprint cookies for your holiday celebrations.
Christmas Thumbprint Cookies
Equipment
- Mixing Bowl
- Hand mixer or stand mixer
- Measuring cups and spoons
- Baking Sheet
- Cooling Rack
- Teaspoon or Small Spoon
- Cookie scoop (optional)
Ingredients
For the Cookies:
- 1 cup 2 sticks unsalted butter, softened
- 2/3 cup granulated sugar
- 1/2 teaspoon vanilla extract
- 1/4 teaspoon almond extract optional, but adds a nice depth
- 2 cups all-purpose flour
- 1/4 teaspoon salt
For the Filling:
- 1/3 cup jam raspberry, strawberry, apricot, or your favorite
- Optional: 1/4 cup finely chopped nuts or sprinkles for topping
Instructions
Preheat and Prep
- Preheat your oven to 350°F (175°C).
- Line a baking sheet with parchment paper or a silicone baking mat. This prevents sticking and makes cleanup a breeze.
- Pro Tip: If you want perfectly round cookies, chill the dough for 10–15 minutes before shaping—it helps hold the shape while baking.
Cream the Butter and Sugar
- In a large mixing bowl, add the softened butter and granulated sugar.
- Use a hand mixer or stand mixer to beat on medium speed until light and fluffy, about 2–3 minutes.
- Pro Tip: Scrape down the sides of the bowl once or twice to make sure everything is evenly combined.
Add Extracts
- Mix in the vanilla extract and almond extract (if using) until fully incorporated.
- The aroma here is amazing and really starts that holiday feeling!
Combine Dry Ingredients
- In a separate bowl, whisk together the all-purpose flour and salt.
- Gradually add the dry ingredients to the butter mixture on low speed. Mix until just combined. Avoid overmixing—overworked dough can make cookies tough.
Shape the Cookies
- Scoop out about 1 tablespoon of dough and roll it into a smooth ball.
- Place the dough balls on the prepared baking sheet about 2 inches apart.
- Use your thumb (or the back of a teaspoon) to gently press an indentation into the center of each ball.
Fill the Thumbprints
- Spoon a small amount of your favorite jam into each indentation. Don’t overfill, or it may spill while baking.
- Optional: Sprinkle chopped nuts or festive sprinkles over the jam for extra holiday flair.
Bake the Cookies
- Bake in the preheated oven for 12–15 minutes, or until the edges are lightly golden.
- Pro Tip: Keep an eye on them in the last 2 minutes—overbaking can dry them out, and we want soft, tender cookies.
Cool and Serve
- Allow the cookies to cool on the baking sheet for 5 minutes before transferring them to a cooling rack.
- Once fully cooled, store in an airtight container to keep them fresh.
Notes
Nutritional Value (Per Cookie):
- Calories: 115
- Total Fat: 6g
- Saturated Fat: 4g
- Cholesterol: 20mg
- Sodium: 35mg
- Total Carbohydrates: 14g
- Sugars: 7g
- Protein: 1g
- Fiber: 0.3g