Christmas Spritz Cookies
The scent of buttery dough and sweet vanilla filling your kitchen is one of the most joyful parts of the holiday season. Christmas spritz cookies are a classic treat that bring a touch of tradition and charm to every holiday gathering. Their delicate shapes, often decorated with festive sprinkles, make them not just a delight to eat but a joy to look at. From cozy afternoons baking with family to elegant cookie exchanges, these cookies are always a hit.
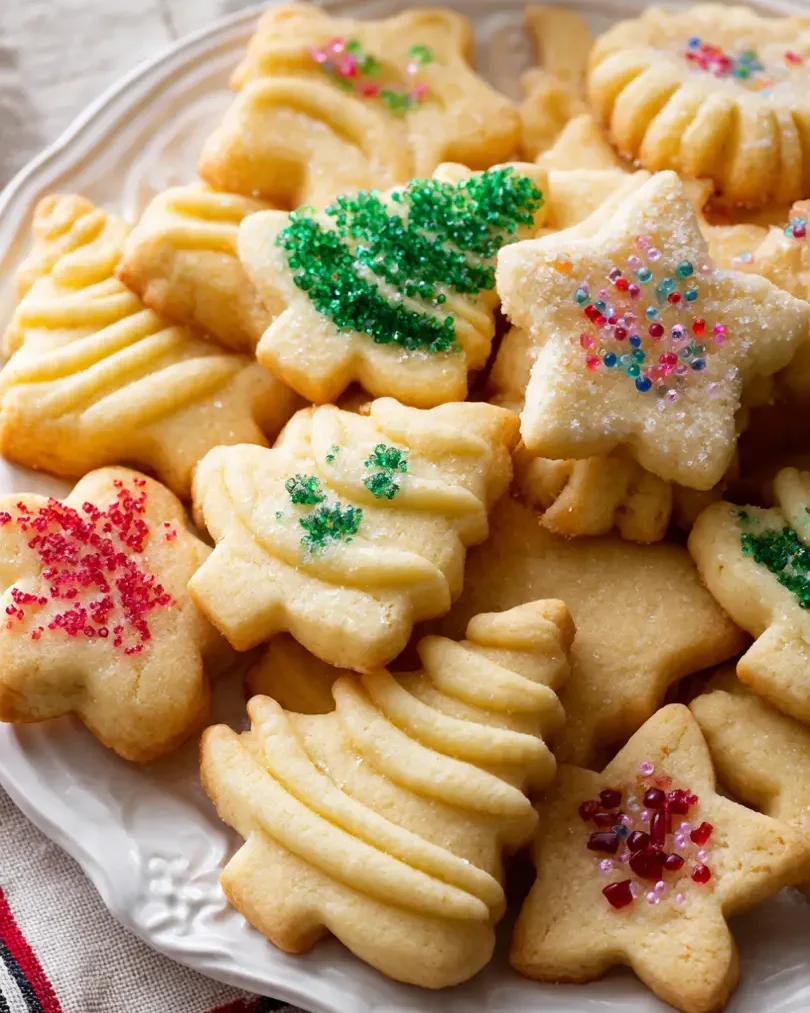
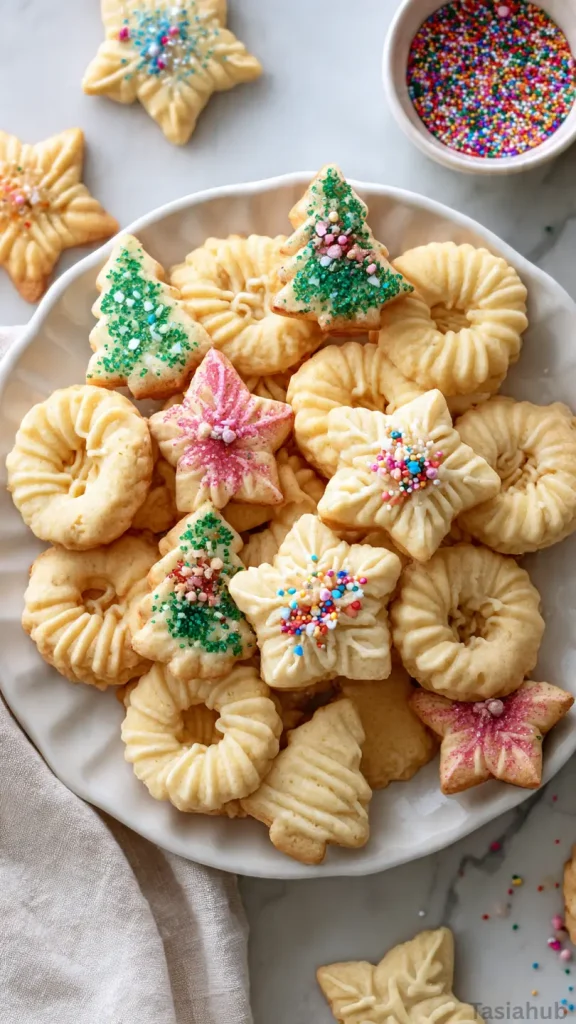
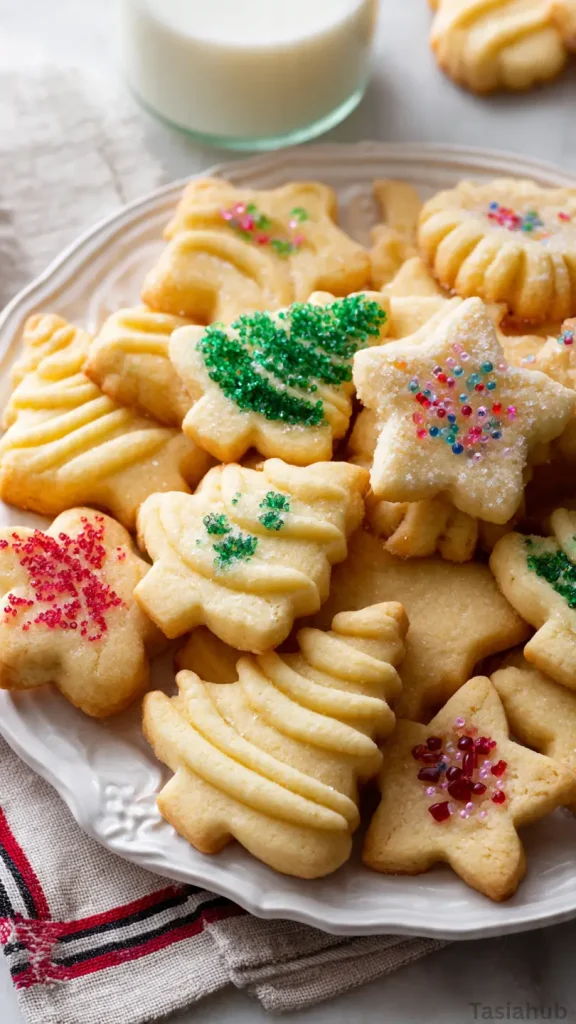
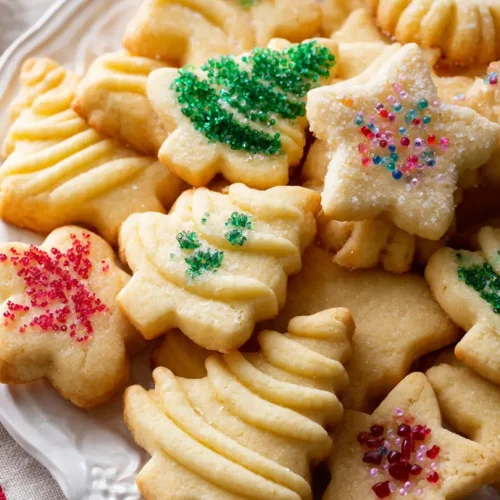
What makes holiday spritz cookies so special is how effortlessly they combine simplicity with charm. With just a few basic ingredients and a cookie press or piping bag, you can create a tray of perfectly uniform cookies that taste as delightful as they look. Their crisp edges and tender centers make them a favorite at holiday parties, and they’re the perfect base for adding a pop of color with sprinkles or colored sugar.
Easy spritz cookies are perfect for bakers of all skill levels. Even if you don’t bake often, you can enjoy the process and see impressive results with minimal effort. There’s something magical about pressing out dough into festive shapes, whether stars, trees, or classic wreaths, and knowing that each cookie will be perfectly golden and ready to enjoy.
Over the years, Christmas spritz cookies recipes have become a staple in many homes, celebrated alongside other popular Christmas cookies. They’re simple Christmas treats that carry a sense of nostalgia and joy, a reminder of holidays past while creating new memories. Whether you’re filling tins for neighbors or simply enjoying them with a cup of hot cocoa, these cookies are destined to become a favorite Christmas cookie in your home.
Why You’ll Love It
- Quick to make, big on charm – With just a few pantry staples, you can have a batch of cookies that look like they came from a bakery. It’s satisfying to see how simple ingredients turn into festive shapes in minutes.
- Perfect for decorating – From colorful sprinkles to a light dusting of sugar, these cookies invite creativity. Each batch can be a canvas for holiday cheer, making baking fun for both kids and adults.
- Versatile and timeless – Christmas spritz cookies fit any occasion. Whether you’re filling cookie tins, bringing treats to a party, or enjoying a quiet afternoon snack, they never feel out of place.
- Crispy yet tender – The cookies have that ideal texture: crisp around the edges but soft enough to melt in your mouth. It’s a balance that makes them irresistible bite after bite.
- Nostalgic holiday magic – These cookies carry a sense of tradition and warmth, reminding us of holiday mornings, family gatherings, and the simple joy of baking. They often become a favorite Christmas cookie year after year.
Ingredient List
For the Cookies:
- 1 cup (2 sticks) unsalted butter, softened
- 3/4 cup granulated sugar
- 1 large egg
- 1 teaspoon vanilla extract
- 1/2 teaspoon almond extract (optional, but so festive!)
- 2 1/2 cups all-purpose flour
- 1/4 teaspoon salt
- Colored sugar or sprinkles, for decorating
Ingredient Notes
- I always use unsalted butter—it gives the cookies the perfect rich flavor without being too salty.
- Granulated sugar is key for that light, crisp edge. Don’t swap it for brown sugar, or the texture changes.
- Almond extract is optional, but it adds a little extra holiday magic. Even a tiny bit makes the flavor pop!
- Sprinkles aren’t just for looks—they bring that festive crunch. I love using a mix of red, green, and white for Christmas spritz cookies.
Kitchen Equipment Needed
- Cookie press or piping bag – For creating those classic spritz shapes. I love my [brand/model] cookie press; it makes the process so smooth.
- Mixing bowls – One for wet ingredients, one for dry. A set of sturdy glass bowls works best.
- Electric mixer or hand mixer – Makes creaming butter and sugar effortless. I usually use my hand mixer; it gets the job done quickly.
- Baking sheets – Nonstick or lined with parchment paper to prevent sticking.
- Cooling racks – To let the cookies cool evenly and maintain their crisp edges.
- Spatula – For transferring cookies to the rack without breaking them.
Instructions
1. Prep Your Ingredients and Equipment
- Measure everything accurately before starting—baking is precise!
- Soften your butter: Leave it at room temperature for about 30–60 minutes. Softened butter creams more evenly with sugar.
- Line your baking sheets with parchment paper or silicone mats so cookies don’t stick.
Pro tip: Prepping everything first makes the process much smoother and less stressful.
2. Cream Butter and Sugar
- In a large mixing bowl, beat the softened butter and sugar together on medium speed until light and fluffy, about 2–3 minutes.
- Scrape the sides of the bowl occasionally to ensure even mixing.
Pro tip: Don’t rush this step—well-creamed butter and sugar give the cookies their tender, light texture.
3. Add Eggs and Extracts
- Beat in the egg until fully incorporated.
- Mix in vanilla extract and almond extract (if using) until smooth.
- Stop and scrape the bowl again to catch any bits clinging to the sides.
4. Combine Dry Ingredients
- In a separate bowl, whisk together the flour and salt.
- Gradually add the dry ingredients to the wet mixture on low speed. Mix just until combined—overmixing can make the cookies tough.
Pro tip: If the dough feels too soft to hold a shape, chill it for 10–15 minutes before pressing.
5. Shape the Cookies
- Fill your cookie press or piping bag with dough.
- Press or pipe cookies directly onto your prepared baking sheets in festive shapes like stars, trees, or wreaths.
- Leave a little space between each cookie—they spread slightly while baking.
Pro tip: Practice a few test cookies first to get comfortable with your cookie press pressure.
6. Decorate Before Baking
- Sprinkle colored sugar or festive sprinkles on each cookie.
- Gently press sprinkles into the dough so they stick during baking.
7. Bake the Cookies
- Bake in a preheated oven at 350°F (175°C) for 8–10 minutes, or until the edges are just starting to turn golden.
- Rotate the baking sheet halfway through for even baking.
Pro tip: Keep a close eye on them—spritz cookies bake quickly and can brown too fast.
8. Cool and Serve
- Let cookies cool on the baking sheet for 2–3 minutes before transferring to a wire rack.
- Allow them to cool completely to maintain crisp edges.
- Store in an airtight container or share immediately—these cookies disappear fast!
Tips and Tricks for Success
- Room temperature butter is key – It creams better with sugar, giving the cookies a tender texture.
- Don’t overmix the dough once you add flour; overworking it can make cookies dense.
- Chill dough if needed – If it’s too soft to hold shapes, a short chill makes pressing easier.
- Use parchment or silicone mats – Prevents sticking and helps cookies bake evenly.
- Practice your shapes – A few test cookies help you get consistent pressure with your cookie press.
- Watch the bake time closely – Spritz cookies bake quickly; edges should just start turning golden.
Ingredient Substitutions and Variations
- Butter: Can substitute with margarine in a pinch, though flavor may be slightly different.
- Flour: For a lighter texture, try half all-purpose and half cake flour.
- Extracts: Swap almond extract for lemon or orange for a citrusy twist.
- Decorations: Use mini chocolate chips, sanding sugar, or edible glitter instead of traditional sprinkles.
- Add-ins: Fold in finely chopped nuts or dried cranberries for extra flavor and texture.
Serving Suggestions
- I love serving Christmas spritz cookies with a cup of hot cocoa on a chilly evening—it’s the perfect cozy combo!
- Arrange them on a festive cookie platter for holiday parties; the colorful shapes always spark conversation.
- Pair a few cookies with vanilla or peppermint ice cream for a simple but indulgent dessert.
- Wrap a small batch in cellophane with a ribbon to give as sweet homemade gifts to friends and neighbors.
- Enjoy them alongside your favorite holiday tea or coffee for a relaxing afternoon treat.
Storage and Reheating Instructions
- Room temperature: Store cookies in an airtight container for up to 1 week.
- Freezing: Freeze baked cookies in a sealed container or freezer bag for up to 3 months.
- Thawing: Let frozen cookies thaw at room temperature for 30–60 minutes before serving.
- Re-crisping: Warm cookies in a 300°F oven for 3–5 minutes to bring back their crisp edges.
- Avoid moisture: Keep away from humid areas to prevent cookies from becoming soft or sticky.
Frequently Asked Questions
Can I make these cookies without a cookie press?
Absolutely! You can use a piping bag with a star or round tip to pipe the dough into shapes. A spoon and your hands also work in a pinch for simple rounds.
Can I freeze the dough before baking?
Yes! Scoop or press the dough onto a tray, freeze until firm, then transfer to a freezer bag. Bake straight from frozen, just add 1–2 extra minutes to the bake time.
How do I keep the cookies from spreading too much?
Make sure your butter is softened, not melted, and don’t overmix once you add the flour. Chilling the dough briefly also helps maintain shapes.
Can I use different extracts for flavor?
Definitely! Almond extract is classic, but you can try vanilla, lemon, or even peppermint for a festive twist.
How long do these cookies stay fresh?
Stored in an airtight container at room temperature, they stay fresh for about a week. You can also freeze baked cookies for up to 3 months.
Can I decorate them after baking?
Yes! Once completely cooled, you can drizzle melted chocolate, add icing, or sprinkle more sugar for extra festive flair.
Did you try this recipe? Let me know in the comments how it turned out!
Christmas Spritz Cookies
Equipment
- Cookie press or piping bag
- Mixing Bowls
- Electric mixer or hand mixer
- Baking sheets
- Cooling racks
- Spatula
Ingredients
- 1 cup 2 sticks unsalted butter, softened
- 3/4 cup granulated sugar
- 1 large egg
- 1 teaspoon vanilla extract
- 1/2 teaspoon almond extract optional, but so festive!
- 2 1/2 cups all-purpose flour
- 1/4 teaspoon salt
- Colored sugar or sprinkles for decorating
Instructions
Prep Your Ingredients and Equipment
- Measure everything accurately before starting—baking is precise!
- Soften your butter: Leave it at room temperature for about 30–60 minutes. Softened butter creams more evenly with sugar.
- Line your baking sheets with parchment paper or silicone mats so cookies don’t stick.
- Pro tip: Prepping everything first makes the process much smoother and less stressful.
Cream Butter and Sugar
- In a large mixing bowl, beat the softened butter and sugar together on medium speed until light and fluffy, about 2–3 minutes.
- Scrape the sides of the bowl occasionally to ensure even mixing.
- Pro tip: Don’t rush this step—well-creamed butter and sugar give the cookies their tender, light texture.
Add Eggs and Extracts
- Beat in the egg until fully incorporated.
- Mix in vanilla extract and almond extract (if using) until smooth.
- Stop and scrape the bowl again to catch any bits clinging to the sides.
Combine Dry Ingredients
- In a separate bowl, whisk together the flour and salt.
- Gradually add the dry ingredients to the wet mixture on low speed. Mix just until combined—overmixing can make the cookies tough.
- Pro tip: If the dough feels too soft to hold a shape, chill it for 10–15 minutes before pressing.
Shape the Cookies
- Fill your cookie press or piping bag with dough.
- Press or pipe cookies directly onto your prepared baking sheets in festive shapes like stars, trees, or wreaths.
- Leave a little space between each cookie—they spread slightly while baking.
- Pro tip: Practice a few test cookies first to get comfortable with your cookie press pressure.
Decorate Before Baking
- Sprinkle colored sugar or festive sprinkles on each cookie.
- Gently press sprinkles into the dough so they stick during baking.
Bake the Cookies
- Bake in a preheated oven at 350°F (175°C) for 8–10 minutes, or until the edges are just starting to turn golden.
- Rotate the baking sheet halfway through for even baking.
- Pro tip: Keep a close eye on them—spritz cookies bake quickly and can brown too fast.
Cool and Serve
- Let cookies cool on the baking sheet for 2–3 minutes before transferring to a wire rack.
- Allow them to cool completely to maintain crisp edges.
- Store in an airtight container or share immediately—these cookies disappear fast!
Notes
Nutritional Value (Per 1 Cookie)
- Calories: 75 kcal
- Carbohydrates: 8 g
- Protein: 1 g
- Fat: 4 g
- Saturated Fat: 2.5 g
- Cholesterol: 15 mg
- Sodium: 25 mg
- Sugar: 4 g
- Fiber: 0 g