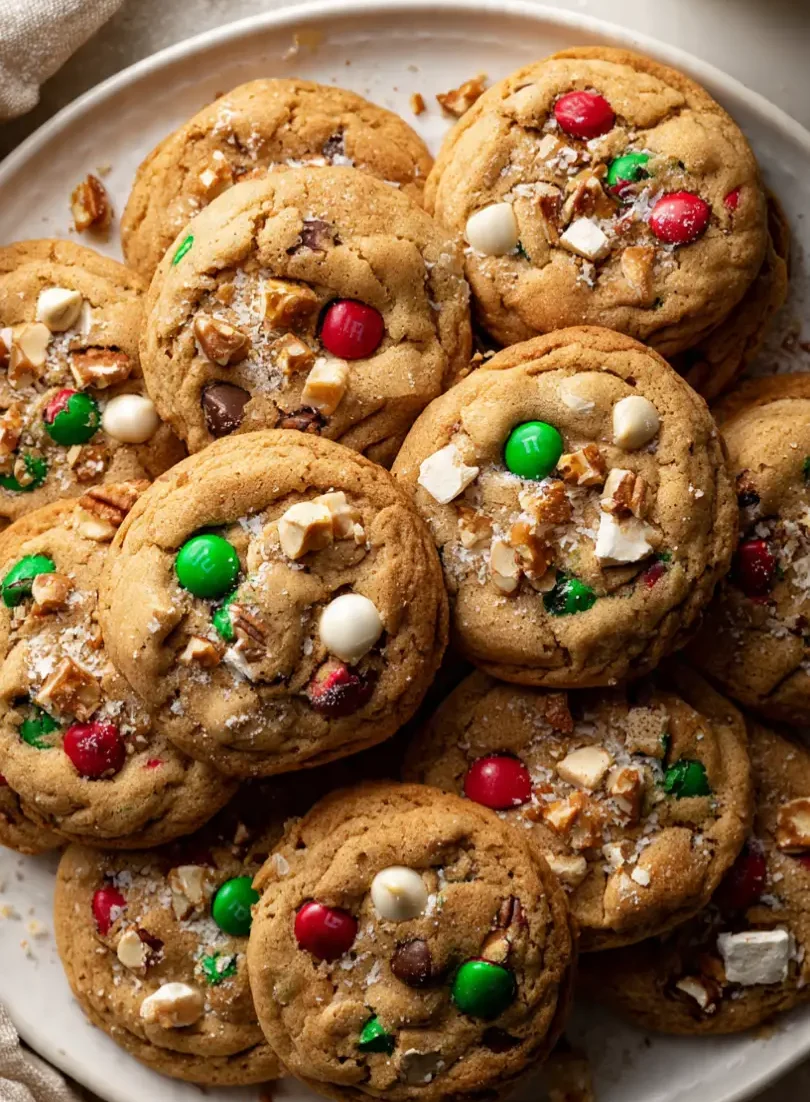
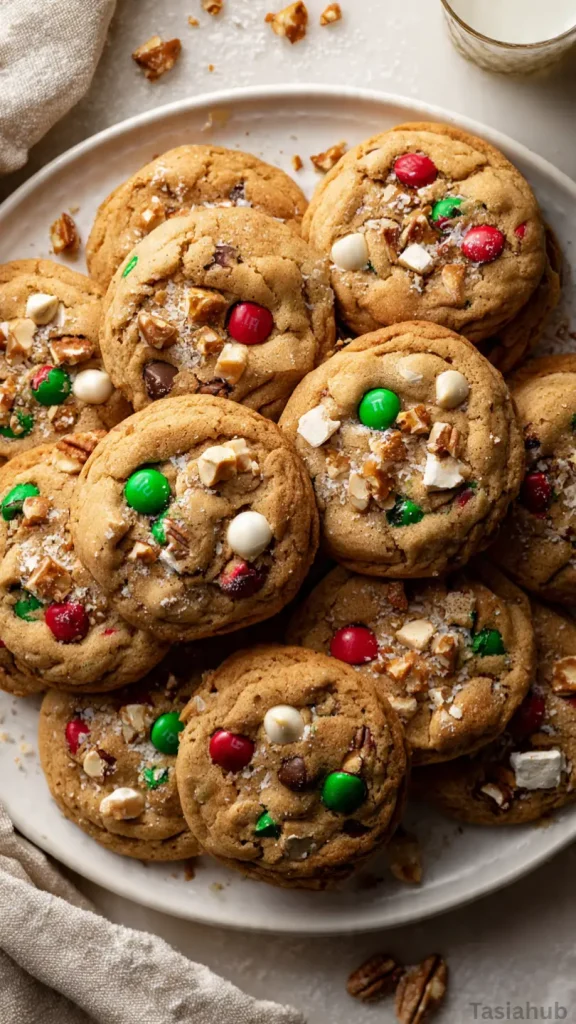
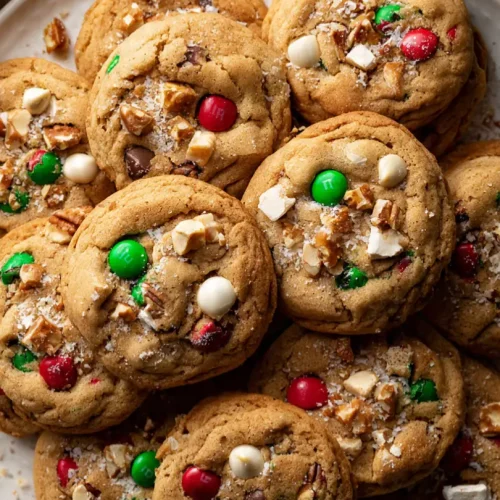
Christmas Kitchen Sink Cookies
The holidays have a way of turning even the simplest days into cozy, memory-filled moments — and nothing says comfort like a batch of freshly baked Christmas kitchen sink cookies. Imagine a cookie so full of flavor and texture that every bite feels like a little celebration. That’s exactly what these beauties are — sweet, salty, chewy, and crunchy all at once.
I first made these during a December baking marathon, when my counter was covered in half-used bags of chocolate chips, crushed candy canes, and pretzels. Instead of picking just one to bake with, I decided to throw in everything but the kitchen sink — and that’s how these Christmas sink cookies were born. It turned out to be the best cookie recipe ever for those who can’t decide between chocolate, caramel, or a bit of festive crunch.
What makes these thick Christmas cookies so irresistible is how they manage to balance all those fun, festive add-ins. The base dough is soft and buttery, perfectly thick without being heavy. Then come the holiday mix-ins — red and green M&M’s, bits of toffee, pretzel pieces, maybe even some white chocolate chunks or dried cranberries if you’re feeling fancy. Each cookie looks like a little ornament straight out of Santa’s workshop, bursting with color and flavor.
And let’s be honest, baking these isn’t just about the final cookie (though that’s definitely the highlight). It’s about the process — the smell of vanilla and brown sugar filling your kitchen, the warmth from the oven on a chilly day, and the joy of sneaking one warm cookie before they’ve even cooled. These Christmas cookies have that homemade charm that instantly makes everyone who tastes them ask for the recipe.
Whether you’re planning a cookie swap, packing tins for friends, or just baking for your own family, these holiday treats will fit right in. They’re festive without being fussy, crowd-pleasing without being complicated, and a guaranteed way to make your kitchen smell like Christmas magic. So, grab a big mixing bowl and get ready — these kitchen sink cookies are about to become your new holiday favorite.
Why You’ll Love It
- Every bite is a surprise – One moment you get a gooey chocolate chip, the next you’re crunching into a pretzel or a bit of toffee. No two bites are the same, and that’s what makes these cookies so fun to eat.
- Perfectly thick and chewy – These aren’t your average flat cookies. They bake up thick, soft in the center, and slightly crisp on the edges — the ultimate texture combo that makes them downright addictive.
- Festive and colorful – With red and green M&M’s sprinkled throughout, they instantly bring Christmas cheer to any dessert table or cookie box. They look as good as they taste!
- Totally customizable – Got leftover candy canes, nuts, or caramel bits? Toss them in! These cookies are designed to use whatever you have on hand, which means no ingredient goes to waste.
- The ultimate crowd-pleaser – Whether you’re baking for family, coworkers, or a holiday party, these Christmas kitchen sink cookies always disappear first. Everyone loves a treat that feels both nostalgic and over-the-top delicious.
Ingredient List
For the Cookie Dough:
- 1 cup (2 sticks) unsalted butter, softened
- 1 cup brown sugar, packed
- ½ cup granulated sugar
- 2 large eggs
- 2 teaspoons vanilla extract
- 2 ½ cups all-purpose flour
- 1 teaspoon baking soda
- ½ teaspoon baking powder
- ½ teaspoon salt
For the Mix-Ins (“Everything but the Kitchen Sink”):
- 1 cup semi-sweet chocolate chips
- ½ cup white chocolate chips
- ½ cup crushed pretzels
- ½ cup toffee bits
- ¾ cup red and green M&M’s
- ⅓ cup shredded coconut (optional)
- ⅓ cup chopped pecans or walnuts (optional)
Ingredient Notes
- Butter: Use real unsalted butter — not margarine. It gives these thick Christmas cookies that rich, bakery-style flavor and perfect chewy texture.
- Brown sugar: I always go for dark brown sugar here; it adds a deeper caramel sweetness that makes the cookies taste extra cozy and holiday-perfect.
- Vanilla extract: Don’t skip the vanilla! It ties all those sweet, salty, and chocolatey flavors together beautifully.
- M&M’s: I love using the Christmas-colored ones — they make the cookies pop with color and instantly festive.
- Pretzels: Go for the classic salted twists or sticks. That tiny bit of salt brings out the sweetness in the dough.
- Toffee bits: I usually use Heath toffee bits because they melt slightly into the cookie, adding a buttery crunch in every bite.
- Mix-ins: This is where you can play! Add mini marshmallows, crushed peppermint, or caramel chunks — anything you love in your holiday treats.
Kitchen Equipment Needed
- Large mixing bowl – For creaming the butter and sugars together. I like using a deep ceramic one so nothing spills when mixing.
- Hand or stand mixer – Makes blending the dough smooth and fluffy in half the time (I swear by my trusty KitchenAid — worth every penny!).
- Rubber spatula – Perfect for folding in all those fun mix-ins without overworking the dough.
- Measuring cups and spoons – Accuracy matters in baking, especially for that perfect chewy texture.
- Baking sheets – Use heavy-duty, nonstick ones so the cookies bake evenly and don’t brown too quickly.
- Parchment paper or silicone baking mats – Keeps the cookies from sticking and makes cleanup effortless.
- Cookie scoop – Helps portion the dough evenly so every cookie bakes to the same thickness (and looks bakery-perfect).
- Wire cooling rack – Letting the cookies cool properly keeps them soft in the center and slightly crisp on the edges.
Instructions
1. Prep the oven & your workspace
- Take the butter out of the fridge so it can come to room temperature while you gather everything else.
- Preheat your oven to 350°F (175°C) and place the rack in the middle position.
- Line two baking sheets with parchment paper or silicone mats and set them near your workspace.
- Measure and prep your mix-ins (chop nuts, crush pretzels if needed, separate out a few M&M’s to press on top later).
Pro tip: Make sure your oven is fully preheated — an oven that’s still coming up to temp is the sneakiest cause of flat cookies.
2. Cream the butter and sugars
- In a large mixing bowl, add 1 cup softened unsalted butter.
- Add 1 cup packed brown sugar and ½ cup granulated sugar.
- Beat with a hand mixer or stand mixer on medium speed for 2–3 minutes until the mixture looks pale, light, and slightly fluffy.
- Scrape down the sides with a spatula, then add the eggs one at a time, beating briefly after each. Add 2 teaspoons vanilla extract and mix just until combined.
Pro tip: Room-temperature butter creams with the sugars properly — if your butter is too cold the dough won’t trap air and the cookies won’t be as thick and tender.
3. Whisk the dry ingredients
- In a separate bowl, whisk together 2½ cups all-purpose flour, 1 teaspoon baking soda, ½ teaspoon baking powder, and ½ teaspoon salt until uniform.
- Give the flour mixture a quick sift or whisk to remove lumps and ensure even leavening.
Pro tip: Measure flour by spooning it into the cup and leveling with a knife (don’t scoop straight from the bag). Too much flour makes the cookies dry and cakey instead of thick and chewy.
4. Combine wet and dry — gently
- Add the dry ingredients to the butter-sugar mixture in two additions.
- Mix on low speed (or fold with a spatula) until the flour is just incorporated — you should not see streaks of flour, but avoid overmixing.
- Scrape the bowl and fold any remaining pockets of dry ingredients in by hand.
5. Fold in the mix-ins (“everything but the kitchen sink”)
- Add 1 cup semi-sweet chocolate chips, ½ cup white chocolate chips, ½ cup crushed pretzels, ½ cup toffee bits, ¾ cup red & green M&M’s, and any optional add-ins (⅓ cup shredded coconut, ⅓ cup chopped nuts) to the dough.
- Fold gently with a rubber spatula until the mix-ins are evenly distributed.
- Reserve a handful of M&M’s or chocolate chips to press on top of each dough ball right before baking for a prettier cookie.
Pro tip: Reserve colorful candies for topping — pressing a few on top after scooping keeps them visible and makes the cookies look festive.
6. Chill the dough (recommended for thick cookies)
- For thick, bakery-style cookies, cover the bowl with plastic wrap and refrigerate for at least 30–60 minutes. For best flavor and texture, chill 2–24 hours.
- If you’re short on time, place scooped dough balls on a tray and pop them in the freezer for 15–20 minutes to firm up.
Pro tip: Chilling solidifies the butter so the cookies spread less. This is the single easiest trick to turn a good cookie into the best cookie recipe ever for thick Christmas cookies.
7. Scoop and bake
- Use a cookie scoop (about 2–3 tablespoons, golf-ball sized) to portion dough. Place scoops on the prepared baking sheets about 2 inches apart.
- Press any reserved M&M’s or chips gently into the tops of the dough balls for a picture-perfect finish.
- Bake one sheet at a time in the preheated oven for 10–12 minutes. You want the edges to be set and lightly golden while the centers still look a tiny bit soft — they’ll finish cooking on the hot sheet.
- If your oven runs hot or your cookies are very large, check at 9 minutes and be prepared to go up to 13 minutes. Rotate the pan halfway through baking if your oven bakes unevenly.
Pro tip: Pull the cookies when the edges are set but centers are slightly underdone — this guarantees a soft, chewy center for those thick Christmas cookies.
8. Cool, serve, and store
- Let cookies cool on the baking sheet for 5–7 minutes so they firm up and don’t break when you move them.
- Transfer to a wire cooling rack to cool completely (or enjoy warm — I won’t judge).
- Store cooled cookies in an airtight container at room temperature for up to 5 days. Add a piece of bread or a slice of apple to the container to help keep them soft.
- To freeze: freeze baked cookies in a single layer on a tray, then transfer to a freezer bag for up to 3 months. You can also freeze scooped raw dough (flash-freeze scoops, then bag) and bake from frozen — add 1–2 minutes to the bake time.
Tips and Tricks for Success
- Chill the dough: Even a quick 30-minute chill helps your cookies bake up thicker and chewier instead of flat and crispy.
- Use parchment paper: It prevents over-browning and keeps the bottoms from sticking, making your cookies bake evenly.
- Don’t overbake: Pull them out when the centers still look slightly soft — they’ll set as they cool, giving you that perfect chewy texture.
- Mix-ins last: Always fold in the candies, pretzels, and chips at the end to avoid crushing them or overmixing the dough.
- Add a sprinkle of sea salt: A tiny pinch of flaky salt on top before baking brings out the sweet and salty contrast beautifully.
- Make them picture-perfect: Press a few colorful M&M’s or chocolate chunks on top right before baking so every cookie looks festive and inviting.
- Bake one sheet at a time: It ensures even baking and consistent results every time.
Ingredient Substitutions and Variations
- Butter substitute: Use plant-based butter for a dairy-free version — just make sure it’s solid, not a soft spread.
- Gluten-free option: Swap the all-purpose flour for a 1:1 gluten-free baking blend. The texture stays surprisingly close to the original.
- Sugar swap: Use coconut sugar instead of brown sugar for a slightly deeper, caramel-like flavor.
- Chocolate chips: Replace semi-sweet chips with dark chocolate chunks or white chocolate for a different flavor twist.
- Pretzel alternative: Try crushed potato chips or cornflakes for that same salty crunch.
- Festive flavor boost: Add a teaspoon of peppermint extract or mix in crushed candy canes for a minty Christmas vibe.
- Nutty variation: Add chopped pecans, almonds, or pistachios for an extra layer of texture and warmth.
- Caramel lovers’ version: Fold in soft caramel bits or drizzle melted caramel over cooled cookies.
- Dried fruit twist: Mix in dried cranberries or cherries for a sweet-tart balance that tastes like the holidays in every bite.
Serving Suggestions
- Fresh from the oven: Nothing beats warm Christmas kitchen sink cookies with the chocolate still gooey — I always grab one (or two) straight off the tray with a cold glass of milk.
- Holiday dessert platter: Mix these cookies with sugar cookies, gingerbread men, and fudge squares for a colorful, crowd-pleasing holiday dessert spread.
- Gift idea: Stack a few in clear treat bags, tie with red and green ribbons, and add a cute tag — perfect for neighbors, teachers, or coworkers.
- Ice cream sandwich: Place a scoop of vanilla or peppermint ice cream between two cookies for a festive frozen treat that everyone will love.
- Movie night snack: I love cozying up with a cup of hot cocoa and a plate of these cookies while watching Christmas movies — pure holiday comfort.

Storage and Reheating Instructions
- Room temperature: Store cookies in an airtight container at room temp for up to 5 days. Add a small slice of bread or a piece of apple to keep them soft.
- Refrigerator: If your kitchen runs warm, you can refrigerate them for up to 7 days. Let them come to room temperature before serving.
- Freezer (baked cookies): Freeze cooled cookies in a single layer, then transfer to freezer bags. They’ll stay fresh for up to 3 months.
- Freezer (cookie dough): Scoop dough into balls, freeze on a tray, and transfer to a bag. Bake straight from frozen — just add 1–2 minutes to the bake time.
- Reheating: Warm cookies in the microwave for 10–12 seconds or pop them in a 300°F (150°C) oven for 3–4 minutes to bring back that fresh-baked softness.
Frequently Asked Questions
Can I make the dough ahead of time?
Absolutely! You can prepare the dough up to 2 days in advance and keep it covered in the fridge. When ready to bake, let it sit at room temperature for about 15 minutes to soften slightly before scooping.
Can I freeze the dough or baked cookies?
Yes — both freeze beautifully. Freeze scooped dough balls for up to 3 months and bake straight from frozen. Or freeze baked cookies once cooled, and thaw at room temp when you need a sweet treat.
How do I keep my cookies soft and chewy?
Store them in an airtight container with a slice of bread or a piece of apple. The moisture keeps your Christmas cookies perfectly soft for days.
Why did my cookies spread too much?
That usually means the butter was too warm or the dough wasn’t chilled long enough. Pop your dough in the fridge for at least 30 minutes next time — it helps the cookies hold their shape and stay thick.
Can I skip some of the mix-ins?
Definitely! The beauty of kitchen sink cookies is flexibility. Use what you love — chocolate chips, toffee bits, pretzels, M&M’s, nuts, or dried fruit. They’ll still turn out amazing.
How do I make these more festive for Christmas?
Add crushed candy canes, red and green sprinkles, or a drizzle of melted white chocolate after baking. They’ll look extra merry and taste just as good as they look!
Did you try this recipe? I’d love to hear how your Christmas kitchen sink cookies turned out! Share your favorite mix-ins or any fun holiday twists in the comments below — let’s swap cookie ideas and spread the Christmas baking joy!
Christmas Kitchen Sink Cookies
Equipment
- Large mixing bowl
- Hand or Stand Mixer
- Rubber spatula
- Measuring cups and spoons
- Baking sheets
- Parchment paper or silicone baking mats
- Cookie scoop
- Wire Cooling Rack
Ingredients
For the Cookie Dough:
- 1 cup 2 sticks unsalted butter, softened
- 1 cup brown sugar packed
- ½ cup granulated sugar
- 2 large eggs
- 2 teaspoons vanilla extract
- 2 ½ cups all-purpose flour
- 1 teaspoon baking soda
- ½ teaspoon baking powder
- ½ teaspoon salt
For the Mix-Ins (“Everything but the Kitchen Sink”):
- 1 cup semi-sweet chocolate chips
- ½ cup white chocolate chips
- ½ cup crushed pretzels
- ½ cup toffee bits
- ¾ cup red and green M&M’s
- ⅓ cup shredded coconut optional
- ⅓ cup chopped pecans or walnuts optional
Instructions
Prep the oven & your workspace
- Take the butter out of the fridge so it can come to room temperature while you gather everything else.
- Preheat your oven to 350°F (175°C) and place the rack in the middle position.
- Line two baking sheets with parchment paper or silicone mats and set them near your workspace.
- Measure and prep your mix-ins (chop nuts, crush pretzels if needed, separate out a few M&M’s to press on top later).
- Pro tip: Make sure your oven is fully preheated — an oven that’s still coming up to temp is the sneakiest cause of flat cookies.
Cream the butter and sugars
- In a large mixing bowl, add 1 cup softened unsalted butter.
- Add 1 cup packed brown sugar and ½ cup granulated sugar.
- Beat with a hand mixer or stand mixer on medium speed for 2–3 minutes until the mixture looks pale, light, and slightly fluffy.
- Scrape down the sides with a spatula, then add the eggs one at a time, beating briefly after each. Add 2 teaspoons vanilla extract and mix just until combined.
- Pro tip: Room-temperature butter creams with the sugars properly — if your butter is too cold the dough won’t trap air and the cookies won’t be as thick and tender.
Whisk the dry ingredients
- In a separate bowl, whisk together 2½ cups all-purpose flour, 1 teaspoon baking soda, ½ teaspoon baking powder, and ½ teaspoon salt until uniform.
- Give the flour mixture a quick sift or whisk to remove lumps and ensure even leavening.
- Pro tip: Measure flour by spooning it into the cup and leveling with a knife (don’t scoop straight from the bag). Too much flour makes the cookies dry and cakey instead of thick and chewy.
Combine wet and dry — gently
- Add the dry ingredients to the butter-sugar mixture in two additions.
- Mix on low speed (or fold with a spatula) until the flour is just incorporated — you should not see streaks of flour, but avoid overmixing.
- Scrape the bowl and fold any remaining pockets of dry ingredients in by hand.
Fold in the mix-ins (“everything but the kitchen sink”)
- Add 1 cup semi-sweet chocolate chips, ½ cup white chocolate chips, ½ cup crushed pretzels, ½ cup toffee bits, ¾ cup red & green M&M’s, and any optional add-ins (⅓ cup shredded coconut, ⅓ cup chopped nuts) to the dough.
- Fold gently with a rubber spatula until the mix-ins are evenly distributed.
- Reserve a handful of M&M’s or chocolate chips to press on top of each dough ball right before baking for a prettier cookie.
- Pro tip: Reserve colorful candies for topping — pressing a few on top after scooping keeps them visible and makes the cookies look festive.
Chill the dough (recommended for thick cookies)
- For thick, bakery-style cookies, cover the bowl with plastic wrap and refrigerate for at least 30–60 minutes. For best flavor and texture, chill 2–24 hours.
- If you’re short on time, place scooped dough balls on a tray and pop them in the freezer for 15–20 minutes to firm up.
- Pro tip: Chilling solidifies the butter so the cookies spread less. This is the single easiest trick to turn a good cookie into the best cookie recipe ever for thick Christmas cookies.
Scoop and bake
- Use a cookie scoop (about 2–3 tablespoons, golf-ball sized) to portion dough. Place scoops on the prepared baking sheets about 2 inches apart.
- Press any reserved M&M’s or chips gently into the tops of the dough balls for a picture-perfect finish.
- Bake one sheet at a time in the preheated oven for 10–12 minutes. You want the edges to be set and lightly golden while the centers still look a tiny bit soft — they’ll finish cooking on the hot sheet.
- If your oven runs hot or your cookies are very large, check at 9 minutes and be prepared to go up to 13 minutes. Rotate the pan halfway through baking if your oven bakes unevenly.
- Pro tip: Pull the cookies when the edges are set but centers are slightly underdone — this guarantees a soft, chewy center for those thick Christmas cookies.
Cool, serve, and store
- Let cookies cool on the baking sheet for 5–7 minutes so they firm up and don’t break when you move them.
- Transfer to a wire cooling rack to cool completely (or enjoy warm — I won’t judge).
- Store cooled cookies in an airtight container at room temperature for up to 5 days. Add a piece of bread or a slice of apple to the container to help keep them soft.
- To freeze: freeze baked cookies in a single layer on a tray, then transfer to a freezer bag for up to 3 months. You can also freeze scooped raw dough (flash-freeze scoops, then bag) and bake from frozen — add 1–2 minutes to the bake time.
Notes
Nutritional Value (per cookie, approximate):
- Calories: 220–250 kcal
- Fat: 12g
- Carbohydrates: 30g
- Sugars: 18g
- Protein: 3g
- Fiber: 1g
- Sodium: 150mg