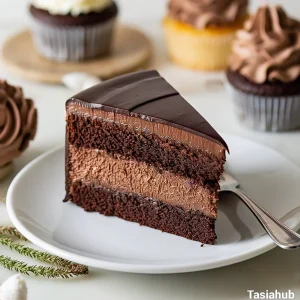
Chocolate Mousse Cake
There’s something about chocolate mousse cake that just feels right, no matter the occasion. It’s that perfect blend of richness and airiness — the kind of dessert that looks fancy but makes you feel cozy inside.
I remember the first time I made one from scratch. I was craving something indulgent but not too heavy, and this cake hit every single note. Since then, it’s become one of my favorite go-to desserts whenever I want to impress guests or just treat myself after a long week.
I love how this chocolate mousse cake combines different textures: a soft, fudgy base paired with a smooth, velvety mousse on top. And if you’re anything like me — a total chocolate lover — it’s basically your dream dessert.
The best part? You don’t have to be a professional baker to pull it off. It’s easier than it looks, and I’m going to walk you through the whole process. Whether you’re making it for a birthday, a holiday, or a random Tuesday, this recipe is a keeper.
What is Chocolate Mousse Cake?
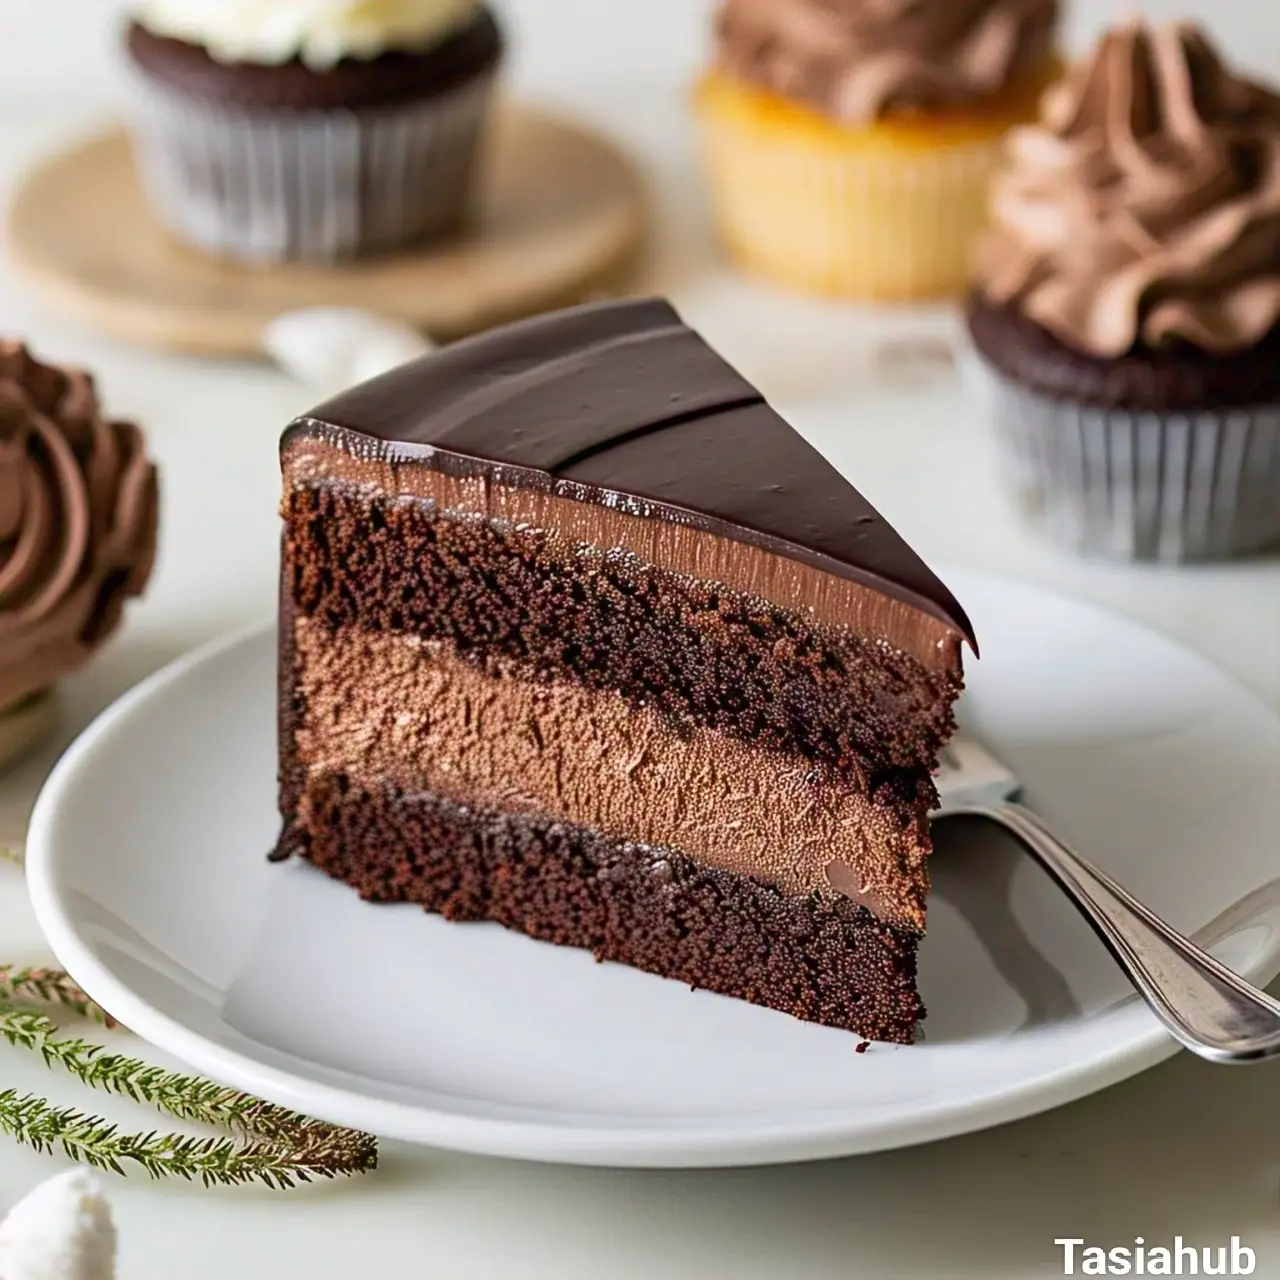
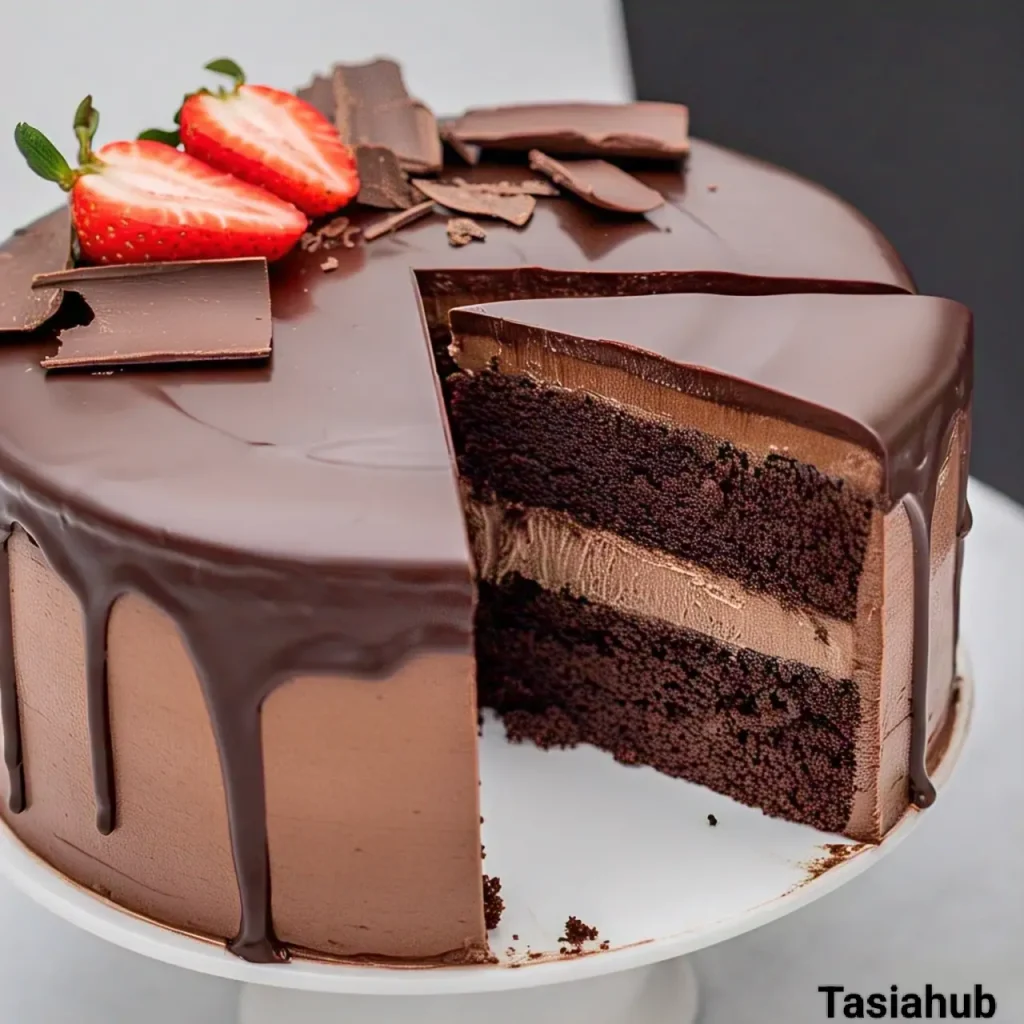
Chocolate mousse cake is a dessert made by layering a rich chocolate cake (or sometimes a brownie-like base) with a light, airy chocolate mousse. It’s the kind of cake that feels fancy enough for special occasions but is honestly simple enough to make at home.
The contrast between the dense base and the fluffy mousse creates that melt-in-your-mouth magic we all love. Some versions even add a glossy ganache topping or a dusting of cocoa powder for extra flair.
Instead of being entirely baked, the mousse layer is chilled to set, giving it that silky, almost creamy finish that feels luxurious with every bite. Think of it as the perfect hybrid between a cake and a chilled dessert. One slice, and you’ll see why it’s always a crowd favorite.
Why You’ll Love It
- It’s pure chocolate heaven – If you’re a chocoholic (welcome to the club), this cake delivers on all levels: deep flavor, luscious texture, and visual appeal.
- Perfect for any celebration – Birthdays, dinner parties, or even just a weekend treat — this cake fits the vibe.
- No fancy skills needed – It looks impressive but is surprisingly easy to make with basic tools and ingredients.
- Make-ahead friendly – You can prep it the night before, chill it, and it’ll be even better the next day.
- Customizable – Add a touch of espresso, orange zest, or top it with berries — this cake plays well with flavors!
Ingredient List
For the Cake Base:
- 1 cup all-purpose flour
- 1/2 cup cocoa powder
- 1 teaspoon baking powder
- 1/2 teaspoon salt
- 1/2 cup unsalted butter, softened
- 1 cup granulated sugar
- 2 large eggs
- 1 teaspoon vanilla extract
- 1/2 cup whole milk
- 1/4 cup boiling water
For the Chocolate Mousse:
- 8 oz semi-sweet chocolate, chopped
- 1 1/4 cups heavy cream
- 1 tablespoon sugar
- 1 teaspoon vanilla extract
- 3 large egg yolks
- 1 tablespoon water (for the egg yolks)
- 1/2 teaspoon gelatin powder (optional, for extra stability)
If you’d like a thicker layer of mousse between the cake layers and a more generous outer frosting, simply double this recipe.
For the Ganache (Optional):
- 4 oz semi-sweet chocolate
- 1/2 cup heavy cream
Ingredient Notes
- I always use unsweetened cocoa powder for the cake base — it adds a deeper, richer flavor compared to sweetened cocoa.
- High-quality chocolate is key for the mousse; I love using Ghirardelli or Lindt for that smooth, velvety texture.
- Don’t skip the gelatin powder in the mousse if you want a firmer set! It gives the mousse extra stability without compromising on creaminess.
- The boiling water added to the cake batter helps the cocoa powder dissolve better, ensuring a smooth, moist base.
- If you’re not a fan of ganache, feel free to skip it — it’s great for extra shine and richness, but the cake will still be delicious without it.
Kitchen Tools Needed
- Mixing bowls – Essential for combining the cake and mousse ingredients. I love using glass bowls for better visibility when mixing and for easy cleanup.
- Electric mixer – You can mix by hand, but a hand or stand mixer will make your life so much easier, especially when whipping the mousse. I prefer my KitchenAid stand mixer for its smooth, consistent whipping.
- 9-inch round cake pan – You’ll need this for baking the cake base. I use a non-stick version for easy release, but make sure to line it with parchment paper just in case.
- Double boiler or microwave-safe bowl – For melting the chocolate. I use a Pyrex glass bowl in the microwave — it’s quick and easy to monitor the chocolate’s progress.
- Whisk – A must for mixing egg yolks and sugar for the mousse. A balloon whisk works best for getting air into the mixture.
- Spatula – I use a silicone spatula to scrape down the sides of the bowl and fold in ingredients without deflating the mousse.
- Measuring cups and spoons – To get those measurements just right. I always keep my OXO measuring cups on hand — they’re accurate and durable.
Instructions
1. Prepare the Cake Base
-
Preheat and Prepare the Pan
Preheat your oven to 350°F (175°C). Grease a 9-inch (23 cm) round cake pan and line the bottom with parchment paper for easy release. Set aside. -
Mix the Dry Ingredients
In a medium bowl, whisk together the flour, cocoa powder, baking powder, and salt until fully combined. Set aside. -
Cream the Butter and Sugar
In a large mixing bowl, beat the butter and sugar using an electric mixer on medium speed for about 3–4 minutes, until light, pale, and fluffy. Scrape down the sides of the bowl as needed to ensure even mixing. -
Incorporate the Eggs and Vanilla
Add the eggs, one at a time, mixing well after each addition. Stir in the vanilla extract until smooth. -
Alternate Dry Ingredients and Milk
Add the dry ingredients to the butter mixture in three parts, alternating with the milk (beginning and ending with the dry ingredients). Mix until just combined — the batter will be thick. -
Add the Boiling Water
Carefully stir in the boiling water. The batter will thin out and become pourable — this is normal and expected. -
Bake
Pour the batter into the prepared cake pan and smooth the top.
Bake for 25–30 minutes, or until a toothpick inserted into the center comes out clean or with a few moist crumbs attached. -
Cool the Cake
Let the cake cool completely in the pan before transferring it to a wire rack.
(Pro Tip: Need to speed it up? Place the cake in the fridge for about 10–15 minutes.)
2. Make the Chocolate Mousse
-
Melt the Chocolate
Place the chopped chocolate in a microwave-safe bowl and heat in 30-second bursts, stirring between each, until melted and smooth. Alternatively, use a double boiler. Set aside to cool slightly — it should be warm, not hot. -
Whisk the Egg Yolks and Sugar
In a separate bowl, whisk the egg yolks and sugar together until thick, pale, and creamy — about 2 minutes. -
Prepare the Gelatin
In a small saucepan, sprinkle the gelatin powder over cold water. Let it bloom for 1–2 minutes, then gently heat over low heat, stirring until completely dissolved. Remove from heat. -
Combine Chocolate and Eggs
Slowly mix the melted chocolate into the egg mixture, stirring constantly until smooth. -
Add the Gelatin Mixture
Stir the dissolved gelatin into the chocolate and egg mixture until fully incorporated. -
Whip the Cream
In another bowl, whip the heavy cream and vanilla extract until stiff peaks form (about 3–4 minutes). -
Fold Everything Together
Add a small scoop of whipped cream to the chocolate mixture to lighten it, then gently fold in the remaining whipped cream.
(Pro Tip: Fold slowly and carefully to keep the mousse airy and fluffy.)
3. Assemble the Cake
-
Slice the Cake
Once fully cooled, carefully slice the cake in half horizontally using a serrated knife or cake leveler to create two even layers. -
Layer the Mousse
Place the bottom cake layer on your serving plate. Spread a generous amount of chocolate mousse over the surface, stopping just short of the edges. -
Add the Top Layer
Gently place the second cake layer on top, aligning it carefully. -
Frost the Outside (Optional)
Use the remaining chocolate mousse to frost the top and sides of the cake. Smooth it out with an offset spatula or create rustic swirls and peaks for a homemade look.
(Tip: If the mousse is too soft to spread neatly, refrigerate it for 10–15 minutes to firm up.) -
Optional Ganache Topping
For extra indulgence, melt equal parts heavy cream and chopped chocolate until smooth, then pour the ganache over the top of the cake. Let it drip naturally down the sides or spread it evenly for full coverage. -
Chill
Refrigerate the cake for at least 2 hours (or longer) to allow the mousse and ganache to set completely.
4. Decorating (Optional)
- Garnish the top of the cake with chocolate shavings, fresh berries, a light dusting of cocoa powder, or powdered sugar right before serving.
Tips and Tricks for Success
- Use room temperature ingredients – This applies to the butter, eggs, and milk for the cake. It helps create a smoother batter and ensures the cake bakes evenly.
- Don’t overmix the mousse – When folding the whipped cream into the chocolate mixture, be gentle. Overmixing can deflate the mousse, leaving you with a denser texture.
- Chill the cake before serving – This allows the mousse to set properly, making each slice cleaner and easier to serve.
- Test the cake for doneness – If you’re unsure, insert a toothpick into the center. It should come out clean or with a few moist crumbs, not wet batter.
- Give yourself time – Let the cake cool completely before adding the mousse. This will prevent the mousse from melting or becoming too runny.
Ingredient Substitutions and Variations
- For a dairy-free version: Use dairy-free butter, coconut cream for the mousse, and a dairy-free chocolate like Enjoy Life.
- Gluten-free option: Swap the all-purpose flour with a gluten-free all-purpose flour blend.
- For a different flavor: Add a splash of espresso to the cake batter for a deeper flavor or a few tablespoons of orange zest for a citrusy twist.
- Add a crunchy layer: Try incorporating crushed cookies or chopped nuts (like hazelnuts or almonds) between the layers for added texture.
- Skip the ganache: If you prefer a simpler finish, the mousse alone is rich and beautiful. Just dust with cocoa powder or top with fresh berries for a lighter touch.
Serving Suggestions
- Top with fresh berries – I love pairing this cake with a handful of fresh raspberries or strawberries. The tartness of the fruit complements the richness of the mousse perfectly.
- Serve with a dollop of whipped cream – For an extra indulgent touch, add a light swirl of freshly whipped cream to each slice.
- Pair with a cup of coffee – This cake goes wonderfully with a warm, freshly brewed cup of coffee or espresso, making it a perfect dessert for after-dinner.
- Add a sprinkle of sea salt – For a sweet and salty combo, a light sprinkle of flaky sea salt on top of the ganache can elevate the flavor even more.
- Enjoy it with vanilla ice cream – If you want to take it up a notch, serve a slice with a scoop of creamy vanilla ice cream — there’s no such thing as too much dessert!

Storage and Reheating Instructions
- Store in the fridge – Keep the chocolate mousse cake covered in an airtight container in the fridge. It’ll stay fresh for about 3-4 days.
- Freezing – If you want to store it for longer, wrap individual slices tightly in plastic wrap, then place them in a freezer-safe bag. It’ll last for up to 1 month.
- Reheat with care – If you prefer to warm it up, microwave individual slices for about 10-15 seconds to soften the mousse. Be careful not to overheat and melt the mousse completely!
- Serve cold – The mousse cake is best enjoyed chilled, so avoid letting it sit out too long before serving.
Frequently Asked Questions
How do I know when the cake is fully baked?
The best way to check is by inserting a toothpick into the center of the cake. If it comes out clean or with just a few moist crumbs, it’s done. If there’s wet batter, give it a few more minutes in the oven!
Can I make this cake ahead of time?
Absolutely! The cake gets better with time. You can bake the cake a day ahead and assemble it the next day. Just make sure to refrigerate it for at least 2 hours before serving to allow the mousse to set.
Can I use a different type of chocolate for the mousse?
Definitely! You can swap the semi-sweet chocolate for dark chocolate for a richer, less sweet mousse, or milk chocolate for a sweeter, creamier version.
Can I make this cake gluten-free?
Yes! Simply substitute the all-purpose flour with a gluten-free flour blend, and you’re good to go. Just be sure to use a blend that’s suitable for baking.
How do I get a clean slice of cake?
Let the cake cool completely before slicing. Use a sharp, serrated knife and dip it in hot water between each slice to keep the cuts neat and clean.
Can I freeze the cake?
Yes! You can freeze the cake slices for up to a month. Just make sure they’re wrapped tightly in plastic wrap or stored in an airtight container to avoid freezer burn.
Feel free to reach out if you have more questions or need some inspiration! You can find me on Instagram (@tasiahub_). Let’s connect and share our love for delicious desserts!
Chocolate Mousse Cake
Equipment
- Mixing Bowls
- Electric mixer
- 9-inch round cake pan
- Double boiler or microwave-safe bowl
- Whisk
- Spatula
- Measuring cups and spoons
Ingredients
For the Cake Base:
- 1 cup all-purpose flour
- 1/2 cup cocoa powder
- 1 teaspoon baking powder
- 1/2 teaspoon salt
- 1/2 cup unsalted butter softened
- 1 cup granulated sugar
- 2 large eggs
- 1 teaspoon vanilla extract
- 1/2 cup whole milk
- 1/4 cup boiling water
For the Chocolate Mousse:
- 8 oz semi-sweet chocolate chopped
- 1 1/4 cups heavy cream
- 1 tablespoon sugar
- 1 teaspoon vanilla extract
- 3 large egg yolks
- 1 tablespoon water for the egg yolks
- 1/2 teaspoon gelatin powder optional, for extra stability
- If you'd like a thicker layer of mousse between the cake layers and a more generous outer frosting, simply double this recipe.
For the Ganache (Optional):
- 4 oz semi-sweet chocolate
- 1/2 cup heavy cream
Instructions
Preheat and Prepare the Pan
- Preheat your oven to 350°F (175°C). Grease a 9-inch (23 cm) round cake pan and line the bottom with parchment paper for easy release. Set aside.
Mix the Dry Ingredients
- In a medium bowl, whisk together the flour, cocoa powder, baking powder, and salt until fully combined. Set aside.
Cream the Butter and Sugar
- In a large mixing bowl, beat the butter and sugar using an electric mixer on medium speed for about 3–4 minutes, until light, pale, and fluffy. Scrape down the sides of the bowl as needed to ensure even mixing.
Incorporate the Eggs and Vanilla
- Add the eggs, one at a time, mixing well after each addition. Stir in the vanilla extract until smooth.
Alternate Dry Ingredients and Milk
- Add the dry ingredients to the butter mixture in three parts, alternating with the milk (beginning and ending with the dry ingredients). Mix until just combined — the batter will be thick.
Add the Boiling Water
- Carefully stir in the boiling water. The batter will thin out and become pourable — this is normal and expected.
Bake
- Pour the batter into the prepared cake pan and smooth the top.
- Bake for 25–30 minutes, or until a toothpick inserted into the center comes out clean or with a few moist crumbs attached.
Cool the Cake
- Let the cake cool completely in the pan before transferring it to a wire rack.
- (Pro Tip: Need to speed it up? Place the cake in the fridge for about 10–15 minutes.)
Make the Chocolate Mousse
- Place the chopped chocolate in a microwave-safe bowl and heat in 30-second bursts, stirring between each, until melted and smooth. Alternatively, use a double boiler. Set aside to cool slightly — it should be warm, not hot.
- In a separate bowl, whisk the egg yolks and sugar together until thick, pale, and creamy — about 2 minutes.
Prepare the Gelatin
- In a small saucepan, sprinkle the gelatin powder over cold water. Let it bloom for 1–2 minutes, then gently heat over low heat, stirring until completely dissolved. Remove from heat.
- Slowly mix the melted chocolate into the egg mixture, stirring constantly until smooth.
- Stir the dissolved gelatin into the chocolate and egg mixture until fully incorporated.
- In another bowl, whip the heavy cream and vanilla extract until stiff peaks form (about 3–4 minutes).
Fold Everything Together
- Add a small scoop of whipped cream to the chocolate mixture to lighten it, then gently fold in the remaining whipped cream.
- (Pro Tip: Fold slowly and carefully to keep the mousse airy and fluffy.)
Assemble the Cake
- Once fully cooled, carefully slice the cake in half horizontally using a serrated knife or cake leveler to create two even layers.
- Place the bottom cake layer on your serving plate. Spread a generous amount of chocolate mousse over the surface, stopping just short of the edges.
- Gently place the second cake layer on top, aligning it carefully.
Frost the Outside (Optional)
- Use the remaining chocolate mousse to frost the top and sides of the cake. Smooth it out with an offset spatula or create rustic swirls and peaks for a homemade look.
- (Tip: If the mousse is too soft to spread neatly, refrigerate it for 10–15 minutes to firm up.)
Optional Ganache Topping
- For extra indulgence, melt equal parts heavy cream and chopped chocolate until smooth, then pour the ganache over the top of the cake. Let it drip naturally down the sides or spread it evenly for full coverage.
- Refrigerate the cake for at least 2 hours (or longer) to allow the mousse and ganache to set completely.
Decorating (Optional)
- Garnish the top of the cake with chocolate shavings, fresh berries, a light dusting of cocoa powder, or powdered sugar right before serving.
Notes
Nutritional Value (Per Serving)
- Calories: ~420
- Carbohydrates: ~36g
- Protein: ~6g
- Fat: ~30g
- Saturated Fat: ~18g
- Sugar: ~28g
- Fiber: ~3g
The nutritional information provided on this website is an estimate only and is intended for general guidance. We cannot guarantee its accuracy and recommend consulting a qualified healthcare professional or registered dietitian for personalized nutrition advice.