Candy Corn Cupcakes
Baking during the fall season just hits differently, doesn’t it? The cozy spices, the golden leaves outside, and the endless excuses to whip up something sweet—it all feels so comforting. And when it comes to festive treats that really stand out, candy corn cupcakes are at the top of the list. These little desserts aren’t just colorful and fun, they’re also surprisingly easy to make, which is why I find myself coming back to them every year.
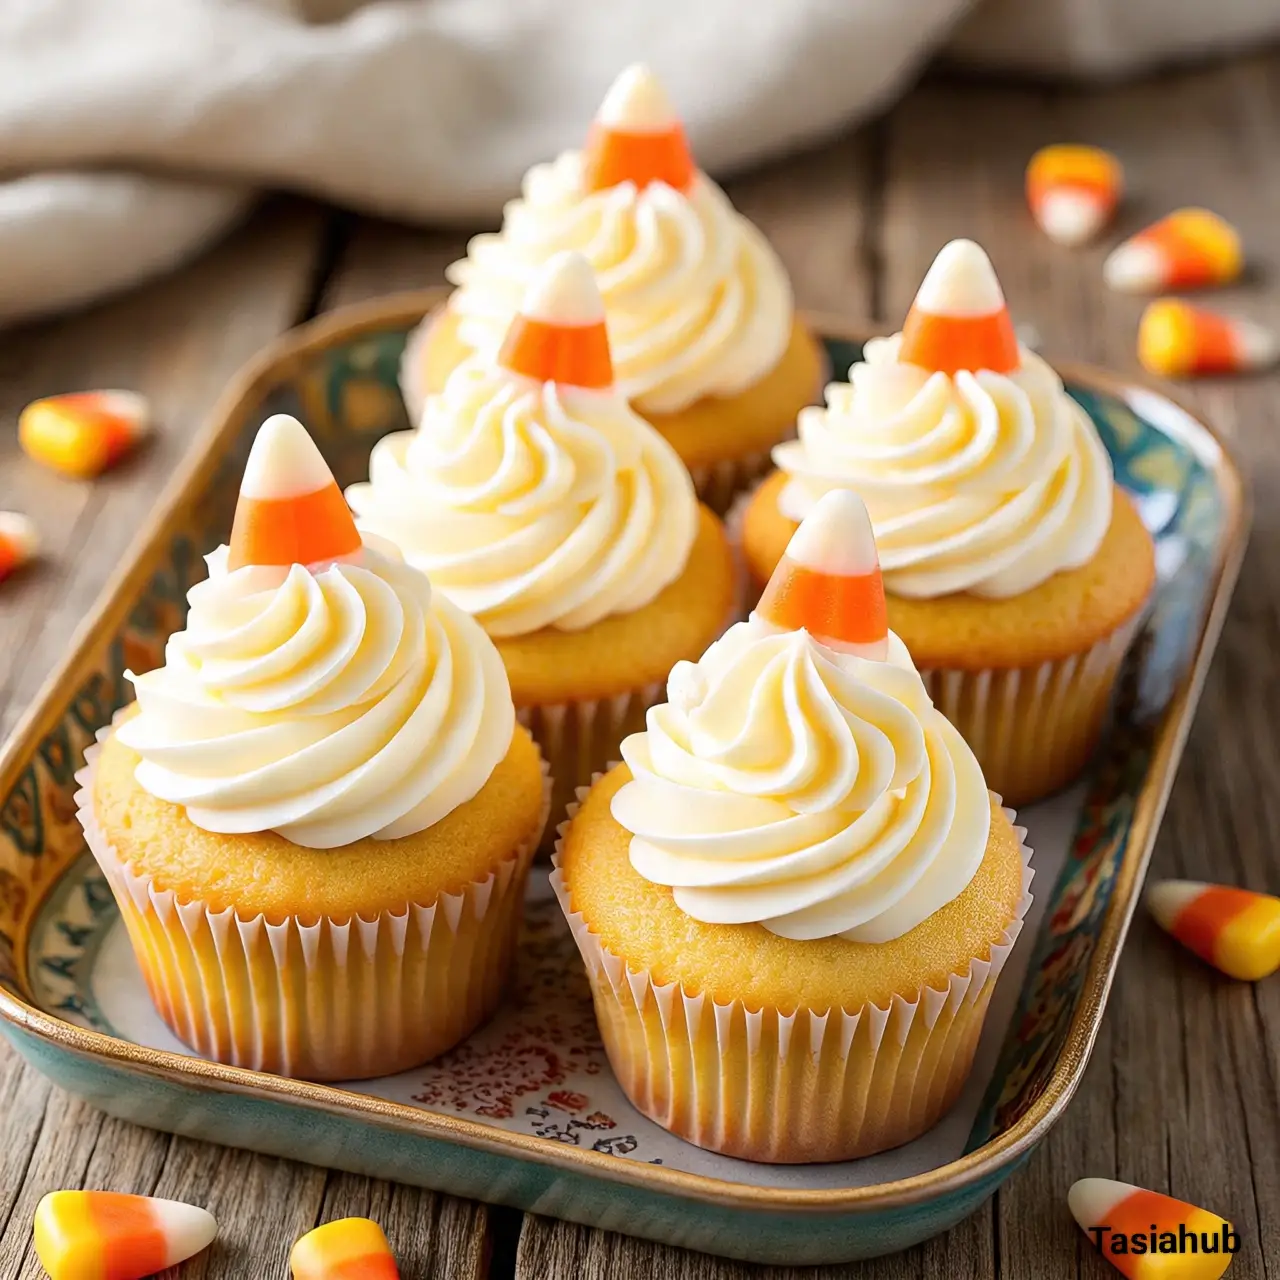
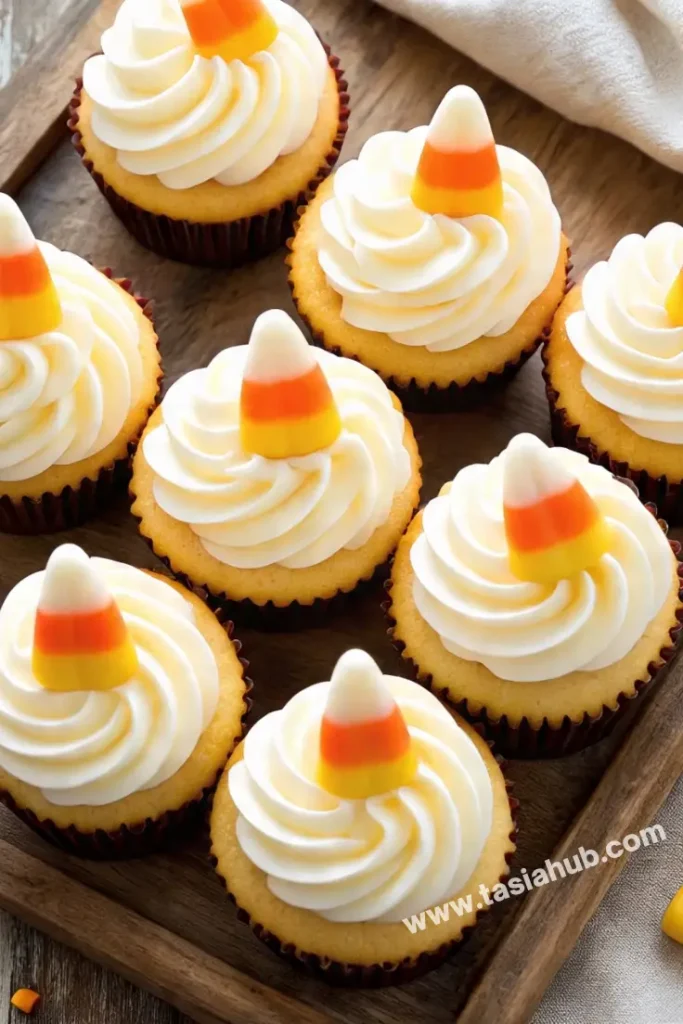
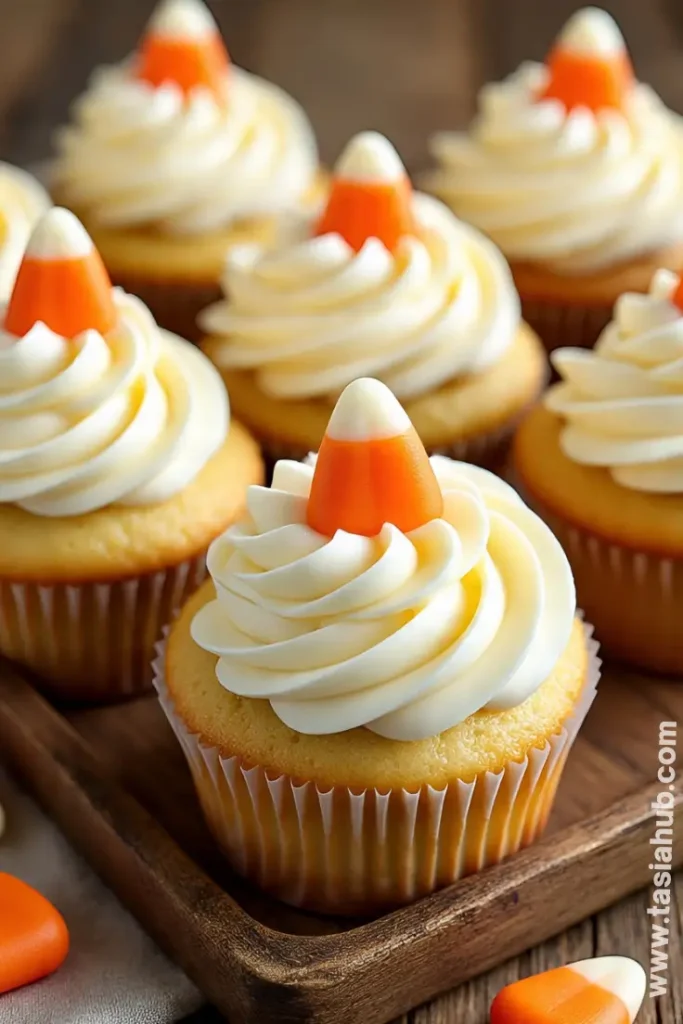
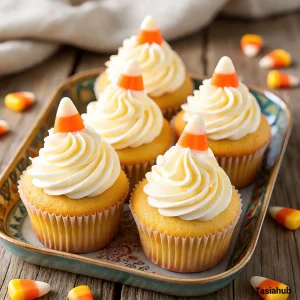
These cupcakes bring the nostalgic charm of candy corn—the iconic fall candy—into a soft, fluffy cake form. Imagine layers of yellow, orange, and white that mirror the classic tri-colored candy, topped with creamy frosting and a piece of candy corn for the perfect finishing touch. They’re not only delicious, but they also instantly dress up any dessert table with that warm seasonal glow.
What I love most about these cupcakes is how versatile they are. You can make them as simple Halloween cupcakes for a kid’s party, use them as fall themed cupcakes for a family get-together, or even serve them up as part of your thanksgiving cake ideas when you want something festive but not too heavy after a big meal. They work beautifully as fall candy corn cupcakes for just about any gathering—playful enough for Halloween, yet charming enough for Thanksgiving.
And let’s be honest: we all need a few recipes in our back pocket that don’t require tons of fuss but still look like they belong in a bakery window. These candy corn cupcakes check every box—easy, colorful, seasonal, and guaranteed to spark smiles the moment you bring them out.
Why You’ll Love It
- They’re a showstopper without the stress. The bright yellow, orange, and white layers make these cupcakes look bakery-worthy, but they’re actually simple enough for a beginner baker to pull off.
- Perfect for every fall occasion. Whether you need simple Halloween cupcakes for trick-or-treat night or fun thanksgiving cake ideas for the dessert table, these cupcakes fit right in.
- Kid-approved and adult-adored. Little ones love the playful colors and candy corn topper, while adults appreciate the nostalgia (and of course, the soft, moist cake).
- Customizable to your vibe. You can keep them light and fluffy with vanilla cake, add a hint of warm spices for a cozier flavor, or even swap in chocolate for a fun twist.
- Instant mood-lifters. Something about peeling back the wrapper to reveal those cheerful stripes just makes people smile—it’s like baking happiness into each bite.
Ingredient List
For the Cupcakes:
- 1 ½ cups all-purpose flour
- 1 ½ teaspoons baking powder
- ¼ teaspoon salt
- ½ cup unsalted butter, softened
- 1 cup granulated sugar
- 2 large eggs
- 2 teaspoons vanilla extract
- ½ cup whole milk
- Food coloring (yellow + orange)
For the Frosting:
- 1 cup unsalted butter, softened
- 3 ½ cups powdered sugar
- 2–3 tablespoons heavy cream (or milk)
- 1 teaspoon vanilla extract
- Candy corn (for topping)
Ingredient Notes
- Butter – I always use real unsalted butter (no substitutes here!) for both the cupcakes and frosting—it gives that rich, bakery-style flavor.
- Food Coloring – Gel food coloring works best because it gives vibrant yellow and orange without thinning out the batter. A little goes a long way.
- Vanilla Extract – Don’t skip this. Good vanilla adds warmth and depth that balances the sweetness. If you can, use pure vanilla extract instead of imitation.
- Milk – Whole milk keeps the cupcakes moist and tender. If you only have 2% or non-dairy, it’ll still work, but the texture won’t be quite as rich.
- Candy Corn – The star of the show! I like topping each cupcake with just one piece—it keeps things festive without being overwhelmingly sweet.
Kitchen Equipment Needed
- Mixing Bowls – For whisking dry and wet ingredients separately before bringing everything together. I like using my nesting glass bowls because they make cleanup easier.
- Hand Mixer or Stand Mixer – To cream the butter and sugar until light and fluffy (this step makes the cupcakes soft!). Personally, I reach for my hand mixer when I don’t feel like hauling out the big stand mixer.
- Measuring Cups & Spoons – Accuracy matters in baking, so having a good set makes a difference. I love my stainless steel set because it lasts forever.
- Cupcake Pan + Liners – The pan keeps everything uniform, and liners make removing (and eating) the cupcakes a breeze. Fun fall-themed liners always add a festive touch.
- Spatula – For folding in the batter and scraping every last bit from the bowl (because no one likes wasted cupcake batter!).
- Piping Bag + Tip – For frosting those pretty swirls on top. If you don’t have one, a zip-top bag with the corner snipped off works in a pinch.
Instructions
1. Preheat & Prep
- Preheat the oven to 350°F (175°C). Line a 12-cup muffin tin with cupcake liners.
- Set out the butter, eggs, and milk so they’re comfortably at room temperature—this helps everything mix smoothly.
Pro Tip: Room-temp butter should give slightly when pressed, not squish like melted butter. Creaming works best at this stage!
2. Combine the Dry Ingredients
- In a medium bowl, whisk together flour, baking powder, and salt until well combined.
- Set aside; you’ll add this in stages so the batter stays tender.
3. Cream the Butter & Sugar
- In a large mixing bowl, beat butter and granulated sugar on medium-high until the mixture looks pale and fluffy, about 2–3 minutes.
- Scrape down the bowl to catch any butter hiding on the sides.
Pro Tip: Proper creaming traps air—this is what gives you that soft, bakery-style crumb in your candy corn cupcakes.
4. Add Eggs & Vanilla
- Beat in eggs one at a time, mixing well after each addition.
- Mix in vanilla extract until the batter looks silky and cohesive.
Pro Tip: If the mixture looks a bit curdled, don’t panic—it’ll smooth out once the dry ingredients go in.
5. Alternate Dry Ingredients & Milk
- Add half of the dry mixture to the bowl; mix on low just until combined.
- Pour in all the milk; mix again on low until incorporated.
- Finish with the remaining dry mixture, mixing only until the flour disappears.
Pro Tip: Stop mixing as soon as you don’t see streaks of flour. Overmixing = dense cupcakes, and we want light, festive bites for your simple Halloween cupcakes.
6. Divide & Color the Batter
- Split the batter evenly into three bowls.
- Tint one bowl yellow, one orange, and leave one plain/white. Use gel food coloring so the batter doesn’t thin out.
- Stir each color gently until the shade is even.
Pro Tip: Go a shade brighter than you think—colors soften slightly as they bake, especially in fall candy corn cupcakes.
7. Layer the Colors in the Liners
- Spoon a heaping tablespoon of yellow batter into each liner and gently nudge it to the edges.
- Add orange batter on top, smoothing lightly to cover the yellow.
- Finish with the white batter. Aim to fill liners about ⅔ full total.
Pro Tip: Don’t press or swirl; layering gives that clean candy-corn stripe. A quick tap of the pan on the counter helps the layers settle without mixing.
8. Bake
- Bake for 16–19 minutes, until the centers spring back lightly and a toothpick comes out clean.
- Let cupcakes cool in the pan for 5 minutes, then transfer to a wire rack to cool completely.
Pro Tip: If the tops are browning but still underbaked, your oven runs hot—tent lightly with foil for the last few minutes.
9. Make the Vanilla Buttercream
- Beat softened butter on medium-high for 2 minutes until creamy.
- Add powdered sugar in 2–3 additions on low, then increase speed to whip until fluffy.
- Mix in vanilla and 2 tablespoons cream (or milk). If needed, add an extra splash of cream for a softer, pipeable texture.
Pro Tip: Sift the powdered sugar for ultra-smooth, bakery-style frosting—totally worth the extra minute.
10. Frost & Decorate
- Fit a piping bag with a large round or star tip and fill with frosting.
- Pipe generous swirls on fully cooled cupcakes.
- Top each with a single candy corn (or a few mini ones) for instant Halloween themed cupcakes.
Pro Tip: For a fun twist on fall themed cupcakes, make a quick two-tone swirl by streaking a line of orange gel inside the piping bag before adding the frosting.
11. Serve & Store
- Serve on a festive tray for party-ready thanksgiving cake ideas or pop them on the porch for neighborhood get-togethers.
- Store leftovers covered at room temperature for 1–2 days, or refrigerate up to 5 days. Bring to room temp before serving for the best texture.
Tips and Tricks for Success
- Measure flour the right way. Spoon it into the cup and level off with a knife—packing it in can make cupcakes dense.
- Use gel food coloring. It gives vibrant colors without thinning the batter. Liquid coloring often makes the batter runny.
- Cool completely before frosting. Warm cupcakes will melt your buttercream into a sad puddle.
- Pipe high swirls. A tall frosting swirl not only looks fancy but also gives the perfect balance of cake-to-frosting in every bite.
- Don’t skip the tap. Lightly tap the pan on the counter after layering the batter to even out the stripes without mixing them.
Ingredient Substitutions and Variations
- Milk – Swap with buttermilk for extra tang and tenderness, or use almond milk if you need a dairy-free option.
- Butter – Dairy-free margarine or vegan butter sticks can work if you’re making these for non-dairy eaters.
- Frosting flavor – Add a teaspoon of pumpkin spice or cinnamon to the buttercream for cozy fall vibes.
- Cake flavor – Use a yellow cake mix as a shortcut base—just divide and color the batter as directed.
- Topping twist – Instead of candy corn, try mini pumpkins, chocolate sprinkles, or even edible glitter for different fall themed cupcakes.
- Thanksgiving-ready – Mix a little maple or brown sugar into the frosting for a flavor that leans more toward thanksgiving cake ideas.
Serving Suggestions
- I love serving these candy corn cupcakes on a big fall dessert tray alongside caramel apples and spiced cookies—it feels like a mini fall festival at home.
- They make the cutest centerpiece at a Halloween party. Just arrange them on a tiered stand with some candy corn sprinkled around the base.
- Pair them with hot apple cider or pumpkin spice lattes for a cozy afternoon treat with friends.
- For Thanksgiving, I like placing one at each guest’s plate as a sweet little edible “place card.”
- Kids go wild when I pack one of these in their lunchbox during October—it’s like sending a little holiday cheer to school.
Storage and Reheating Instructions
- Room Temperature: Store frosted cupcakes in an airtight container at room temp for up to 2 days.
- Refrigerator: Keep in a covered container in the fridge for up to 5 days. Let them come to room temperature before eating for the best flavor.
- Freezer (Unfrosted): Wrap cupcakes individually in plastic wrap, then place in a freezer bag. Freeze for up to 2 months.
- Reheating: If frozen, thaw at room temp for about 1–2 hours before frosting or serving. Do not microwave—this can dry them out.
- Frosting Ahead: Buttercream can be made in advance and stored in the fridge for up to a week. Just whip it again before piping to bring back the fluffy texture.
Frequently Asked Questions
Can I make these cupcakes ahead of time?
Yes! You can bake the cupcakes a day or two in advance and keep them covered at room temperature. Frost them the day you plan to serve for the freshest look and taste.
Do I have to use gel food coloring?
Gel food coloring is best for vibrant, clean stripes, but liquid food coloring will work in a pinch—you just may need more of it, and the colors won’t be as bold.
How do I get even layers of color?
Use a spoon or small cookie scoop for each layer and gently spread it to the edges. A quick tap of the pan on the counter helps settle the batter without mixing the colors.
Can I use a boxed cake mix?
Absolutely! A yellow or white cake mix works great. Just prepare the batter, divide, color, and layer as directed. It’s a quick shortcut for simple Halloween cupcakes.
What other toppings can I use besides candy corn?
Mini pumpkins, festive sprinkles, or even a drizzle of caramel make fun alternatives. It’s easy to turn these into different fall themed cupcakes with small swaps.
Are these good for Thanksgiving too?
Definitely! While they’re a hit at Halloween parties, they also double as playful thanksgiving cake ideas, especially with a touch of warm spice in the frosting.
Did you try these candy corn cupcakes? Let me know in the comments how they turned out—I’d love to hear how you served them!
Candy Corn Cupcakes
Equipment
- Mixing Bowls
- Hand mixer or stand mixer
- Measuring Cups & Spoons
- Cupcake Pan + Liners
- Spatula
- Piping Bag + Tip
Ingredients
For the Cupcakes:
- 1 ½ cups all-purpose flour
- 1 ½ teaspoons baking powder
- ¼ teaspoon salt
- ½ cup unsalted butter softened
- 1 cup granulated sugar
- 2 large eggs
- 2 teaspoons vanilla extract
- ½ cup whole milk
- Food coloring yellow + orange
For the Frosting:
- 1 cup unsalted butter softened
- 3 ½ cups powdered sugar
- 2 –3 tablespoons heavy cream or milk
- 1 teaspoon vanilla extract
- Candy corn for topping
Instructions
Preheat & Prep
- Preheat the oven to 350°F (175°C). Line a 12-cup muffin tin with cupcake liners.
- Set out the butter, eggs, and milk so they’re comfortably at room temperature—this helps everything mix smoothly.
- Pro Tip: Room-temp butter should give slightly when pressed, not squish like melted butter. Creaming works best at this stage!
Combine the Dry Ingredients
- In a medium bowl, whisk together flour, baking powder, and salt until well combined.
- Set aside; you’ll add this in stages so the batter stays tender.
Cream the Butter & Sugar
- In a large mixing bowl, beat butter and granulated sugar on medium-high until the mixture looks pale and fluffy, about 2–3 minutes.
- Scrape down the bowl to catch any butter hiding on the sides.
- Pro Tip: Proper creaming traps air—this is what gives you that soft, bakery-style crumb in your candy corn cupcakes.
Add Eggs & Vanilla
- Beat in eggs one at a time, mixing well after each addition.
- Mix in vanilla extract until the batter looks silky and cohesive.
- Pro Tip: If the mixture looks a bit curdled, don’t panic—it’ll smooth out once the dry ingredients go in.
Alternate Dry Ingredients & Milk
- Add half of the dry mixture to the bowl; mix on low just until combined.
- Pour in all the milk; mix again on low until incorporated.
- Finish with the remaining dry mixture, mixing only until the flour disappears.
- Pro Tip: Stop mixing as soon as you don’t see streaks of flour. Overmixing = dense cupcakes, and we want light, festive bites for your simple Halloween cupcakes.
Divide & Color the Batter
- Split the batter evenly into three bowls.
- Tint one bowl yellow, one orange, and leave one plain/white. Use gel food coloring so the batter doesn’t thin out.
- Stir each color gently until the shade is even.
- Pro Tip: Go a shade brighter than you think—colors soften slightly as they bake, especially in fall candy corn cupcakes.
Layer the Colors in the Liners
- Spoon a heaping tablespoon of yellow batter into each liner and gently nudge it to the edges.
- Add orange batter on top, smoothing lightly to cover the yellow.
- Finish with the white batter. Aim to fill liners about ⅔ full total.
- Pro Tip: Don’t press or swirl; layering gives that clean candy-corn stripe. A quick tap of the pan on the counter helps the layers settle without mixing.
Bake
- Bake for 16–19 minutes, until the centers spring back lightly and a toothpick comes out clean.
- Let cupcakes cool in the pan for 5 minutes, then transfer to a wire rack to cool completely.
- Pro Tip: If the tops are browning but still underbaked, your oven runs hot—tent lightly with foil for the last few minutes.
Make the Vanilla Buttercream
- Beat softened butter on medium-high for 2 minutes until creamy.
- Add powdered sugar in 2–3 additions on low, then increase speed to whip until fluffy.
- Mix in vanilla and 2 tablespoons cream (or milk). If needed, add an extra splash of cream for a softer, pipeable texture.
- Pro Tip: Sift the powdered sugar for ultra-smooth, bakery-style frosting—totally worth the extra minute.
Frost & Decorate
- Fit a piping bag with a large round or star tip and fill with frosting.
- Pipe generous swirls on fully cooled cupcakes.
- Top each with a single candy corn (or a few mini ones) for instant Halloween themed cupcakes.
- Pro Tip: For a fun twist on fall themed cupcakes, make a quick two-tone swirl by streaking a line of orange gel inside the piping bag before adding the frosting.
Serve & Store
- Serve on a festive tray for party-ready thanksgiving cake ideas or pop them on the porch for neighborhood get-togethers.
- Store leftovers covered at room temperature for 1–2 days, or refrigerate up to 5 days. Bring to room temp before serving for the best texture.
Notes
Nutritional Value (per cupcake, approximate):
- Calories: 250–280 kcal
- Carbohydrates: 35g
- Sugar: 22g
- Fat: 12g
- Saturated Fat: 7g
- Protein: 3g
- Fiber: 0–1g