Candy Cane Cookies

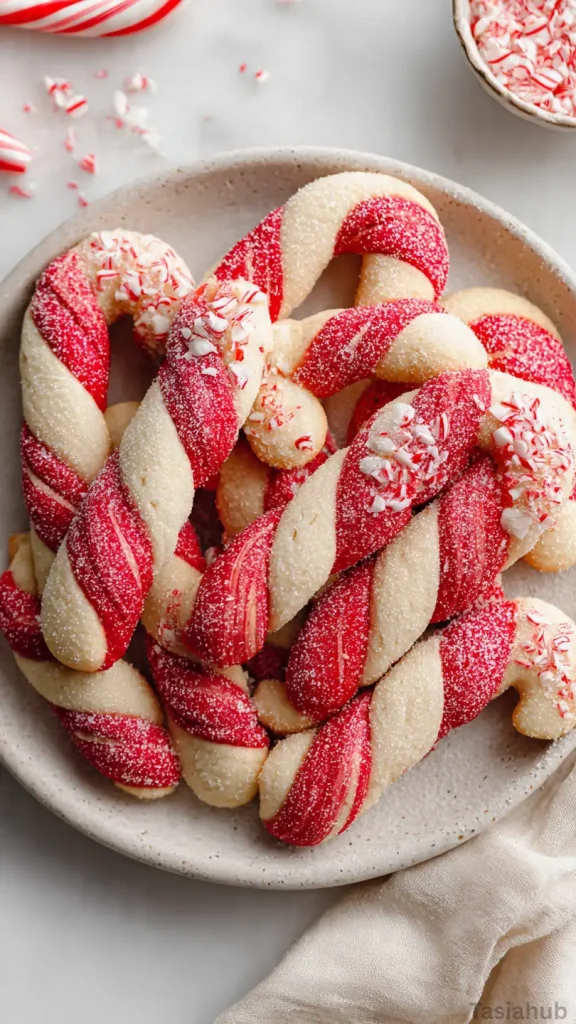
The holiday season calls for festive flavors that fill the kitchen with warmth and cheer, and candy cane cookies are a perfect example. With their swirled red and white patterns and subtle peppermint flavor, they bring a playful twist to classic Christmas desserts. They’re not only eye-catching but also melt-in-your-mouth delicious, making them a favorite for gatherings, cookie exchanges, or simply enjoying with a mug of hot cocoa by the fire.
Baking candy cane cookies is an experience that feels almost as magical as the finished product. The aroma of peppermint wafting through your home instantly sets a festive mood, and the act of rolling the dough into charming candy cane shapes is satisfying in its own right. Kids and adults alike can join in on the fun, shaping and decorating the cookies together, creating memories that last long after the last bite is gone.
These cookies are more than just a treat—they’re a holiday tradition in the making. They stand out on cookie trays alongside other Christmas cookies, and their playful design makes them a showstopper at parties. Whether you’re gifting them to friends, sending them with family, or enjoying them yourself, candy cane cookies embody the joy and sweetness of the season.
One of the best things about candy cane cookies is how versatile they are. You can add crushed candy cane pieces for a bit of crunch, drizzle them with chocolate for an extra festive touch, or even use them to decorate cupcakes and other Christmas desserts. Their peppermint flavor pairs beautifully with classic holiday spices like cinnamon and nutmeg, making them a perfect addition to your collection of holiday treats.
Why You’ll Love It
- Festive and Fun: These cookies instantly brighten up any holiday spread with their iconic red-and-white swirls. They’re almost too pretty to eat… almost!
- Peppermint Perfection: The subtle peppermint flavor makes each bite refreshingly sweet without being overpowering, a perfect balance for candy cane desserts.
- Great for Gifting: Wrapped in cellophane or tucked into a holiday tin, these cookies make thoughtful and delicious gifts that friends and family will adore.
- Kid-Friendly Baking: Shaping and decorating the candy cane cookies is a fun activity for little hands, making holiday baking a memorable family tradition.
- Versatile Treat: Enjoy them on their own, paired with hot chocolate, or crushed over ice cream and other Christmas desserts for a creative twist.
Ingredient List
For the Cookie Dough:
- 2 ½ cups all-purpose flour
- ½ teaspoon baking powder
- ¼ teaspoon salt
- ¾ cup unsalted butter, softened
- 1 cup granulated sugar
- 1 large egg
- 1 teaspoon vanilla extract
- ½ teaspoon peppermint extract
- Red food coloring
For Decoration:
- ½ cup crushed candy canes
- ¼ cup powdered sugar (optional, for dusting)
Ingredient Notes
- I always use unsalted butter for cookies—it makes the flavor buttery without being too salty.
- Don’t skip the peppermint extract! It’s what gives these candy cane cookies that classic, festive flavor.
- Red food coloring is optional, but it really makes the cookies pop and look like the real deal.
- Crushed candy canes aren’t just for decoration—they add a little crunch and extra pepperminty goodness.
- For a smoother, sweeter finish, a light dusting of powdered sugar can make these cookies extra festive.
Kitchen Equipment Needed
- Mixing Bowls: For combining your dough ingredients—I love using glass bowls so I can see everything clearly.
- Electric Mixer or Stand Mixer: Makes creaming butter and sugar effortless. Hand mixing works too if you don’t mind a little arm workout!
- Measuring Cups & Spoons: Essential for accuracy—my favorite set is stainless steel, super durable.
- Rolling Pin: For shaping the dough evenly; a silicone one works best to prevent sticking.
- Baking Sheets: Nonstick or lined with parchment paper for easy cleanup.
- Cooling Rack: Helps cookies cool evenly without getting soggy.
- Spatula: For transferring cookies safely from sheet to rack; I use a thin, flexible one.
Instructions
1. Prep Your Ingredients
- Measure out all your ingredients so everything is ready to go—it makes baking smoother and more enjoyable.
- Preheat your oven to 350°F (175°C) and line your baking sheets with parchment paper.
Pro Tip: Softened butter is key for smooth dough. If it’s too hard, microwave in 5-second bursts until soft but not melted.
2. Mix the Dry Ingredients
- In a medium bowl, whisk together the flour, baking powder, and salt until evenly combined.
- Set aside while you work on the wet ingredients.
Pro Tip: Whisking the dry ingredients prevents lumps and ensures the cookies have a consistent texture.
3. Cream Butter and Sugar
- In a large bowl, beat the softened butter and sugar together until light and fluffy (about 2–3 minutes).
- Add the egg, vanilla extract, and peppermint extract, and beat until fully incorporated.
Pro Tip: Scrape down the sides of the bowl occasionally to make sure everything is evenly mixed.
4. Combine Wet and Dry Ingredients
- Gradually add the flour mixture to the butter mixture, mixing on low speed until the dough comes together.
- Divide the dough into two portions—leave one plain and tint the other with red food coloring.
Pro Tip: Don’t overmix here; stop once the dough comes together to keep cookies tender.
5. Shape the Candy Canes
- Roll small portions of the plain dough and red dough into thin ropes of equal length.
- Gently twist one red rope with one plain rope, then shape into a candy cane curve.
- Place shaped cookies on the prepared baking sheet, leaving space for spreading.
Pro Tip: If the dough is sticky, chill for 10 minutes before shaping—it makes rolling much easier.
6. Bake the Cookies
- Bake in the preheated oven for 10–12 minutes, or until edges are lightly golden.
- Remove from oven and let cookies cool on the sheet for 5 minutes before transferring to a cooling rack.
Pro Tip: Don’t overbake! Candy cane cookies should stay soft and slightly chewy in the center.
7. Add Finishing Touches
- While cookies are still slightly warm, sprinkle crushed candy canes on top.
- Allow cookies to cool completely before serving or storing.
Pro Tip: For extra festive flair, drizzle a little melted white chocolate over the cooled cookies—it’s optional but looks beautiful!

Tips and Tricks for Success
- Chill the Dough: If your kitchen is warm, chilling the dough for 10–15 minutes makes it much easier to roll and shape.
- Use Parchment Paper: Prevents sticking and makes cleanup a breeze—plus, it helps the cookies bake evenly.
- Even Rope Thickness: Make sure the red and white dough ropes are the same thickness so the candy cane shapes are uniform.
- Don’t Overbake: Remove cookies when edges are lightly golden to keep them soft and chewy.
- Storage: Store in an airtight container at room temperature for up to a week, or freeze for longer.
Ingredient Substitutions and Variations
- Butter Substitute: Use coconut oil or vegan butter for a dairy-free version.
- Flour Options: Gluten-free all-purpose flour works well, just add a teaspoon of xanthan gum if needed.
- Sugar Swap: Brown sugar can replace granulated sugar for a slightly richer flavor.
- Flavor Twist: Add a pinch of cinnamon or nutmeg to the dough for a warm, spiced note.
- Decorations: Swap crushed candy canes for colored sprinkles, mini chocolate chips, or a drizzle of chocolate for different festive looks.
Serving Suggestions
- I love serving candy cane cookies with a steaming mug of hot chocolate—it’s the ultimate cozy treat for chilly evenings.
- Pair them with a plate of assorted Christmas cookies for a festive dessert spread at holiday parties.
- Crumble a few over vanilla ice cream for a pepperminty twist on a classic dessert—it adds a fun crunch!
- Serve alongside peppermint bark or other candy cane desserts for a peppermint-themed treat table.
- Wrap a few in cellophane tied with a ribbon for gifting—they’re as fun to give as they are to eat!
Storage and Reheating Instructions
- Room Temperature: Store in an airtight container for up to 1 week to maintain freshness.
- Freezing: Freeze unbaked dough or baked cookies for up to 3 months; thaw at room temperature before serving.
- Reheating: Warm cookies in a preheated oven at 300°F (150°C) for 3–5 minutes to refresh their soft, chewy texture.
- Avoid Moisture: Keep away from humid areas to prevent the candy cane topping from melting or becoming sticky.
Frequently Asked Questions
Can I make these cookies ahead of time?
Yes! You can make the dough and store it in the fridge for up to 2 days before baking, or freeze baked cookies for longer storage.
Can I use a different shape instead of candy canes?
Absolutely! You can roll the dough into circles, twists, or any fun festive shapes you like.
How do I prevent the candy cane pieces from sinking?
Sprinkle the crushed candy canes on the cookies while they’re still slightly warm so they stick without melting too much.
Can I make these cookies gluten-free?
Yes, substitute the all-purpose flour with a gluten-free blend. Just make sure it contains xanthan gum for structure.
What’s the best way to store leftover cookies?
Keep them in an airtight container at room temperature for up to a week, or freeze for longer.
Can I add chocolate or other flavors?
Definitely! Drizzle melted chocolate over cooled cookies, or mix mini chocolate chips into the dough for an extra festive touch.
Did you try this recipe? Let me know in the comments how it turned out!

Candy Cane Cookies
Equipment
- Mixing Bowls
- Electric mixer or stand mixer
- Measuring Cups & Spoons
- Rolling Pin
- Baking sheets
- Cooling Rack
- Spatula
Ingredients
For the Cookie Dough:
- 2 ½ cups all-purpose flour
- ½ teaspoon baking powder
- ¼ teaspoon salt
- ¾ cup unsalted butter softened
- 1 cup granulated sugar
- 1 large egg
- 1 teaspoon vanilla extract
- ½ teaspoon peppermint extract
- Red food coloring
For Decoration:
- ½ cup crushed candy canes
- ¼ cup powdered sugar optional, for dusting
Instructions
Prep Your Ingredients
- Measure out all your ingredients so everything is ready to go—it makes baking smoother and more enjoyable.
- Preheat your oven to 350°F (175°C) and line your baking sheets with parchment paper.
- Pro Tip: Softened butter is key for smooth dough. If it’s too hard, microwave in 5-second bursts until soft but not melted.
Mix the Dry Ingredients
- In a medium bowl, whisk together the flour, baking powder, and salt until evenly combined.
- Set aside while you work on the wet ingredients.
- Pro Tip: Whisking the dry ingredients prevents lumps and ensures the cookies have a consistent texture.
Cream Butter and Sugar
- In a large bowl, beat the softened butter and sugar together until light and fluffy (about 2–3 minutes).
- Add the egg, vanilla extract, and peppermint extract, and beat until fully incorporated.
- Pro Tip: Scrape down the sides of the bowl occasionally to make sure everything is evenly mixed.
Combine Wet and Dry Ingredients
- Gradually add the flour mixture to the butter mixture, mixing on low speed until the dough comes together.
- Divide the dough into two portions—leave one plain and tint the other with red food coloring.
- Pro Tip: Don’t overmix here; stop once the dough comes together to keep cookies tender.
Shape the Candy Canes
- Roll small portions of the plain dough and red dough into thin ropes of equal length.
- Gently twist one red rope with one plain rope, then shape into a candy cane curve.
- Place shaped cookies on the prepared baking sheet, leaving space for spreading.
- Pro Tip: If the dough is sticky, chill for 10 minutes before shaping—it makes rolling much easier.
Bake the Cookies
- Bake in the preheated oven for 10–12 minutes, or until edges are lightly golden.
- Remove from oven and let cookies cool on the sheet for 5 minutes before transferring to a cooling rack.
- Pro Tip: Don’t overbake! Candy cane cookies should stay soft and slightly chewy in the center.
Add Finishing Touches
- While cookies are still slightly warm, sprinkle crushed candy canes on top.
- Allow cookies to cool completely before serving or storing.
- Pro Tip: For extra festive flair, drizzle a little melted white chocolate over the cooled cookies—it’s optional but looks beautiful!
Notes
Nutritional Value (Per Cookie – Approximate)
- Calories: 120
- Total Fat: 5g
- Saturated Fat: 3g
- Cholesterol: 20mg
- Sodium: 45mg
- Carbohydrates: 17g
- Sugars: 9g
- Protein: 1g