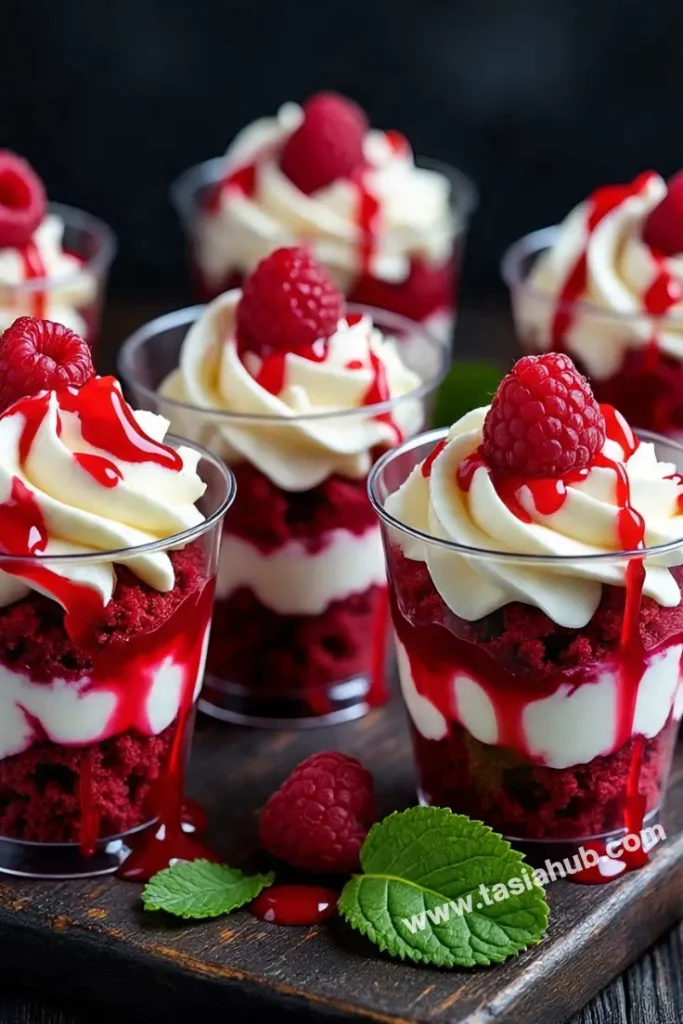
Bloody Red Velvet Trifles

Halloween just got a little sweeter—and a lot spookier—with these bloody red velvet trifles. Imagine layers of rich, moist red velvet cake, decadent cream cheese frosting, and a drizzle of raspberry “blood” that oozes through every bite. These trifles are dramatic, indulgent, and perfect for bringing a little festive flair to your dessert table. Honestly, they’re the kind of treat that will have everyone reaching for seconds before they even realize how beautiful they are.
What I love most about making red velvet trifles is how simple they are to assemble but how impressive they look. You don’t need to be a professional baker to create something that looks straight out of a Halloween spread from a magazine. The secret is in layering: alternate cake, creamy frosting, and the raspberry sauce, letting the “bloody” effect do the work for you. It’s messy, fun, and utterly satisfying.
These trifles aren’t just for Halloween, either. The vibrant red layers make them a perfect showstopper for a romantic night in or even Valentine’s trifle cups. Picture a cozy evening with a loved one, a few candles flickering, and this indulgent dessert waiting at the end—it’s the kind of treat that feels both decadent and personal. Plus, making them in individual cups means everyone gets their own mini masterpiece without any fuss.
Another thing I adore is the versatility. You can use leftover red velvet cake, store-bought frosting, or even tweak the toppings with chocolate shavings, crushed cookies, or a handful of fresh berries. Whether you’re going all out for Halloween or just craving something indulgent, these trifles are easy to customize and will instantly become a favorite dessert to serve again and again.
Why You’ll Love It
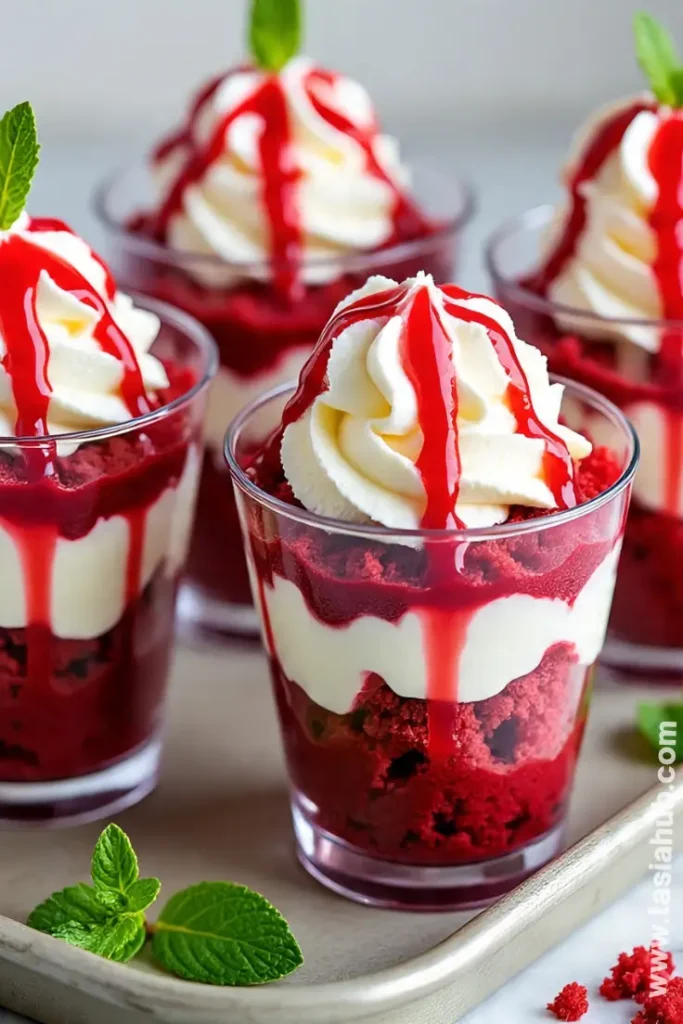
- Gorgeous and spooky at the same time – The deep red layers contrasted with creamy frosting make these red velvet trifles an eye-catching centerpiece for any Halloween table. Guests will be impressed before they even take a bite!
- Quick to assemble, big payoff – Even if you’re not a master baker, layering cake, frosting, and raspberry sauce creates a dessert that looks intricate and decadent without hours in the kitchen.
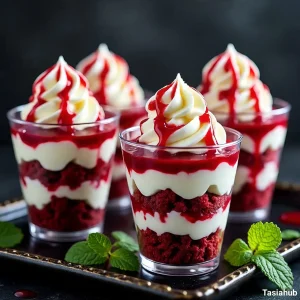
- Perfect for individual servings – Make them in Valentine’s trifle cups or small jars, so everyone gets their own portion. No fighting over slices, and they’re just the right size for indulging without overdoing it.
- Flexible and customizable – You can mix in chocolate chips, crushed cookies, or fresh berries to suit your taste. It’s easy to adjust for both spooky Halloween vibes or romantic Valentine’s flair.
- Deliciously indulgent – Every bite balances the tender, moist cake with creamy frosting and a tangy-sweet “bloody” raspberry drizzle. It’s rich, festive, and unforgettable.
Ingredient List
For the Red Velvet Cake
- 2 cups all-purpose flour
- 1½ cups granulated sugar
- 1 tsp baking soda
- 1 tsp cocoa powder
- ½ tsp salt
- 1 cup vegetable oil
- 1 cup buttermilk, room temperature
- 2 large eggs, room temperature
- 2 tbsp red food coloring
- 1 tsp vanilla extract
- 1 tsp white vinegar
For the Cream Cheese Frosting
- 8 oz cream cheese, softened
- ½ cup unsalted butter, softened
- 3 cups powdered sugar
- 1 tsp vanilla extract
For the Raspberry “Blood” Drizzle
- 1 cup fresh or frozen raspberries
- 2 tbsp granulated sugar
- 1 tsp lemon juice
Ingredient Notes
- I always use Daisy cream cheese for frosting—it’s super creamy and gives the trifle that perfect silky texture.
- Red food coloring is a must! It gives the “bloody” effect that makes this dessert so dramatic.
- Don’t skip the buttermilk—it keeps the cake tender and moist.
- Fresh raspberries make the drizzle taste brighter and more vibrant, but frozen works in a pinch.
- I usually grab unsalted butter for the frosting—it balances the sweetness beautifully and keeps it from getting too rich.
Kitchen Equipment Needed
- Mixing bowls – For combining cake batter and frosting. I love using glass bowls so I can see everything clearly.
- Electric mixer or hand mixer – Makes frosting silky and cake batter smooth. Hand mixers work fine if you don’t have a stand mixer.
- Measuring cups and spoons – Accuracy is key for perfect layers. I keep a set of stainless steel ones handy.
- 9×13-inch baking pan – Perfect for baking the red velvet cake evenly.
- Cooling rack – Lets the cake cool completely before assembling, so the frosting doesn’t melt.
- Food processor or blender – Great for turning raspberries into a smooth “blood” drizzle.
- Spatula – For spreading frosting and folding ingredients without losing air in the batter.
- Trifle bowl or individual cups – For assembling your layers. I adore using clear cups so everyone can see the gorgeous red and white layers.
Instructions
Step 1: Prepare the Cake
- Preheat your oven to 350°F (175°C) and grease a 9×13-inch baking pan.
- In a large mixing bowl, whisk together flour, cocoa powder, baking soda, and salt. This ensures the dry ingredients are evenly combined.
- In a separate bowl, mix vegetable oil, sugar, eggs, buttermilk, red food coloring, vanilla extract, and white vinegar until smooth.
- Gradually add the dry ingredients to the wet mixture, folding gently until fully incorporated.
Pro Tip: Don’t overmix! Fold just until the flour disappears to keep the cake tender and soft.
- Pour the batter into the prepared pan and bake for 25–30 minutes, or until a toothpick inserted into the center comes out clean.
- Let the cake cool completely on a cooling rack before cutting it into cubes.
Step 2: Make the Cream Cheese Frosting
- In a mixing bowl, beat cream cheese and butter together until smooth and creamy.
- Gradually add powdered sugar, beating on low first to avoid a sugar cloud, then increase speed until light and fluffy.
- Mix in vanilla extract for that extra warmth and flavor.
Pro Tip: Make sure your cream cheese and butter are at room temperature—it makes frosting silky and easy to spread.
Step 3: Prepare the Raspberry “Blood” Drizzle
- In a small saucepan, combine raspberries, sugar, and lemon juice over medium heat.
- Cook for 5–7 minutes, stirring occasionally, until the raspberries break down and the mixture thickens slightly.
- Strain the sauce through a fine mesh sieve to remove seeds, if desired, for a smooth drizzle.
- Let it cool to room temperature before layering.
Pro Tip: Taste and adjust sugar if needed; you want a balance of sweet and tart.
Step 4: Assemble the Trifles
- In your trifle bowl or individual cups, start with a layer of red velvet cake cubes.
- Spoon a generous layer of cream cheese frosting over the cake.
- Drizzle a little of the raspberry sauce on top to create that dramatic “bloody” effect.
- Repeat layers until you reach the top of the bowl or cup, finishing with frosting and a final drizzle of raspberry sauce.
Pro Tip: Press the layers gently but don’t compact them too much—you want each bite to be light, creamy, and full of flavor.
Step 5: Chill and Serve
- Refrigerate the assembled trifles for at least 1–2 hours before serving. This helps the layers set and flavors meld.
- Garnish with chocolate shavings, crushed cookies, or fresh berries if you like.
- Serve chilled and watch everyone’s eyes light up!
Tips and Tricks for Success
- Use room temperature ingredients – Eggs, butter, and cream cheese blend more smoothly and create a fluffier texture.
- Don’t overmix the cake batter – Folding just until combined keeps your red velvet tender and moist.
- Cool cake completely before layering – Warm cake can melt the frosting and make the layers run together.
- Chill before serving – Refrigerating for at least 1–2 hours helps the trifles set and makes them easier to serve.
- Layer with care – Press lightly, not too hard, to maintain distinct layers and that gorgeous visual effect.
- Adjust raspberry drizzle to taste – Sweet, tart, or extra “bloody,” this step lets you control flavor and presentation.
Ingredient Substitutions and Variations
- Red velvet cake – Use boxed mix if you’re short on time; just follow package instructions.
- Cream cheese frosting – Swap half the butter for Greek yogurt for a lighter, tangy version.
- Raspberry “blood” drizzle – Substitute strawberry or cherry puree for a different flavor profile.
- Mini cups – Make individual trifles in mason jars or Valentine’s trifle cups for a fun, portable option.
- Add texture – Sprinkle crushed cookies, brownie bits, or chocolate chips between layers for extra crunch.
- Dairy-free option – Use plant-based cream cheese and butter to make this dessert vegan-friendly.
Serving Suggestions
- I love serving these bloody red velvet trifles at a Halloween party with a scoop of vanilla ice cream on the side—it balances the rich cake and frosting perfectly.
- For a cozy night in, pair a trifle cup with a hot cup of coffee or spiced tea—it makes the red velvet layers feel extra indulgent.
- Serve in individual Valentine’s trifle cups for a romantic twist, topped with fresh berries for a pretty, personal touch.
- Make a dessert platter with mini trifles and dark chocolate squares—it’s a fun way to let guests mix and match flavors.
- For a festive brunch, add a dollop of whipped cream and a few chocolate shavings on top—it adds elegance and a little extra sweetness.
Storage and Reheating Instructions
- Refrigerate – Store covered in the fridge for up to 3 days. Layers stay fresh and the flavors meld beautifully.
- Freeze – You can freeze individual cups for up to 1 month; thaw in the fridge overnight before serving.
- Do not leave at room temperature – Cream cheese frosting can soften too much if left out for extended periods.
- Serving chilled – Always serve straight from the fridge for the best texture and “bloody” effect.
- Garnish before serving – Add any fresh toppings like berries, chocolate shavings, or whipped cream right before serving to keep them looking fresh.
Frequently Asked Questions
Can I make the trifles ahead of time?
Absolutely! Assemble them a few hours or even a day before serving. Just cover and refrigerate to keep the layers fresh and the frosting firm.
Can I use a boxed cake mix?
Yes! A red velvet boxed mix works perfectly and saves time. Just bake according to the package instructions and let it cool completely before layering.
Can I make these dairy-free?
Definitely. Use plant-based cream cheese and butter to make the frosting, and you’ll have a vegan-friendly version that’s just as creamy and delicious.
How long will they keep in the fridge?
Trifles stay fresh in the fridge for up to 3 days. Keep them covered to prevent the cake from drying out and the frosting from forming a crust.
Can I use other fruits for the drizzle?
Yes! Strawberries or cherries make a great substitute for raspberries and still give that dramatic “bloody” effect. Adjust sugar to taste.
Can I make mini versions for parties?
Absolutely! Valentine’s trifle cups or small mason jars are perfect for individual servings. They’re easy to serve and look super cute on a dessert table.
Did you try this recipe? Let me know in the comments how your bloody red velvet trifles turned out—I’d love to hear your tips, tweaks, and how everyone enjoyed them!
Bloody Red Velvet Trifles
Equipment
- Mixing Bowls
- Electric mixer or hand mixer
- Measuring cups and spoons
- 9×13-inch Baking Pan
- Cooling Rack
- Food Processor or Blender
- Spatula
- Trifle bowl or individual cups
Ingredients
For the Red Velvet Cake
- 2 cups all-purpose flour
- 1½ cups granulated sugar
- 1 tsp baking soda
- 1 tsp cocoa powder
- ½ tsp salt
- 1 cup vegetable oil
- 1 cup buttermilk room temperature
- 2 large eggs room temperature
- 2 tbsp red food coloring
- 1 tsp vanilla extract
- 1 tsp white vinegar
For the Cream Cheese Frosting
- 8 oz cream cheese softened
- ½ cup unsalted butter softened
- 3 cups powdered sugar
- 1 tsp vanilla extract
For the Raspberry “Blood” Drizzle
- 1 cup fresh or frozen raspberries
- 2 tbsp granulated sugar
- 1 tsp lemon juice
Instructions
Step 1: Prepare the Cake
- Preheat your oven to 350°F (175°C) and grease a 9×13-inch baking pan.
- In a large mixing bowl, whisk together flour, cocoa powder, baking soda, and salt. This ensures the dry ingredients are evenly combined.
- In a separate bowl, mix vegetable oil, sugar, eggs, buttermilk, red food coloring, vanilla extract, and white vinegar until smooth.
- Gradually add the dry ingredients to the wet mixture, folding gently until fully incorporated.
- Pro Tip: Don’t overmix! Fold just until the flour disappears to keep the cake tender and soft.
- Pour the batter into the prepared pan and bake for 25–30 minutes, or until a toothpick inserted into the center comes out clean.
- Let the cake cool completely on a cooling rack before cutting it into cubes.
Step 2: Make the Cream Cheese Frosting
- In a mixing bowl, beat cream cheese and butter together until smooth and creamy.
- Gradually add powdered sugar, beating on low first to avoid a sugar cloud, then increase speed until light and fluffy.
- Mix in vanilla extract for that extra warmth and flavor.
- Pro Tip: Make sure your cream cheese and butter are at room temperature—it makes frosting silky and easy to spread.
Step 3: Prepare the Raspberry “Blood” Drizzle
- In a small saucepan, combine raspberries, sugar, and lemon juice over medium heat.
- Cook for 5–7 minutes, stirring occasionally, until the raspberries break down and the mixture thickens slightly.
- Strain the sauce through a fine mesh sieve to remove seeds, if desired, for a smooth drizzle.
- Let it cool to room temperature before layering.
- Pro Tip: Taste and adjust sugar if needed; you want a balance of sweet and tart.
Step 4: Assemble the Trifles
- In your trifle bowl or individual cups, start with a layer of red velvet cake cubes.
- Spoon a generous layer of cream cheese frosting over the cake.
- Drizzle a little of the raspberry sauce on top to create that dramatic “bloody” effect.
- Repeat layers until you reach the top of the bowl or cup, finishing with frosting and a final drizzle of raspberry sauce.
- Pro Tip: Press the layers gently but don’t compact them too much—you want each bite to be light, creamy, and full of flavor.
Step 5: Chill and Serve
- Refrigerate the assembled trifles for at least 1–2 hours before serving. This helps the layers set and flavors meld.
- Garnish with chocolate shavings, crushed cookies, or fresh berries if you like.
- Serve chilled and watch everyone’s eyes light up!
Notes
Nutritional Value (per serving, approximate):
- Calories: 450–500 kcal
- Total Fat: 25g
- Sodium: 280mg
- Total Carbohydrates: 55g
- Dietary Fiber: 1g
- Sugars: 38g
- Protein: 5g