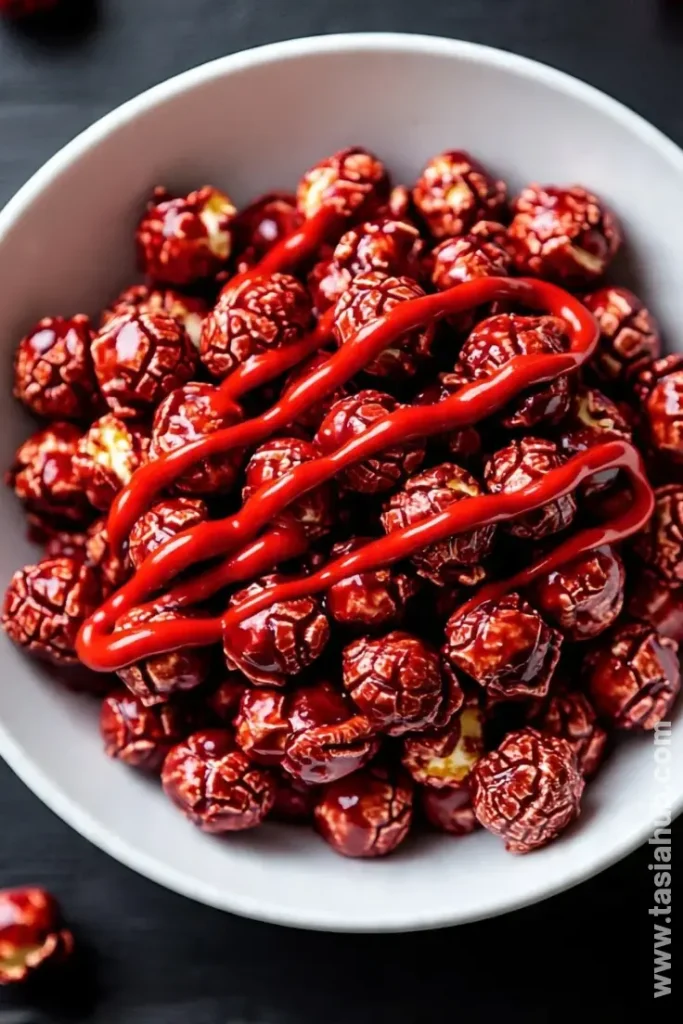
Bloody Red Velvet Cake Pops

Halloween is the perfect excuse to get a little messy in the kitchen, and these bloody red velvet cake pops are just the treat for it. Imagine rich, moist red velvet cake crumbled into bite-sized balls, dipped in creamy white chocolate, and splattered with crimson “blood” for that perfectly eerie effect. They’re cute, creepy, and downright irresistible—all at the same time.
Making Halloween cake pops doesn’t have to be complicated. In fact, the process is surprisingly simple, and you can even get the kids involved in shaping and decorating. Each pop becomes a tiny canvas for your spooky creativity, and with just a few ingredients, you can create a batch that’s as fun to make as it is to eat.
These spooky cake pops are a standout addition to any Halloween spread. Whether you’re hosting a party, bringing a treat to work, or simply enjoying a cozy night at home, they’re guaranteed to impress. The deep red of the cake paired with the crisp white coating and “bloody” drizzle makes them almost too good to resist—almost.
If you’ve been browsing Halloween dessert ideas, you’ll love these Halloween cake pops ideas. They’re part creepy, part indulgent, and all delicious. With the right touch of creativity, these Halloween cake pops recipes will quickly become a favorite in your seasonal rotation—and maybe even a yearly tradition.
Why You’ll Love It
- Perfectly spooky yet adorable – These cake pops hit that sweet spot between creepy Halloween vibes and cute, bite-sized treats. You can make them as scary or as playful as you like!
- Fun to make with friends or kids – Rolling, dipping, and decorating cake pops turns into a mini Halloween party in your kitchen. Plus, everyone gets to add their own “bloody” twist.
- Rich, indulgent flavor – The deep red velvet cake is moist and chocolatey, paired with a creamy coating that balances the sweetness perfectly. Every bite is a little indulgence you won’t feel guilty about.
- Versatile for any Halloween celebration – Whether it’s a classroom party, office gathering, or a family movie night, these cake pops fit right in. They’re easy to transport and always a conversation starter.
- Endless decorating possibilities – From dripping “blood” to spooky faces or even glittery sprinkles, these Halloween cake pops let your imagination run wild. Each pop can be a unique masterpiece!
Ingredient List
For the Cake Pops
- 2 cups all-purpose flour
- 1 ½ cups granulated sugar
- 1 tsp baking soda
- 1 tsp cocoa powder
- ½ tsp salt
- 1 cup buttermilk, room temperature
- ½ cup vegetable oil
- 2 large eggs
- 2 tbsp red food coloring
- 1 tsp vanilla extract
- 1 tsp white vinegar
For the Coating & Decoration
- 12 oz white chocolate or candy melts
- 2–3 tbsp coconut oil (optional, for smoother dipping)
- Red gel food coloring or red decorating gel for “blood” effect
- Sprinkles or edible glitter (optional, for extra spooky flair)
Ingredient Notes
- Red food coloring – I always use gel-based coloring for that deep, bloody red. It makes a huge difference in intensity!
- Buttermilk – Don’t skip this! It keeps the cake super moist and tender.
- White chocolate – I like using high-quality candy melts—they dip easier and harden beautifully.
- Coconut oil – Optional, but it helps the coating smooth out without cracking. Totally worth it.
- Red gel/decorating gel – This is your “blood” magic. Go bold—it makes the cake pops look insanely spooky.
Kitchen Equipment Needed
- Mixing bowls – For combining cake ingredients; I love using glass bowls so you can see everything clearly.
- Electric mixer or stand mixer – Makes mixing smooth and easy; saves your arms from extra workout.
- Spatula – For folding in ingredients and scraping the bowl; my silicone spatula is a must.
- Baking pan (9×13 inch) – To bake the red velvet cake evenly.
- Cooling rack – Helps the cake cool quickly without getting soggy.
- Large spoon or cookie scoop – Perfect for portioning cake balls evenly.
- Baking sheet – For placing cake balls before chilling.
- Parchment paper – Prevents sticking while chilling or decorating.
- Microwave-safe bowl or double boiler – For melting white chocolate smoothly.
- Lollipop sticks – Essential for holding your cake pops; I like the sturdy wooden ones.
- Toothpicks (optional) – Handy for adding small decorations or adjusting “bloody” drips.
Instructions
1. Bake the Red Velvet Cake
- Preheat your oven to 350°F (175°C) and grease a 9×13-inch baking pan.
- In a large bowl, whisk together the flour, sugar, cocoa powder, baking soda, and salt.
- In a separate bowl, combine the buttermilk, vegetable oil, eggs, red food coloring, vanilla extract, and white vinegar.
- Gradually add the wet ingredients to the dry, mixing until smooth. Pro tip: Mix gently at the end to avoid overworking the batter—this keeps your cake tender.
- Pour the batter into the prepared pan and bake for 25–30 minutes, or until a toothpick inserted comes out clean.
- Allow the cake to cool completely on a cooling rack before handling.
2. Prepare the Cake Balls
- Once cooled, crumble the cake into a large mixing bowl using your hands or a fork.
- Add 2–3 tablespoons of frosting (store-bought or homemade) to the crumbs. Mix until the texture is moist and holds together when pressed. Pro tip: Start with less frosting—you can always add more if needed.
- Using a spoon or cookie scoop, form the mixture into small, evenly sized balls (about 1–1.5 inches).
- Place the cake balls on a parchment-lined baking sheet and chill in the fridge for at least 30 minutes.
3. Insert Sticks
- Melt a small amount of white chocolate and dip the tip of each lollipop stick into it.
- Insert the stick halfway into each chilled cake ball. This helps secure the stick so it doesn’t fall out when dipping.
- Chill again for 10 minutes to set the chocolate “glue.”
4. Dip the Cake Pops
- Melt the white chocolate or candy melts in a microwave-safe bowl or double boiler. If using a microwave, heat in 30-second intervals, stirring in between. Pro tip: Add 1 teaspoon of coconut oil if the chocolate seems too thick—it makes dipping smoother.
- Holding the stick, dip each cake ball into the melted chocolate until fully coated. Tap off the excess gently.
- Place the dipped pops on a parchment-lined baking sheet to set.
5. Add the “Bloody” Drizzle
- Mix a few drops of red gel or decorating gel with a tiny bit of white chocolate if needed for a thinner consistency.
- Drizzle over the set cake pops using a spoon or a toothpick for dramatic, spooky “blood” effects.
- Add optional sprinkles, edible glitter, or small decorations while the coating is still slightly wet.
6. Let Them Set
- Allow the cake pops to set completely at room temperature or in the fridge for 15–20 minutes.
- Once set, your bloody red velvet cake pops are ready to serve!

Tips and Tricks for Success
- Chill the cake balls thoroughly – Cold cake balls hold their shape better when dipping. Don’t skip this step!
- Use high-quality chocolate – It melts smoother and sets with a nice glossy finish.
- Thin your coating if needed – Add a teaspoon of coconut oil or vegetable oil for easier dipping.
- Tap off excess chocolate – Prevents drips and keeps your pops looking neat.
- Get creative with your drizzle – Use a fork or toothpick to make random splatters for a realistic bloody effect.
- Work in batches – Dip a few at a time so the chocolate doesn’t harden too quickly in the bowl.
Ingredient Substitutions and Variations
- Buttermilk substitute – Use 1 cup milk + 1 tbsp lemon juice or vinegar, let sit 5 minutes.
- Red velvet flavor – For a slightly different flavor, try adding 1 tsp almond extract with vanilla.
- Chocolate coating alternatives – Dark or milk chocolate works for a different look, though white shows the “blood” best.
- Vegan option – Use plant-based milk, flax eggs, and vegan chocolate/candy melts.
- Extra spooky decorations – Add edible eyes, black sprinkles, or colored sugar for variety.
- Frosting variations – Cream cheese frosting is classic, but buttercream or marshmallow frosting works too.
Serving Suggestions
- I love arranging these bloody red velvet cake pops in a spooky Halloween-themed mug or jar—it instantly makes them feel festive on the table.
- Serve them alongside a bowl of candy corn or other Halloween treats for a fun mix of textures and flavors.
- They’re perfect for gifting—wrap a few in clear cellophane with a black or orange ribbon for an easy, festive present.
- Pair them with a cold glass of milk or a warm cup of hot chocolate—the richness of the cake pops balances the drink perfectly.
- For a party display, stick them into a foam block covered with black tissue paper; it makes a dramatic centerpiece and keeps them upright.
Storage and Reheating Instructions
- Room temperature – Keep in an airtight container for up to 2 days. Ideal if serving the same day.
- Refrigerator – Store in an airtight container for up to 1 week. Brings out the creaminess in the coating.
- Freezer – Wrap individually in plastic wrap, then place in a freezer-safe container for up to 3 months. Thaw in the fridge before serving.
- Avoid microwaving – Chocolate coating may seize. If needed, let cake pops sit at room temperature for a few minutes before serving.
- Touch-ups – If any drips or “blood” decorations fade, you can redo them quickly with a toothpick and some red gel.
Frequently Asked Questions
Can I make these cake pops ahead of time?
Absolutely! You can prepare the cake balls a day or two in advance and store them in the fridge. Just dip and decorate them when you’re ready to serve.
Can I use store-bought cake instead of baking from scratch?
Yes! A boxed red velvet cake or even a leftover homemade cake works perfectly. Just crumble it and follow the same steps for cake balls.
How do I prevent the cake pops from falling off the sticks?
Chill the cake balls well before inserting the sticks and dip the tip of the stick in melted chocolate before inserting—it acts like glue and keeps everything secure.
Can I use chocolate other than white for the coating?
Definitely! Dark or milk chocolate works, though the white coating really makes the red “blood” pop visually.
How do I make the “bloody” effect look realistic?
Use a small spoon or toothpick to drizzle red decorating gel in random patterns. Less control can make it look messy in a spooky, intentional way!
Can I freeze these cake pops?
Yes! Wrap them individually in plastic wrap, place in a freezer-safe container, and freeze for up to 3 months. Thaw in the fridge before serving.
Did you try this recipe? Let me know in the comments how your bloody red velvet cake pops turned out! I’d love to see your spooky creations.

Bloody Red Velvet Cake Pops
Equipment
- Mixing Bowls
- Electric mixer or stand mixer
- Spatula
- Baking pan (9×13 inch)
- Cooling Rack
- Large spoon or cookie scoop
- Baking Sheet
- Parchment paper
- Microwave-safe bowl or double boiler
- Lollipop sticks
- Toothpicks (optional)
Ingredients
For the Cake Pops
- 2 cups all-purpose flour
- 1 ½ cups granulated sugar
- 1 tsp baking soda
- 1 tsp cocoa powder
- ½ tsp salt
- 1 cup buttermilk room temperature
- ½ cup vegetable oil
- 2 large eggs
- 2 tbsp red food coloring
- 1 tsp vanilla extract
- 1 tsp white vinegar
For the Coating & Decoration
- 12 oz white chocolate or candy melts
- 2 –3 tbsp coconut oil optional, for smoother dipping
- Red gel food coloring or red decorating gel for “blood” effect
- Sprinkles or edible glitter optional, for extra spooky flair
Instructions
Bake the Red Velvet Cake
- Preheat your oven to 350°F (175°C) and grease a 9×13-inch baking pan.
- In a large bowl, whisk together the flour, sugar, cocoa powder, baking soda, and salt.
- In a separate bowl, combine the buttermilk, vegetable oil, eggs, red food coloring, vanilla extract, and white vinegar.
- Gradually add the wet ingredients to the dry, mixing until smooth. Pro tip: Mix gently at the end to avoid overworking the batter—this keeps your cake tender.
- Pour the batter into the prepared pan and bake for 25–30 minutes, or until a toothpick inserted comes out clean.
- Allow the cake to cool completely on a cooling rack before handling.
Prepare the Cake Balls
- Once cooled, crumble the cake into a large mixing bowl using your hands or a fork.
- Add 2–3 tablespoons of frosting (store-bought or homemade) to the crumbs. Mix until the texture is moist and holds together when pressed. Pro tip: Start with less frosting—you can always add more if needed.
- Using a spoon or cookie scoop, form the mixture into small, evenly sized balls (about 1–1.5 inches).
- Place the cake balls on a parchment-lined baking sheet and chill in the fridge for at least 30 minutes.
Insert Sticks
- Melt a small amount of white chocolate and dip the tip of each lollipop stick into it.
- Insert the stick halfway into each chilled cake ball. This helps secure the stick so it doesn’t fall out when dipping.
- Chill again for 10 minutes to set the chocolate “glue.”
Dip the Cake Pops
- Melt the white chocolate or candy melts in a microwave-safe bowl or double boiler. If using a microwave, heat in 30-second intervals, stirring in between. Pro tip: Add 1 teaspoon of coconut oil if the chocolate seems too thick—it makes dipping smoother.
- Holding the stick, dip each cake ball into the melted chocolate until fully coated. Tap off the excess gently.
- Place the dipped pops on a parchment-lined baking sheet to set.
Add the “Bloody” Drizzle
- Mix a few drops of red gel or decorating gel with a tiny bit of white chocolate if needed for a thinner consistency.
- Drizzle over the set cake pops using a spoon or a toothpick for dramatic, spooky “blood” effects.
- Add optional sprinkles, edible glitter, or small decorations while the coating is still slightly wet.
Let Them Set
- Allow the cake pops to set completely at room temperature or in the fridge for 15–20 minutes.
- Once set, your bloody red velvet cake pops are ready to serve!
Notes
Nutritional Value (per cake pop, approx.)
- Calories: 160
- Carbohydrates: 20g
- Protein: 2g
- Fat: 8g
- Cholesterol: 20mg
- Sodium: 120mg
- Fiber: 1g
- Sugar: 15g