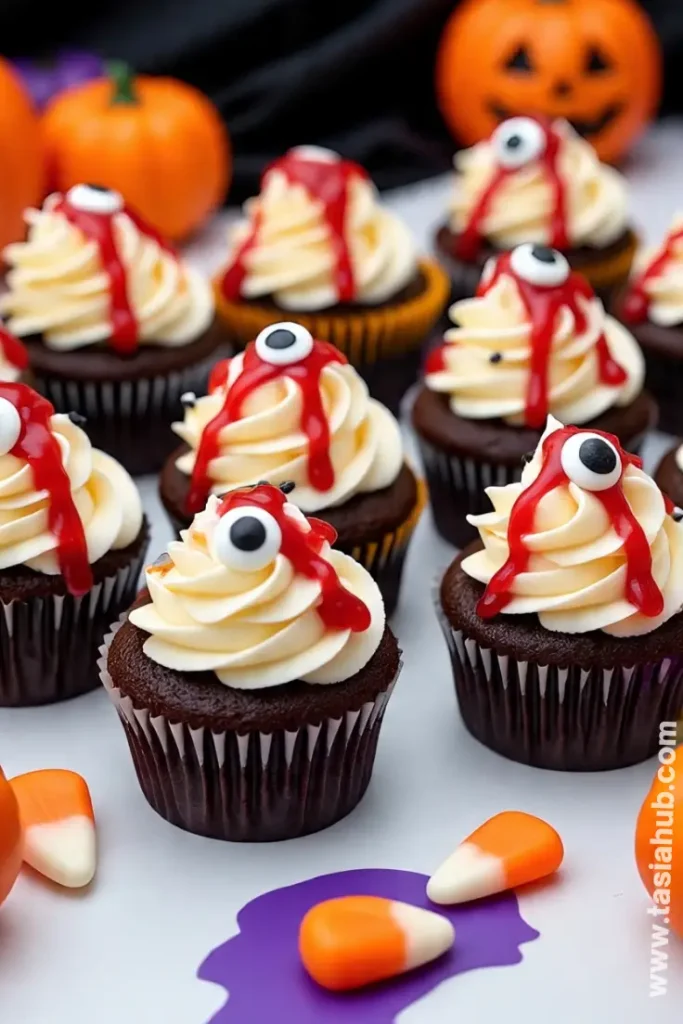
Bloody Halloween Cupcakes

Halloween is the perfect time to get a little creative in the kitchen, and nothing says spooky fun quite like a cupcake that looks like it just stepped out of a haunted house. These Bloody Halloween Cupcakes are the kind of treat that makes people do a double take—they’re festive, eerie, and delicious all at once. I love how they combine the comfort of a soft, moist cupcake with the thrill of a spooky, gory surprise inside.
I remember making these for the first time a few years ago, and my friends were both delighted and a little squeamish! The secret is in the “blood” effect—don’t worry, it’s completely edible and super easy to achieve. It’s one of those Halloween dessert ideas that looks intimidating but is actually surprisingly simple. Once you get the hang of it, these cupcakes are perfect for parties, classroom treats, or just indulging your inner Halloween fanatic at home.
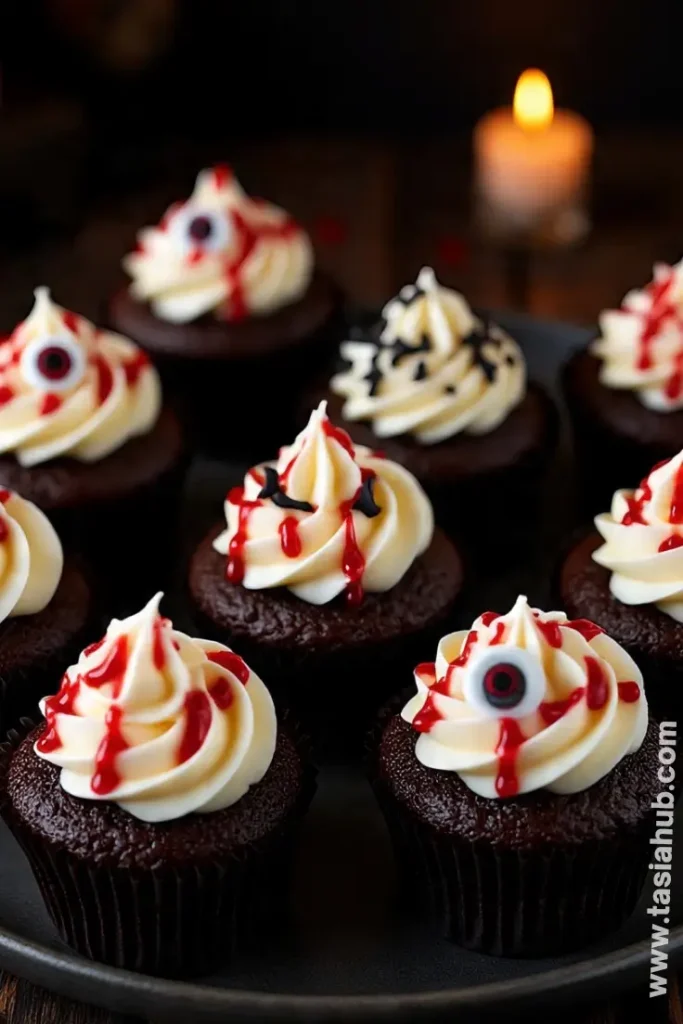
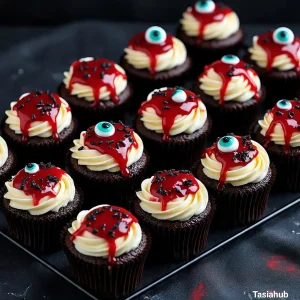
These Halloween-themed cupcakes with frosting are a fantastic canvas for creativity. You can go classic with bright red “blood” drips over a dark chocolate frosting or add little spooky details like candy eyeballs, fangs, or spider webs for extra flair. The combination of colors and textures makes them irresistible—and a little terrifying, in the best way!
One of the things I love most is how adaptable this recipe is. Whether you want to make a batch of simple Halloween cupcakes that kids can help decorate or more elaborate spooky cupcakes for a themed party, these cupcakes hit the mark. Plus, making them at home gives you full control over flavors, sweetness, and that all-important creepy effect that makes Halloween treats so much fun.
Why You’ll Love It
- Show-stopping presentation: These cupcakes instantly become the centerpiece of any Halloween spread. The “bloody” effect makes them look like something straight out of a haunted house, and guests won’t be able to resist snapping a photo before taking a bite.
- Fun for all ages: Kids and adults alike will get a kick out of decorating and eating these spooky cupcakes. The drippy frosting and gooey “blood” filling make it a hands-on, playful experience in the kitchen.
- Customizable flavor and design: Whether you prefer chocolate, vanilla, or a mix of flavors, you can tailor these cupcakes to your taste. Plus, the decoration possibilities are endless—you can make them creepy, cute, or downright terrifying.
- Simple yet impressive: Even if you’re new to baking, these simple Halloween cupcakes are easy to make and assemble. A few easy techniques create a dramatic effect without hours of work.
- Perfect for Halloween dessert ideas: These cupcakes aren’t just for parties—they’re great for school events, office treats, or just a fun weekend project. They capture the spirit of Halloween in every bite!
Ingredient List
For the Cupcakes:
- 1½ cups all-purpose flour
- 1 cup granulated sugar
- ½ cup unsweetened cocoa powder
- 1 tsp baking powder
- ½ tsp baking soda
- ¼ tsp salt
- ½ cup vegetable oil
- 2 large eggs
- 1 tsp vanilla extract
- ¾ cup buttermilk
- ½ cup hot water
For the Frosting:
- 1 cup unsalted butter, softened
- 3–4 cups powdered sugar
- ¼ cup heavy cream
- 2 tsp vanilla extract
- Pinch of salt
- Red food coloring (for that “bloody” effect)
For the “Blood” Filling:
- ½ cup raspberry or strawberry jam
- 1–2 tsp red food coloring (optional, for extra drama)
Ingredient Notes
- I always use Dole or Driscoll berries for my jam—it adds such a natural sweetness that balances the cocoa perfectly.
- Don’t skip the hot water in the cupcake batter! It really helps the cocoa bloom and makes the cupcakes super moist.
- Unsalted butter is key for the frosting; it lets you control the sweetness without it turning too sugary.
- Red food coloring is optional in the jam, but I like to add a little extra—it gives that deep, horror-movie blood effect that makes these cupcakes so fun.
- Buttermilk is non-negotiable if you want soft, tender cupcakes—it’s the secret to a perfect base for these spooky treats.
Kitchen Equipment Needed
- Mixing bowls – For combining your dry and wet ingredients separately; I love using glass bowls so I can see everything clearly.
- Measuring cups & spoons – Accurate measurements make a big difference in baking. I keep a colorful set that’s easy to grab.
- Electric mixer or hand whisk – Makes frosting silky smooth and cupcake batter lump-free. My hand mixer is my go-to for quick cleanup.
- Muffin tin – For baking the cupcakes; I always use a non-stick 12-cup tin for even baking.
- Cupcake liners – Prevent sticking and make cupcakes look festive; I like plain white or black for a spooky vibe.
- Spatula – For scraping the bowl and folding in ingredients; a silicone one is my favorite.
- Small spoon or piping bag – For filling the cupcakes with “blood” jam. I love a disposable piping bag for easy cleanup.
- Cooling rack – Lets cupcakes cool evenly and prevents soggy bottoms.
Instructions
Step 1: Preheat and Prep
- Preheat your oven to 350°F (175°C).
- Line a 12-cup muffin tin with cupcake liners. I like using black liners for that extra spooky vibe.
- Pro Tip: Set up all your ingredients and tools before you start mixing. It makes the process smoother and less stressful.
Step 2: Mix the Dry Ingredients
- In a large mixing bowl, sift together 1½ cups flour, ½ cup cocoa powder, 1 tsp baking powder, ½ tsp baking soda, and ¼ tsp salt.
- Add 1 cup sugar and gently whisk to combine.
- Pro Tip: Sifting helps avoid lumps and gives your cupcakes a lighter texture.
Step 3: Mix the Wet Ingredients
- In another bowl, whisk together ½ cup vegetable oil, 2 large eggs, 1 tsp vanilla extract, and ¾ cup buttermilk.
- Slowly add ½ cup hot water while whisking continuously until smooth.
- Pro Tip: The hot water helps bloom the cocoa powder, enhancing the chocolate flavor.
Step 4: Combine Wet and Dry
- Gradually add the wet ingredients into the dry mixture. Stir gently with a spatula until just combined. Avoid overmixing to keep cupcakes soft and tender.
Step 5: Fill the Cupcake Liners
- Spoon the batter into each cupcake liner, filling about ⅔ full.
- Pro Tip: Use an ice cream scoop for even-sized cupcakes—it helps them bake uniformly.
Step 6: Bake the Cupcakes
- Bake in the preheated oven for 18–22 minutes, or until a toothpick inserted in the center comes out clean.
- Let cupcakes cool in the tin for 5 minutes, then transfer to a cooling rack.
Step 7: Prepare the Frosting
- In a large bowl, beat 1 cup softened butter with 3–4 cups powdered sugar, ¼ cup heavy cream, 2 tsp vanilla, and a pinch of salt until light and fluffy.
- Add red food coloring a few drops at a time until you reach a “bloody” tint for drizzling.
Step 8: Add the “Blood” Filling
- Using a small spoon or piping bag, create a small well in the center of each cooled cupcake.
- Fill each well with 1 tsp of raspberry or strawberry jam (add extra red food coloring if you want a deeper red).
Step 9: Frost the Cupcakes
- Generously frost each cupcake with your prepared buttercream. You can swirl or pipe it as you like.
- Drizzle some red frosting or leftover jam over the top for a “bloody” effect.
- Pro Tip: A gentle hand with the drizzle makes it look natural and spooky, like a horror movie scene.
Step 10: Decorate and Serve
- Add spooky decorations like candy eyeballs, mini fangs, or black sprinkles for extra creep factor.
- Let the frosting set slightly before serving to avoid smudging.
Tips and Tricks for Success
- Room temperature ingredients: Make sure your eggs and butter are at room temperature; it helps the batter mix smoothly.
- Don’t overmix: Once you combine wet and dry ingredients, stir just until incorporated. Overmixing can make cupcakes dense.
- Check your oven: Oven temperatures vary, so start checking your cupcakes a few minutes early to prevent overbaking.
- Cool completely: Fill cupcakes with “blood” and frost only when fully cooled to prevent melting or sinking.
- Layer the effect: For extra gory drama, add a little more jam on top after frosting—it creates a realistic blood-drip look.
- Use quality cocoa: A rich cocoa powder really makes the chocolate flavor pop against the sweet, fruity filling.
Ingredient Substitutions and Variations
- Cupcake base: You can swap cocoa powder for 1½ cups flour + ½ cup chocolate chips for a chocolate-chip version.
- Milk substitute: Use almond milk or oat milk instead of buttermilk for a dairy-free option. Add 1 tsp vinegar to mimic the tang.
- Frosting swap: Cream cheese frosting works beautifully for a tangy twist on the classic buttercream.
- “Blood” options: Raspberry or strawberry jam is traditional, but cherry preserves or pomegranate molasses create a darker, more intense effect.
- Decorations: Use crushed cookies, edible eyes, or candy spiders for varied spooky designs.
Serving Suggestions
- I love serving these Bloody Halloween Cupcakes on a black or orange platter with a few fake cobwebs around for a spooky centerpiece at parties.
- Pair them with a warm cup of hot chocolate or a pumpkin spice latte—the rich chocolate and fruity “blood” balance the drink’s sweetness perfectly.
- For a kid-friendly treat, serve them alongside a simple fruit plate; the contrast between the bright “blood” and fresh fruit is fun and colorful.
- Make a mini dessert table with assorted Halloween-themed cupcakes with frosting, candy, and mini chocolate pumpkins—it’s a hit for both kids and adults.
- I sometimes slice one cupcake in half and drizzle extra jam over it; it makes the “bloody” effect even more dramatic and fun for photos.
Storage and Reheating Instructions
- Store cupcakes in an airtight container at room temperature for up to 2 days.
- For longer storage, keep them in the fridge for up to 5 days; bring to room temperature before serving for best texture.
- Frosted cupcakes can be frozen for up to 2 months; wrap individually in plastic wrap and place in a freezer-safe container.
- Reheat slightly in the microwave (10–15 seconds) if desired, but avoid overdoing it—the jam can get too runny.
- Decorate after freezing if you want the “blood” effect to stay fresh and vibrant.
Frequently Asked Questions
Can I make these cupcakes ahead of time?
Absolutely! You can bake them a day in advance and frost them the next day. Just store them in an airtight container at room temperature.
Can I use a different filling instead of jam?
Yes! Chocolate ganache, caramel, or even cream cheese frosting works wonderfully as a “bloody” filling.
Are these cupcakes kid-friendly?
Totally! The “bloody” effect comes from jam or food coloring, so there’s no actual scary stuff—just a fun, spooky look.
Can I make them dairy-free?
Yes, swap the butter and milk for plant-based alternatives, like coconut oil and almond milk. The cupcakes will still be moist and delicious.
How do I get the “blood” effect to look realistic?
Use a little extra red food coloring in the jam or frosting and drizzle it gently over the frosting. A light hand makes it look more natural.
Can I decorate with candy or other Halloween props?
Definitely! Mini candy eyes, edible spiders, or black sprinkles make the cupcakes even spookier and more festive.
Did you try this recipe? Let me know in the comments how it turned out!
Bloody Halloween Cupcakes
Equipment
- Mixing Bowls
- Measuring Cups & Spoons
- Electric Mixer (or Hand Whisk)
- Muffin Tin
- Cupcake liners
- Spatula
- Small spoon or piping bag
- Cooling Rack
Ingredients
For the Cupcakes:
- 1½ cups all-purpose flour
- 1 cup granulated sugar
- ½ cup unsweetened cocoa powder
- 1 tsp baking powder
- ½ tsp baking soda
- ¼ tsp salt
- ½ cup vegetable oil
- 2 large eggs
- 1 tsp vanilla extract
- ¾ cup buttermilk
- ½ cup hot water
For the Frosting:
- 1 cup unsalted butter softened
- 3 –4 cups powdered sugar
- ¼ cup heavy cream
- 2 tsp vanilla extract
- Pinch of salt
- Red food coloring for that “bloody” effect
For the “Blood” Filling:
- ½ cup raspberry or strawberry jam
- 1 –2 tsp red food coloring optional, for extra drama
Instructions
Step 1: Preheat and Prep
- Preheat your oven to 350°F (175°C).
- Line a 12-cup muffin tin with cupcake liners. I like using black liners for that extra spooky vibe.
- Pro Tip: Set up all your ingredients and tools before you start mixing. It makes the process smoother and less stressful.
Step 2: Mix the Dry Ingredients
- In a large mixing bowl, sift together 1½ cups flour, ½ cup cocoa powder, 1 tsp baking powder, ½ tsp baking soda, and ¼ tsp salt.
- Add 1 cup sugar and gently whisk to combine.
- Pro Tip: Sifting helps avoid lumps and gives your cupcakes a lighter texture.
Step 3: Mix the Wet Ingredients
- In another bowl, whisk together ½ cup vegetable oil, 2 large eggs, 1 tsp vanilla extract, and ¾ cup buttermilk.
- Slowly add ½ cup hot water while whisking continuously until smooth.
- Pro Tip: The hot water helps bloom the cocoa powder, enhancing the chocolate flavor.
Step 4: Combine Wet and Dry
- Gradually add the wet ingredients into the dry mixture. Stir gently with a spatula until just combined. Avoid overmixing to keep cupcakes soft and tender.
Step 5: Fill the Cupcake Liners
- Spoon the batter into each cupcake liner, filling about ⅔ full.
- Pro Tip: Use an ice cream scoop for even-sized cupcakes—it helps them bake uniformly.
Step 6: Bake the Cupcakes
- Bake in the preheated oven for 18–22 minutes, or until a toothpick inserted in the center comes out clean.
- Let cupcakes cool in the tin for 5 minutes, then transfer to a cooling rack.
Step 7: Prepare the Frosting
- In a large bowl, beat 1 cup softened butter with 3–4 cups powdered sugar, ¼ cup heavy cream, 2 tsp vanilla, and a pinch of salt until light and fluffy.
- Add red food coloring a few drops at a time until you reach a “bloody” tint for drizzling.
Step 8: Add the “Blood” Filling
- Using a small spoon or piping bag, create a small well in the center of each cooled cupcake.
- Fill each well with 1 tsp of raspberry or strawberry jam (add extra red food coloring if you want a deeper red).
Step 9: Frost the Cupcakes
- Generously frost each cupcake with your prepared buttercream. You can swirl or pipe it as you like.
- Drizzle some red frosting or leftover jam over the top for a “bloody” effect.
- Pro Tip: A gentle hand with the drizzle makes it look natural and spooky, like a horror movie scene.
Step 10: Decorate and Serve
- Add spooky decorations like candy eyeballs, mini fangs, or black sprinkles for extra creep factor.
- Let the frosting set slightly before serving to avoid smudging.
Notes
Nutritional Value (per cupcake, approximate)
- Calories: 280–320 kcal
- Carbohydrates: 38g
- Sugar: 26g
- Fat: 14g
- Saturated Fat: 6g
- Protein: 3g
- Fiber: 1g
- Sodium: 180mg