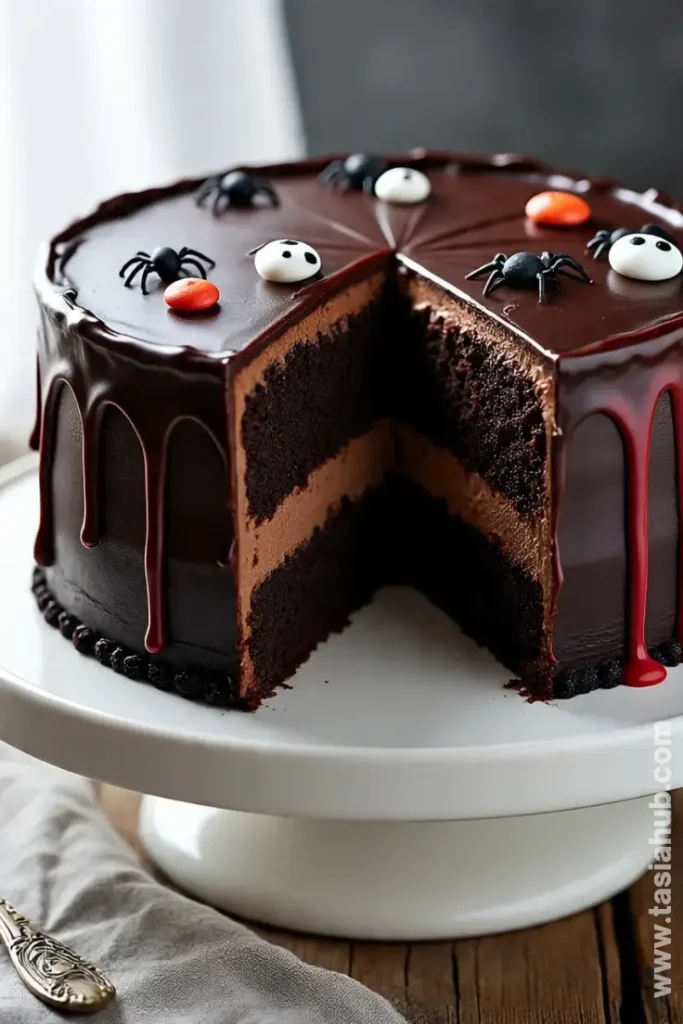
Black Velvet Halloween Cake
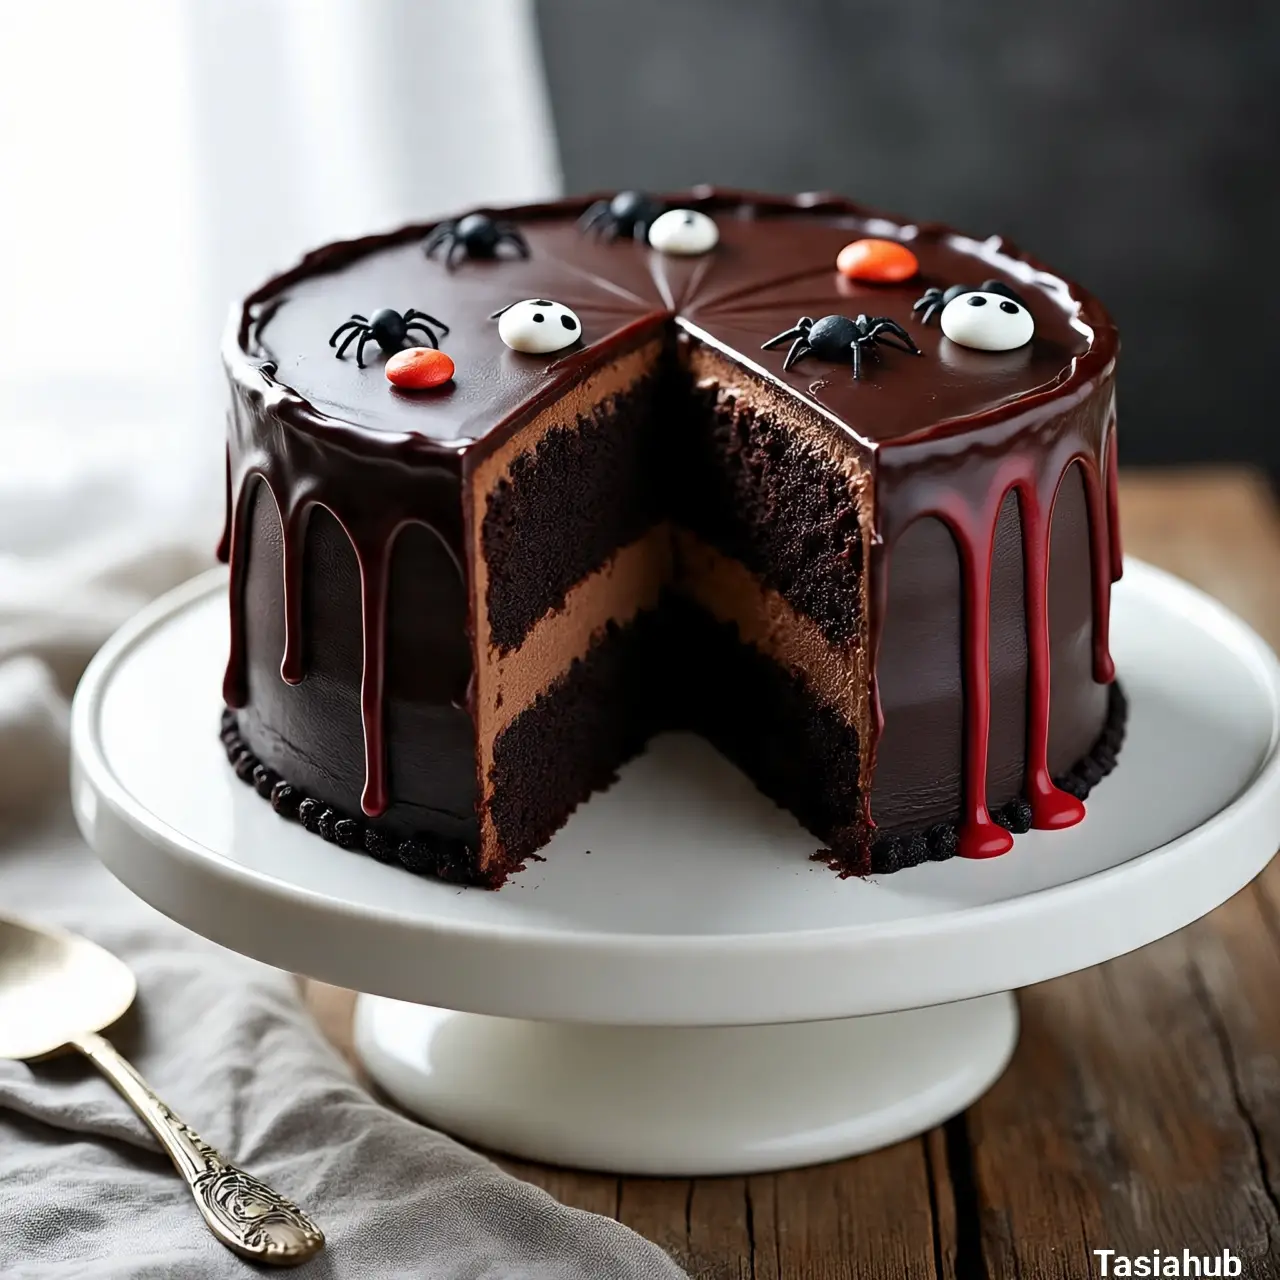
Halloween is the perfect excuse to get a little playful with your baking, and this Black Velvet Halloween Cake is my absolute favorite way to celebrate the season. Imagine a cake so dark, so rich, and velvety smooth, it almost feels like biting into a little piece of Halloween magic. It’s not just any cake—this is one of those spooky Halloween cakes that instantly becomes the centerpiece of your dessert table, drawing oohs and aahs from every guest.
What I love most about this cake is how it balances elegance and fun. The deep black color makes it perfect for Halloween, but it’s also versatile enough to be a spooky birthday cake for someone who loves a little drama. The texture is incredible—soft, moist, and indulgent, with that unmistakable richness you expect from a chocolate cake. And yes, the chocolate flavor is intense, giving every bite that satisfying, melt-in-your-mouth sensation.
This Black Velvet Halloween Cake is also a treat for creative minds. You can go minimal with a sleek black frosting and a simple sprinkle of edible glitter, or go all out with Halloween-themed decorations. Think candy spiders, edible eyes, or drips of red “blood” for a dramatic effect. It’s the kind of spooky cake idea that invites you to have fun, get a little messy, and really let your imagination run wild.
Beyond the looks, it’s incredibly easy to make. I promise, you don’t need to be a professional baker to pull off this cake. With straightforward steps and readily available ingredients, you can whip up a dessert that’s guaranteed to impress, whether you’re hosting a Halloween party, celebrating a spooky birthday, or just treating yourself to something indulgent. It’s one of those Halloween desserts that feels fancy but is totally doable, making it my go-to choice for the season.
Why You’ll Love It
- Ultra-Rich Chocolate Flavor – This isn’t your everyday chocolate cake. Every bite of this Black Velvet Halloween Cake is decadently chocolatey, with a deep, velvety richness that melts in your mouth. Perfect for anyone who takes their chocolate seriously.
- Perfectly Spooky for Halloween – Whether you’re hosting a haunted house party or just want a little festive flair, the jet-black layers make this one of the most eye-catching spooky Halloween cakes on the table. It’s spooky without being over-the-top, a true showstopper.
- Versatile for Any Occasion – While it’s amazing as a Halloween dessert, it also doubles beautifully as a spooky birthday cake or for themed celebrations. Add a few creative decorations, and suddenly it’s a fun, dramatic centerpiece for any party.
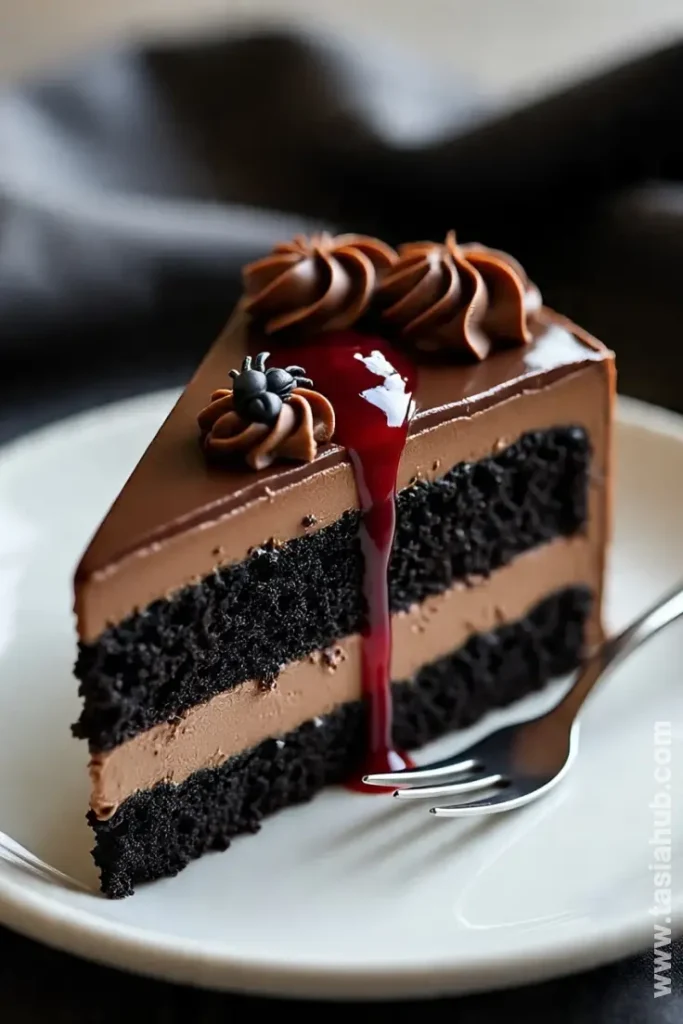
- Soft, Moist, and Velvety – The texture is what keeps people coming back for more. Each slice is soft, tender, and wonderfully moist, giving you that melt-in-your-mouth experience that makes rich chocolate cake so irresistible.
- Fun to Decorate – This cake is basically a canvas for your Halloween creativity. From edible spiders and eyes to drizzles of red syrup, you can turn it into a unique spooky cake idea that’s as playful as it is delicious.
Ingredient List
For the Cake:
- 2 cups all-purpose flour
- 2 cups granulated sugar
- ¾ cup unsweetened cocoa powder
- 2 tsp baking soda
- 1 tsp baking powder
- 1 tsp salt
- 1 cup buttermilk, room temperature
- 1 cup vegetable oil
- 2 large eggs, room temperature
- 1 tsp pure vanilla extract
- 1 cup hot brewed coffee (or strong black coffee)
- 2 tsp black gel food coloring
For the Frosting:
- 1 cup unsalted butter, softened
- 4 cups powdered sugar
- ¾ cup unsweetened cocoa powder
- ¼ cup heavy cream (more if needed)
- 1 tsp vanilla extract
- Pinch of salt
Ingredient Notes
- Cocoa powder: I always use Dutch-processed cocoa—it gives the cake that rich, deep chocolate color and flavor.
- Black gel food coloring: Don’t skip this! It’s what makes the cake that dramatic black velvet look that’s perfect for spooky Halloween cakes.
- Coffee: Adds depth to the chocolate flavor without making the cake taste like coffee. Totally optional, but trust me—it elevates the rich chocolate cake to the next level.
- Buttermilk: Makes the cake extra moist and tender. If you don’t have buttermilk, you can mix 1 cup milk with 1 tbsp vinegar and let it sit for 5 minutes.
- Butter for frosting: Unsalted butter is key here—it balances the sweetness perfectly. I always use [brand] because it whips beautifully and keeps the frosting smooth.
Kitchen Equipment Needed
- Mixing bowls (large and medium): For combining dry and wet ingredients separately. I love using glass bowls because you can see everything clearly.
- Electric mixer or stand mixer: Makes frosting and batter super smooth and easy to whip. Hand mixing works too, but it takes longer!
- Measuring cups and spoons: Essential for accuracy—especially with baking, every teaspoon counts.
- 8- or 9-inch round cake pans: For baking the layers evenly. I like non-stick pans for easy release.
- Parchment paper: Keeps the cake from sticking and makes cleanup a breeze.
- Cooling racks: Lets the cake cool completely without getting soggy on the bottom.
- Offset spatula or butter knife: Perfect for spreading frosting smoothly. I always reach for my offset spatula—it makes decorating so much easier.
- Sifter: For cocoa powder and powdered sugar, so the frosting and batter stay lump-free.
Instructions
Step 1: Preheat and Prepare Pans
- Preheat your oven to 350°F (175°C).
- Grease two 8- or 9-inch round cake pans with butter or non-stick spray.
- Line the bottoms with parchment paper and lightly grease again. This ensures your layers come out cleanly.
Pro Tip: I like to dust the pans lightly with cocoa powder instead of flour—keeps the black color true and prevents sticking.
Step 2: Mix Dry Ingredients
- In a large bowl, sift together the flour, cocoa powder, baking soda, baking powder, and salt.
- Stir in the sugar until well combined.
Pro Tip: Sifting cocoa and flour prevents lumps and gives a smoother, more velvety cake texture.
Step 3: Combine Wet Ingredients
- In a separate bowl, whisk together the buttermilk, vegetable oil, eggs, and vanilla extract until smooth.
- Slowly stir in the black gel food coloring until fully incorporated.
Pro Tip: Using gel coloring instead of liquid ensures the batter stays thick and the color stays rich and dark.
Step 4: Mix Wet and Dry Ingredients
- Gradually add the wet ingredients into the dry mixture, stirring gently until just combined. Avoid overmixing—it can make the cake dense.
- Slowly pour in the hot coffee while stirring. The batter will be thin, but that’s normal—it helps create a moist, rich chocolate cake.
Step 5: Bake the Cake
- Divide the batter evenly between the prepared pans.
- Bake for 30–35 minutes, or until a toothpick inserted into the center comes out clean.
- Let the cakes cool in the pans for 10 minutes, then transfer to a cooling rack to cool completely.
Pro Tip: Don’t rush this step! Letting the cake cool fully prevents the frosting from melting when applied.
Step 6: Make the Frosting
- Beat the softened butter in a large bowl until creamy and smooth.
- Gradually add the sifted powdered sugar and cocoa powder, mixing on low to avoid a sugar cloud.
- Add heavy cream, vanilla, and a pinch of salt. Beat on medium-high for 3–4 minutes until fluffy and spreadable.
Pro Tip: If the frosting is too thick, add a teaspoon of cream at a time. Too thin? Add a bit more powdered sugar.
Step 7: Assemble the Cake
- Place one cooled cake layer on your serving plate. Spread a generous layer of frosting on top.
- Place the second layer on top, pressing gently to secure.
- Frost the top and sides evenly using an offset spatula. Smooth or create swirls—your choice!
Step 8: Decorate
- Add Halloween touches like candy spiders, edible eyes, or drizzles of red syrup for a spooky effect.
- Chill for 20–30 minutes if you want the frosting to set slightly before slicing.
Pro Tip: Use a piping bag for neat edges or fun designs—tiny touches make this spooky cake idea really stand out.
Tips and Tricks for Success
- Measure carefully: Baking is precise—use proper measuring cups and spoons for best results.
- Room temperature ingredients: Eggs and buttermilk at room temperature mix more evenly, giving a smoother batter.
- Don’t overmix: Overworking the batter can make the cake dense instead of soft and velvety.
- Check with a toothpick: Oven temperatures vary, so start checking at 30 minutes to avoid overbaking.
- Cool completely before frosting: Frosting a warm cake can cause it to melt and slide off.
- Use gel coloring for deep black: Liquid coloring can dilute the batter and affect texture.
- Decorate creatively: Have fun with Halloween-themed toppings—this cake is your canvas!
Ingredient Substitutions and Variations
- Buttermilk: Swap with 1 cup milk + 1 tbsp vinegar or lemon juice, let sit for 5 minutes.
- Coffee: Use hot water if you prefer no coffee flavor; it still enhances chocolate richness.
- Black food coloring: Cocoa powder alone makes a dark chocolate cake if you skip the color, though it won’t be jet black.
- Frosting: Substitute with cream cheese frosting for a tangy twist on rich chocolate cake.
- Gluten-free option: Use a 1:1 gluten-free flour blend; texture will be slightly different but still moist.
- Add-ins: Toss in chocolate chips, candy eyes, or crushed cookies for extra Halloween flair.
Serving Suggestions
- I love serving a slice of this Black Velvet Halloween Cake with a dollop of whipped cream and a few fresh raspberries—it balances the richness perfectly!
- Pair it with a cold glass of milk or a rich hot chocolate for an indulgent Halloween dessert experience.
- Top individual slices with a drizzle of caramel or chocolate sauce and a few candy eyes for a fun, spooky touch.
- Serve alongside other Halloween food treats like mini pumpkin tarts or ghost-shaped meringues to create a full dessert table.
- For a spooky birthday cake twist, add sparklers or themed candles—the dramatic black layers make the candles pop beautifully.
Storage and Reheating Instructions
- Room Temperature: Store covered at room temperature for up to 2 days. Keeps the cake moist and soft.
- Refrigeration: Frosted cake can be refrigerated for up to 5 days. Bring to room temperature before serving for best flavor.
- Freezing: Wrap individual layers tightly in plastic wrap and aluminum foil; freeze for up to 3 months. Thaw in the fridge overnight.
- Reheating: If desired, warm slices in the microwave for 10–15 seconds to bring out that rich chocolate flavor.
- Frosting: Store extra frosting in an airtight container in the fridge for up to 1 week; beat briefly before using again.
Frequently Asked Questions
Can I make this cake without coffee?
Absolutely! You can use hot water instead—the coffee just enhances the chocolate flavor, but it’s not essential.
Can I use a different type of frosting?
Yes! Cream cheese frosting works beautifully for a tangy twist, or you can try a simple chocolate ganache for extra richness.
How do I make the cake extra moist?
Using room temperature ingredients, adding the hot coffee, and not overmixing the batter all help keep the cake soft and moist.
Can I make this cake ahead of time?
Definitely! You can bake the layers a day or two ahead, wrap them tightly, and frost just before serving.
How do I get the cake so black?
Gel food coloring is key for the deep black look. Cocoa alone will make it dark chocolate but not jet black.
Can I decorate it for a birthday instead of Halloween?
For sure! This black velvet cake is perfect as a spooky birthday cake—add candles, sprinkles, or fun themed decorations to suit the occasion.
Did you try this recipe? Let me know in the comments how it turned out—I’d love to hear your spooky Halloween cake creations!

Black Velvet Halloween Cake
Equipment
- Mixing bowls (large and medium)
- Electric mixer or stand mixer
- Measuring cups and spoons
- 8- or 9-inch round cake pans
- Parchment paper
- Cooling racks
- Offset spatula or butter knife
- Sifter
Ingredients
For the Cake:
- 2 cups all-purpose flour
- 2 cups granulated sugar
- ¾ cup unsweetened cocoa powder
- 2 tsp baking soda
- 1 tsp baking powder
- 1 tsp salt
- 1 cup buttermilk room temperature
- 1 cup vegetable oil
- 2 large eggs room temperature
- 1 tsp pure vanilla extract
- 1 cup hot brewed coffee or strong black coffee
- 2 tsp black gel food coloring
For the Frosting:
- 1 cup unsalted butter softened
- 4 cups powdered sugar
- ¾ cup unsweetened cocoa powder
- ¼ cup heavy cream more if needed
- 1 tsp vanilla extract
- Pinch of salt
Instructions
Step 1: Preheat and Prepare Pans
- Preheat your oven to 350°F (175°C).
- Grease two 8- or 9-inch round cake pans with butter or non-stick spray.
- Line the bottoms with parchment paper and lightly grease again. This ensures your layers come out cleanly.
- Pro Tip: I like to dust the pans lightly with cocoa powder instead of flour—keeps the black color true and prevents sticking.
Step 2: Mix Dry Ingredients
- In a large bowl, sift together the flour, cocoa powder, baking soda, baking powder, and salt.
- Stir in the sugar until well combined.
- Pro Tip: Sifting cocoa and flour prevents lumps and gives a smoother, more velvety cake texture.
Step 3: Combine Wet Ingredients
- In a separate bowl, whisk together the buttermilk, vegetable oil, eggs, and vanilla extract until smooth.
- Slowly stir in the black gel food coloring until fully incorporated.
- Pro Tip: Using gel coloring instead of liquid ensures the batter stays thick and the color stays rich and dark.
Step 4: Mix Wet and Dry Ingredients
- Gradually add the wet ingredients into the dry mixture, stirring gently until just combined. Avoid overmixing—it can make the cake dense.
- Slowly pour in the hot coffee while stirring. The batter will be thin, but that’s normal—it helps create a moist, rich chocolate cake.
Step 5: Bake the Cake
- Divide the batter evenly between the prepared pans.
- Bake for 30–35 minutes, or until a toothpick inserted into the center comes out clean.
- Let the cakes cool in the pans for 10 minutes, then transfer to a cooling rack to cool completely.
- Pro Tip: Don’t rush this step! Letting the cake cool fully prevents the frosting from melting when applied.
Step 6: Make the Frosting
- Beat the softened butter in a large bowl until creamy and smooth.
- Gradually add the sifted powdered sugar and cocoa powder, mixing on low to avoid a sugar cloud.
- Add heavy cream, vanilla, and a pinch of salt. Beat on medium-high for 3–4 minutes until fluffy and spreadable.
- Pro Tip: If the frosting is too thick, add a teaspoon of cream at a time. Too thin? Add a bit more powdered sugar.
Step 7: Assemble the Cake
- Place one cooled cake layer on your serving plate. Spread a generous layer of frosting on top.
- Place the second layer on top, pressing gently to secure.
- Frost the top and sides evenly using an offset spatula. Smooth or create swirls—your choice!
Step 8: Decorate
- Add Halloween touches like candy spiders, edible eyes, or drizzles of red syrup for a spooky effect.
- Chill for 20–30 minutes if you want the frosting to set slightly before slicing.
- Pro Tip: Use a piping bag for neat edges or fun designs—tiny touches make this spooky cake idea really stand out.
Notes
Nutritional Value (per serving)
- Calories: ~480
- Total Fat: 24g
- Cholesterol: 55mg
- Sodium: 320mg
- Total Carbohydrates: 64g
- Dietary Fiber: 4g
- Sugars: 42g
- Protein: 5g