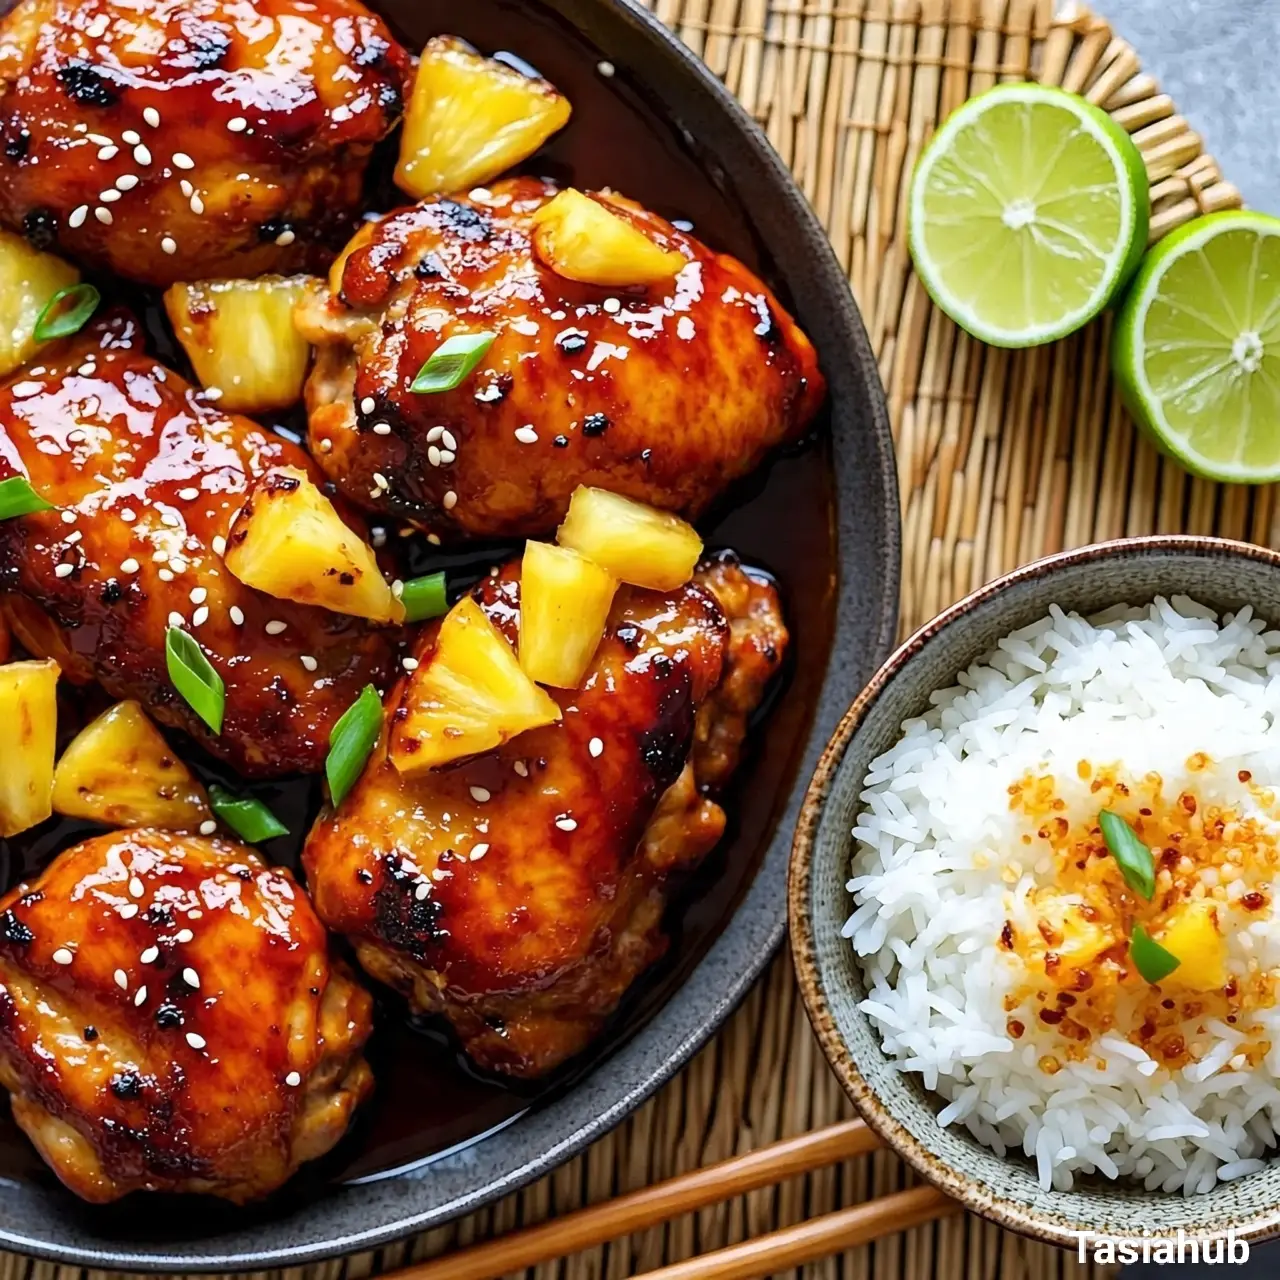
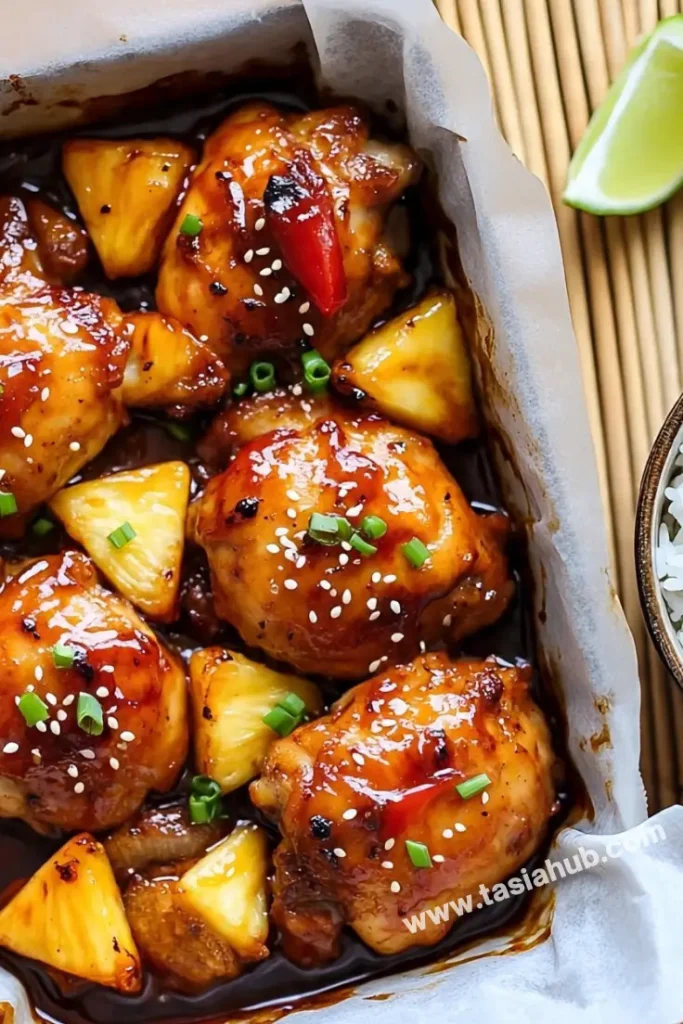
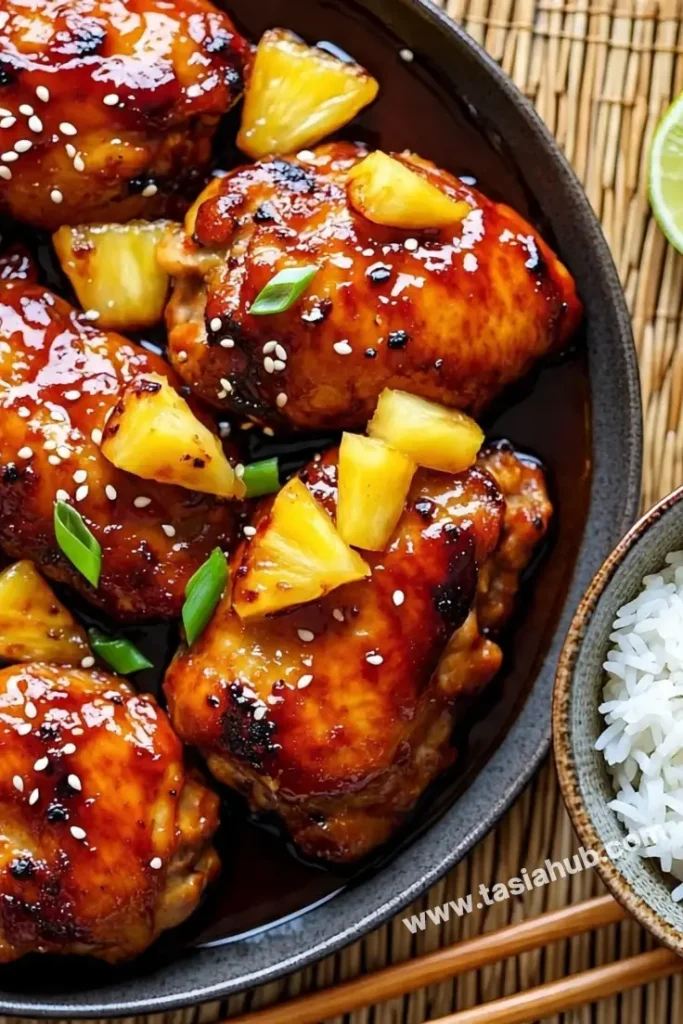
Baked Huli Huli Chicken
If you’ve never tried Huli Huli chicken before, get ready to fall in love with your new go-to chicken recipe. Originally a Hawaiian barbecue classic, this dish is all about that irresistible balance of sweet, savory, and smoky flavors — and the best part? You don’t need a grill to make it. This baked version brings all that tropical magic straight to your kitchen, no charcoal required.
The name “Huli Huli” literally means “turn turn” in Hawaiian, because the traditional version is cooked on a rotisserie, constantly turning over a fire. But don’t worry — we’re skipping the spit and firing up the oven instead. What you’ll get is juicy, tender chicken bathed in a sticky glaze made from soy sauce, pineapple juice, brown sugar, garlic, and ginger. It’s the kind of dish that fills your home with a mouthwatering aroma while it bakes — and leaves everyone at the table asking for seconds.
What makes this recipe really shine is the marinade. It’s not just about flavor; it’s also about how that marinade works its way into every bite of the chicken, giving you a perfectly seasoned dish that’s bold without being overpowering. Letting it marinate overnight (or at least for a few hours) makes all the difference — it’s like a little tropical vacation for your tastebuds.
Whether you’re cooking for your family, meal prepping for the week, or just craving something different from your usual chicken dinner rotation, this baked Huli Huli chicken hits all the right notes. It’s easy, it’s vibrant, and it brings a bit of island flavor into your everyday routine — no passport needed.
Why You’ll Love It
- Big tropical flavor with minimal effort – The marinade does all the heavy lifting. Just mix, pour, and let the chicken soak up all that sweet, savory goodness before baking to perfection.
- Oven-friendly and no grill required – You get that same delicious Huli Huli flavor without needing to fire up a barbecue or step outside. Perfect for weeknights or when the weather isn’t on your side.
- Great for meal prep or leftovers – This chicken stores well and tastes even better the next day. Toss it into salads, rice bowls, or wraps for quick, flavorful meals throughout the week.
- Family-friendly and crowd-pleasing – It’s sweet enough for kids to enjoy, yet bold and savory enough to impress dinner guests. Everyone will be asking for the recipe.
- Easily customizable – Use thighs, drumsticks, or breasts. Want it spicier? Add chili flakes. Prefer it extra saucy? Double the glaze. It’s super adaptable to your taste.
Ingredient List
For the Marinade & Sauce:
- ½ cup soy sauce
- ½ cup pineapple juice (unsweetened)
- ¼ cup ketchup
- ¼ cup brown sugar
- 2 tablespoons rice vinegar
- 1 tablespoon sesame oil
- 1 tablespoon grated fresh ginger
- 3 cloves garlic, minced
- 1 tablespoon cornstarch (for thickening, optional)
- 2 tablespoons water (to mix with cornstarch, optional)
- Fresh pineapple slices (optional, for garnish)
For the Chicken:
- 2 to 2.5 lbs boneless, skinless chicken thighs (about 6–8 pieces)
- Green onions and sesame seeds, for garnish (optional)
Ingredient Notes
- Pineapple juice – Go for 100% unsweetened juice. It adds that signature tropical tang without making the sauce overly sweet.
- Soy sauce – I prefer low-sodium soy sauce so the marinade doesn’t turn out too salty.
- Brown sugar – Light or dark both work, but dark brown sugar gives a deeper molasses flavor.
- Fresh ginger and garlic – Fresh is best here. It really brings the marinade to life.
- Chicken thighs – They stay juicier and more flavorful than breasts, especially when baked.
- Cornstarch + water – This step is optional, but thickening the reserved marinade into a glaze makes it extra irresistible when brushed over the chicken after baking.
Kitchen Equipment Needed
- Mixing bowl – For whisking together the marinade. I like using a glass one so I can cover and refrigerate directly.
- Measuring cups and spoons – To get those marinade ratios just right.
- Whisk or fork – To blend the marinade until smooth and well combined.
- Baking dish or rimmed sheet pan – For baking the chicken without spills. A ceramic baking dish keeps the chicken juicy.
- Tongs – Handy for flipping and transferring chicken without making a mess.
- Small saucepan (optional) – If you want to reduce the marinade into a sticky glaze for serving.
- Pastry brush (optional) – For brushing extra glaze over the chicken before serving. Makes it look and taste amazing.
Instructions
Step 1: Make the Marinade
Mix up the flavor base.
- In a medium mixing bowl, whisk together the soy sauce, pineapple juice, ketchup, brown sugar, rice vinegar, sesame oil, grated ginger, and minced garlic.
- Whisk until everything is fully combined and the sugar is mostly dissolved.
Pro Tip:
Use a microplane grater for the ginger — it blends into the marinade better and gives a stronger flavor.
Step 2: Marinate the Chicken
Let the flavors soak in.
- Place your chicken thighs in a large zip-top bag or shallow glass dish.
- Pour the marinade over the chicken, making sure all pieces are well coated.
- Seal the bag (or cover the dish) and refrigerate for at least 4 hours — overnight is best for maximum flavor.
Pro Tip:
Flip the chicken halfway through marinating (if possible) to make sure both sides soak up the marinade evenly.
Step 3: Prep for Baking
Get everything ready.
- Preheat your oven to 400°F (200°C).
- Lightly grease a baking dish or line a rimmed sheet pan with parchment paper or foil for easier cleanup.
- Remove chicken from the marinade, letting the excess drip off, and arrange the pieces in a single layer in your prepared dish.
Pro Tip:
Don’t discard the leftover marinade — we’ll be using it to make a glaze.
Step 4: Bake the Chicken
Bake to juicy perfection.
- Place the chicken in the preheated oven and bake for 30–35 minutes, or until cooked through and the internal temp reaches 165°F (74°C).
- Halfway through baking (around the 15-minute mark), baste the chicken with some of the leftover marinade (not reused on raw chicken!) or its own juices from the pan.
Step 5: Make the Glaze (Optional but Recommended)
Turn that marinade into magic.
- While the chicken bakes, pour the leftover marinade into a small saucepan (only use the marinade that didn’t touch raw chicken).
- Bring it to a simmer over medium heat.
- In a small bowl, stir together the cornstarch and water to make a slurry.
- Slowly whisk the slurry into the simmering marinade.
- Continue cooking and whisking until the sauce thickens into a glossy glaze (about 3–5 minutes).
Pro Tip:
Whisk continuously while adding the cornstarch slurry to prevent lumps and keep the sauce smooth.
Step 6: Finish and Serve
Bring it all together.
- Once the chicken is done, brush it generously with the glaze.
- Let it rest for 5 minutes before serving to keep the juices locked in.
- Garnish with fresh pineapple slices, chopped green onions and a sprinkle of sesame seeds if desired.
- Serve with rice, grilled veggies, or a tropical slaw — or all three!
Tips and Tricks for Success
- Marinate overnight for best flavor – While 4 hours will do, overnight marinating makes the chicken incredibly juicy and flavorful.
- Use thighs for extra juiciness – Chicken thighs are more forgiving than breasts and stay moist during baking.
- Don’t overcrowd the pan – Give each piece space so it bakes evenly and gets a little caramelized around the edges.
- Line your pan for easier cleanup – The sugars in the marinade can caramelize and stick, so foil or parchment helps a ton.
- Double the sauce if you like it extra glazed – Make a second batch of the marinade (just for cooking) to brush on during baking and drizzle on at the end.
Ingredient Substitutions and Variations
- Chicken breasts – Swap for thighs if you prefer leaner meat, but keep an eye on baking time so they don’t dry out.
- Apple juice instead of pineapple – It’ll be slightly less tangy but still gives a sweet balance to the sauce.
- Honey or maple syrup for brown sugar – These natural sweeteners add a nice depth of flavor if you’re out of brown sugar.
- Add chili flakes or sriracha – For a spicy kick if you like some heat with your sweet.
- Grill instead of bake – Take it to the grill during summer for a more traditional, smoky version of Huli Huli chicken.
- Use bone-in chicken pieces – Drumsticks or bone-in thighs work well too; just adjust the cooking time to ensure they’re cooked through.
Serving Suggestions
- Over steamed white or jasmine rice – The slightly sticky rice soaks up all that delicious glaze—this is my go-to combo.
- With grilled pineapple slices – The caramelized sweetness pairs perfectly with the savory chicken and adds a tropical vibe.
- Alongside roasted or stir-fried veggies – Think broccoli, bell peppers, snap peas, or zucchini for color and crunch.
- In lettuce wraps – Shred the chicken and wrap in crisp romaine or butter lettuce with a drizzle of the glaze—so fresh and light!
- I love serving this chicken with coconut rice and a tangy cucumber salad – It’s the perfect mix of sweet, savory, and refreshing in one plate.
Storage and Reheating Instructions
- Store leftovers in an airtight container – Keep in the fridge for up to 4 days.
- Freeze for longer storage – Place in freezer-safe bags or containers (with or without glaze) and freeze for up to 2 months.
- Reheat in the oven at 350°F (175°C) – Cover with foil and heat for about 10–15 minutes, until warmed through.
- Microwave for quick reheating – Heat in 30-second intervals, covered, to prevent drying out. Add a splash of water or glaze if needed.
- Reheat glaze separately if frozen – Simmer on the stove to bring it back to life, then spoon over reheated chicken for a fresh finish.
Frequently Asked Questions
Can I make this ahead of time?
Absolutely! You can marinate the chicken up to 24 hours in advance, and even bake it the day before. Just reheat gently and brush on fresh glaze before serving for that just-cooked look and flavor.
What’s the best cut of chicken to use?
Boneless, skinless thighs are the best for juicy results, but drumsticks and bone-in thighs also work great—just adjust the baking time slightly. Chicken breasts are fine too, but take care not to overbake them.
Can I grill this instead of baking?
Yes! Huli Huli chicken was originally grilled, so go for it if you have a grill. Cook over medium heat, turning occasionally and basting with glaze until it’s nicely charred and cooked through.
Is the glaze safe if it came from the marinade?
Only if it hasn’t touched raw chicken! Set aside a portion of the marinade before pouring the rest over the chicken. If you forget, just boil the used marinade for a few minutes to kill any bacteria before using it as a glaze.
Can I make it spicier?
Definitely. Add chili flakes, sriracha, or even a splash of hot sauce to the marinade to bring some heat. Taste and adjust to your spice level.
What sides go best with Huli Huli chicken?
Rice, grilled or roasted veggies, pineapple salsa, coconut slaw, or even sweet corn on the cob all work beautifully. Think tropical and fresh!
Did you try this recipe? Let me know in the comments how it turned out!
Don’t forget to share your photos on Instagram and tag me @tasiahub_ or use the hashtag #tasiahub. I’d love to see your creations!

Baked Huli Huli Chicken
Equipment
- Mixing Bowl
- Measuring cups and spoons
- Whisk or fork
- Baking dish or rimmed sheet pan
- Tongs
- Small Saucepan (Optional)
- Pastry brush (optional)
Ingredients
For the Marinade & Sauce:
- ½ cup soy sauce
- ½ cup pineapple juice unsweetened
- ¼ cup ketchup
- ¼ cup brown sugar
- 2 tablespoons rice vinegar
- 1 tablespoon sesame oil
- 1 tablespoon grated fresh ginger
- 3 cloves garlic minced
- 1 tablespoon cornstarch for thickening, optional
- 2 tablespoons water to mix with cornstarch, optional
- Fresh pineapple slices (optional, for garnish)
For the Chicken:
- 2 to 2.5 lbs boneless skinless chicken thighs (about 6–8 pieces)
- Green onions and sesame seeds for garnish (optional)
Instructions
Step 1: Make the Marinade
- Mix up the flavor base.
- In a medium mixing bowl, whisk together the soy sauce, pineapple juice, ketchup, brown sugar, rice vinegar, sesame oil, grated ginger, and minced garlic.
- Whisk until everything is fully combined and the sugar is mostly dissolved.
- Pro Tip:
- Use a microplane grater for the ginger — it blends into the marinade better and gives a stronger flavor.
Step 2: Marinate the Chicken
- Let the flavors soak in.
- Place your chicken thighs in a large zip-top bag or shallow glass dish.
- Pour the marinade over the chicken, making sure all pieces are well coated.
- Seal the bag (or cover the dish) and refrigerate for at least 4 hours — overnight is best for maximum flavor.
- Pro Tip:
- Flip the chicken halfway through marinating (if possible) to make sure both sides soak up the marinade evenly.
Step 3: Prep for Baking
- Get everything ready.
- Preheat your oven to 400°F (200°C).
- Lightly grease a baking dish or line a rimmed sheet pan with parchment paper or foil for easier cleanup.
- Remove chicken from the marinade, letting the excess drip off, and arrange the pieces in a single layer in your prepared dish.
- Pro Tip:
- Don’t discard the leftover marinade — we’ll be using it to make a glaze.
Step 4: Bake the Chicken
- Bake to juicy perfection.
- Place the chicken in the preheated oven and bake for 30–35 minutes, or until cooked through and the internal temp reaches 165°F (74°C).
- Halfway through baking (around the 15-minute mark), baste the chicken with some of the leftover marinade (not reused on raw chicken!) or its own juices from the pan.
Step 5: Make the Glaze (Optional but Recommended)
- Turn that marinade into magic.
- While the chicken bakes, pour the leftover marinade into a small saucepan (only use the marinade that didn’t touch raw chicken).
- Bring it to a simmer over medium heat.
- In a small bowl, stir together the cornstarch and water to make a slurry.
- Slowly whisk the slurry into the simmering marinade.
- Continue cooking and whisking until the sauce thickens into a glossy glaze (about 3–5 minutes).
- Pro Tip:
- Whisk continuously while adding the cornstarch slurry to prevent lumps and keep the sauce smooth.
Step 6: Finish and Serve
- Bring it all together.
- Once the chicken is done, brush it generously with the glaze.
- Let it rest for 5 minutes before serving to keep the juices locked in.
- Garnish with fresh pineapple slices, chopped green onions and a sprinkle of sesame seeds if desired.
- Serve with rice, grilled veggies, or a tropical slaw — or all three!
Notes
Nutritional Value Per serving:
- Calories: ~280–320
- Protein: ~28g
- Carbohydrates: ~15g
- Sugar: ~10g
- Fat: ~12g
- Sodium: ~700–900mg