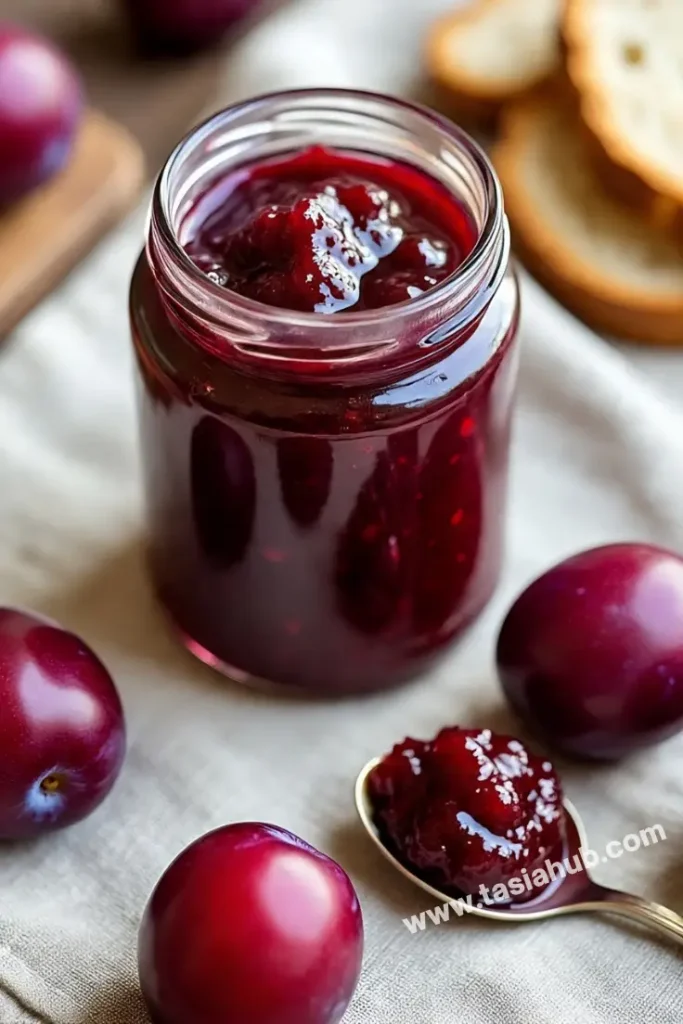
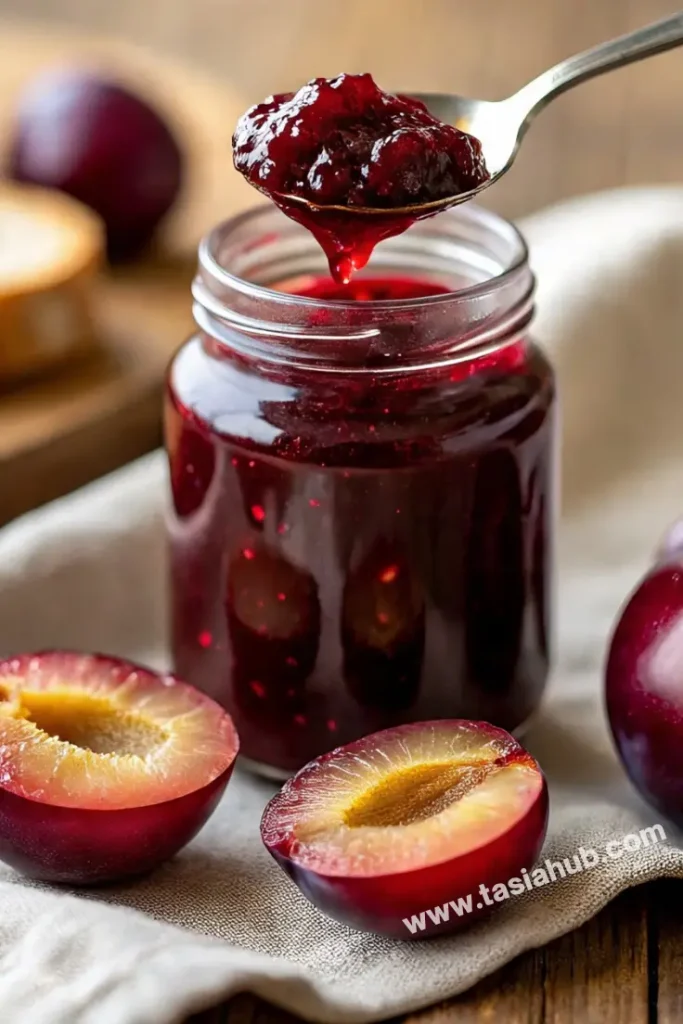
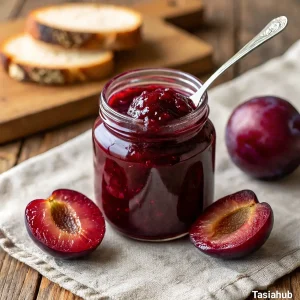
Plum Jam Recipe

Plum season always brings a burst of color and flavor to the kitchen, and one of the most rewarding ways to enjoy this juicy fruit is by turning it into a homemade jam. Whether you’ve got a tree full of ripe plums in your backyard or you grabbed a few baskets from the farmer’s market, this recipe is a simple, satisfying way to preserve their sweet-tart flavor.
Making plum jam at home isn’t just about the delicious outcome—it’s about the experience. There’s something cozy about watching a pot of bubbling fruit transform into a thick, glossy jam. It fills your kitchen with the warm scent of plums and sugar, and honestly, the satisfaction you get when spreading your own jam on toast the next morning? It hits different.
One thing I love about plum jam is how naturally flavorful it is—you don’t need to add much to make it shine. Plums have a perfect balance of sweetness and acidity, and when they break down with just a bit of sugar and lemon juice, the result is something magical. Depending on the variety you use—red, black, or yellow plums—you’ll get slightly different colors and nuances in taste, but they all work beautifully.
And don’t worry if you’ve never made jam before. This recipe doesn’t require any fancy equipment or special techniques. If you can chop fruit and stir a pot, you’re already halfway there. Let’s walk through how to make it step by step—you’re going to love how easy and delicious this is.
Why You’ll Love It
- Naturally delicious with minimal ingredients – Plums have such a bold, rich flavor on their own that you don’t need anything fancy. Just sugar and a splash of lemon juice bring out their best.
- Perfect balance of sweet and tart – This jam hits that sweet spot (literally) with just the right amount of tanginess, making it great for everything from toast to cheese boards.
- No pectin needed – Plums are naturally high in pectin, so you don’t need to add any commercial thickeners. The jam thickens beautifully on its own.
- Great way to use up ripe plums – Got too many plums ripening at once? This recipe is a perfect solution to prevent waste and preserve the fruit at its peak.
- Freezer- or shelf-friendly – Whether you want to can it properly for pantry storage or keep it in the freezer for short-term use, this recipe is flexible to fit your needs.
Ingredient List
- 2 lbs (900g) ripe plums, pitted and chopped
- 1 ½ cups (300g) granulated sugar
- 2 tbsp fresh lemon juice
- ½ tsp lemon zest (optional)
Ingredient Notes
- Plums – Any variety works (red, black, yellow), but make sure they’re ripe and juicy. I like using a mix for a more complex flavor and a richer color.
- Granulated sugar – Regular white sugar is best here. It balances the tartness and helps preserve the jam.
- Lemon juice – Don’t skip this! It brightens the flavor and helps the jam set naturally thanks to the added acidity.
- Lemon zest – Totally optional, but adds a subtle citrusy kick that complements the plums beautifully.
Kitchen Equipment Needed
- Large heavy-bottomed pot – For cooking the jam evenly without burning. I love using my enameled Dutch oven for this—it holds heat well.
- Wooden spoon or silicone spatula – To stir the jam as it cooks. A spatula with a flat edge helps scrape the bottom easily.
- Ladle – Makes it easy to transfer the hot jam into jars without mess.
- Clean glass jars with lids – For storing your jam. I prefer 8 oz mason jars—they’re the perfect size for gifting or keeping small batches fresh.
- Jar funnel (optional but helpful) – Keeps the rims clean when pouring the jam in, especially handy if you’re canning.
- Kitchen scale (optional) – For accurately measuring plums if you’re working from weight.
Instructions
Step 1: Prep the Plums
- Wash the plums thoroughly under running water to remove any dirt or residue.
- Cut each plum in half, remove the pit, and chop them into small chunks. No need to peel them—the skins soften and dissolve beautifully as the jam cooks.
Pro Tip: If your plums are extra juicy, place a cutting board inside a rimmed tray to catch the juices. You’ll want to keep that flavor in the pot!
Step 2: Combine Ingredients in the Pot
- Transfer the chopped plums into a large heavy-bottomed pot.
- Add the sugar, lemon juice, and optional lemon zest.
- Stir everything together so the plums are evenly coated with the sugar.
Pro Tip: Let the mixture sit for about 15–20 minutes before turning on the heat. This maceration helps the fruit release its juices, giving you a juicier, more flavorful jam base.
Step 3: Cook the Jam
- Turn the heat to medium and begin cooking, stirring frequently.
- As the plums break down and the mixture starts bubbling, reduce the heat to medium-low to prevent scorching.
- Continue to stir every few minutes, especially near the bottom of the pot where it can stick.
- Let it simmer for 35–45 minutes, or until thickened.
Pro Tip: To check if your jam is ready, spoon a small amount onto a chilled plate and run your finger through it. If it leaves a clear line and doesn’t run back together, it’s done!
Step 4: Blend (Optional for Smoother Jam)
- If you prefer a smooth jam, use an immersion blender right in the pot once it’s off the heat.
- Blend to your desired texture—either completely smooth or just a few pulses to break up larger chunks.
Pro Tip: Let the jam cool slightly before blending to avoid splatters and burns.
Step 5: Jar It Up
- Carefully ladle the hot jam into clean jars, leaving about ¼ inch of space at the top.
- Wipe the rims clean with a damp cloth to ensure a tight seal.
- Seal with lids and let them cool at room temperature.
Pro Tip: If you’re planning to store them long-term, you can process the jars in a water bath for 10 minutes. Otherwise, once cooled, just refrigerate or freeze them.
Step 6: Cool and Store
- Once cooled, check that the lids are sealed (they should not flex when pressed).
- Store in the fridge for up to 3 weeks, freeze for several months, or keep sealed jars in a cool, dark place for up to a year.
Now the hard part: waiting for it to cool before diving in!
Tips and Tricks for Success
- Use ripe but firm plums – Overripe plums can be too watery and underripe ones can lack flavor. Aim for plums that are juicy but still hold their shape.
- Don’t rush the simmering – Low and slow cooking allows the flavors to deepen and the jam to thicken naturally without burning.
- Stir regularly – Especially as it thickens. This prevents scorching and helps the jam cook evenly.
- Always do the plate test – It’s the easiest way to tell if your jam has set properly without relying on guesswork.
- Sterilize your jars – Even if you’re refrigerating, clean jars help keep your jam fresh longer and reduce the risk of spoilage.
Ingredient Substitutions and Variations
- Honey or maple syrup instead of sugar – Use about ¾ cup honey or maple syrup for every 1 cup of sugar. It gives a slightly softer set and richer flavor.
- Add warm spices – Stir in ½ tsp of cinnamon, a pinch of ground cloves, or even star anise while it simmers for a cozy, spiced twist.
- Mix in other fruits – Combine plums with blackberries, raspberries, or apples (about 1:1 ratio) for a unique blend and added texture.
- Use lime juice instead of lemon – Offers a slightly different citrus note that pairs really well with red or black plums.
- Make it boozy – Add a tablespoon of dark rum, brandy, or amaretto at the end of cooking for a grown-up flavor boost.
Serving Suggestions
- Spread on warm toast or biscuits – Classic and comforting. I love slathering it on a slice of buttered sourdough in the morning with coffee—so simple, so good.
- Swirled into yogurt or oatmeal – Adds a fruity kick and natural sweetness to your breakfast bowls.
- As a glaze for roasted meats – Plum jam pairs beautifully with pork or chicken—just brush it on during the last few minutes of roasting or grilling.
- With cheese and crackers – It’s amazing on a cheese board, especially with brie, goat cheese, or sharp cheddar. I always set a jar out when hosting.
- Spooned over vanilla ice cream or cheesecake – A quick dessert upgrade. The tart-sweet flavor of the jam cuts through rich, creamy treats in the best way.
Storage and Reheating Instructions
- Refrigerator – Store cooled jam in airtight jars or containers in the fridge for up to 3 weeks.
- Freezer – Freeze in freezer-safe jars (leave room for expansion) for up to 6 months. Thaw in the fridge overnight before using.
- Pantry (for canned jars) – If properly sealed and processed, jars can last up to 1 year in a cool, dark place.
- Reheat gently – If your jam stiffens in the fridge, warm it slightly in the microwave (10–15 seconds) or in a small saucepan over low heat. Stir well before serving.
- Check for spoilage – Always inspect homemade jam before use. If you notice mold, off smells, or changes in texture, discard the jar.
Frequently Asked Questions
How do I know when the jam is ready?
The best way is the chilled plate test. Drop a spoonful of jam onto a cold plate, wait a few seconds, then run your finger through it. If it holds a line and doesn’t run back together, it’s ready!
Do I have to peel the plums?
Nope! The skins break down as the jam cooks and add lovely texture and color. Plus, skipping the peeling step makes everything faster.
Can I reduce the sugar?
You can, but keep in mind it may affect the jam’s texture and shelf life. If you like a more tart jam, try reducing by ¼ cup and taste as you go.
What’s the best way to sterilize jars?
You can boil jars and lids in water for 10 minutes or run them through a hot dishwasher cycle. Make sure they’re completely dry before filling.
Can I use frozen plums?
Absolutely! Just thaw them first and drain off excess liquid if they’re very watery. The rest of the process is the same.
My jam didn’t set—can I fix it?
Yes! You can pour it back into a pot, bring it to a boil again, and simmer for another 5–10 minutes. Do the plate test again to check. If needed, add a little lemon juice to help it along.
Did you try this recipe? Let me know in the comments how it turned out!
Don’t forget to share your photos on Instagram and tag me @tasiahub_ or use the hashtag #tasiahub. I’d love to see your creations!
Plum Jam Recipe
Equipment
- Large heavy-bottomed pot
- Wooden Spoon or Silicone Spatula
- Ladle
- Clean glass jars with lids
- Jar funnel (optional but helpful)
- Kitchen scale (optional)
Ingredients
- 2 lbs 900g ripe plums, pitted and chopped
- 1 ½ cups 300g granulated sugar
- 2 tbsp fresh lemon juice
- ½ tsp lemon zest optional
Instructions
Step 1: Prep the Plums
- Wash the plums thoroughly under running water to remove any dirt or residue.
- Cut each plum in half, remove the pit, and chop them into small chunks. No need to peel them—the skins soften and dissolve beautifully as the jam cooks.
- Pro Tip: If your plums are extra juicy, place a cutting board inside a rimmed tray to catch the juices. You’ll want to keep that flavor in the pot!
Step 2: Combine Ingredients in the Pot
- Transfer the chopped plums into a large heavy-bottomed pot.
- Add the sugar, lemon juice, and optional lemon zest.
- Stir everything together so the plums are evenly coated with the sugar.
- Pro Tip: Let the mixture sit for about 15–20 minutes before turning on the heat. This maceration helps the fruit release its juices, giving you a juicier, more flavorful jam base.
Step 3: Cook the Jam
- Turn the heat to medium and begin cooking, stirring frequently.
- As the plums break down and the mixture starts bubbling, reduce the heat to medium-low to prevent scorching.
- Continue to stir every few minutes, especially near the bottom of the pot where it can stick.
- Let it simmer for 35–45 minutes, or until thickened.
- Pro Tip: To check if your jam is ready, spoon a small amount onto a chilled plate and run your finger through it. If it leaves a clear line and doesn’t run back together, it’s done!
Step 4: Blend (Optional for Smoother Jam)
- If you prefer a smooth jam, use an immersion blender right in the pot once it’s off the heat.
- Blend to your desired texture—either completely smooth or just a few pulses to break up larger chunks.
- Pro Tip: Let the jam cool slightly before blending to avoid splatters and burns.
Step 5: Jar It Up
- Carefully ladle the hot jam into clean jars, leaving about ¼ inch of space at the top.
- Wipe the rims clean with a damp cloth to ensure a tight seal.
- Seal with lids and let them cool at room temperature.
- Pro Tip: If you’re planning to store them long-term, you can process the jars in a water bath for 10 minutes. Otherwise, once cooled, just refrigerate or freeze them.
Step 6: Cool and Store
- Once cooled, check that the lids are sealed (they should not flex when pressed).
- Store in the fridge for up to 3 weeks, freeze for several months, or keep sealed jars in a cool, dark place for up to a year.
Notes
Estimated Nutritional Value (Per Tablespoon Serving)
- Calories: 45–50 kcal
- Carbohydrates: 12g
- Sugars: 11g
- Fiber: 0.3g
- Protein: 0g
- Fat: 0g
- Vitamin C: Small amount