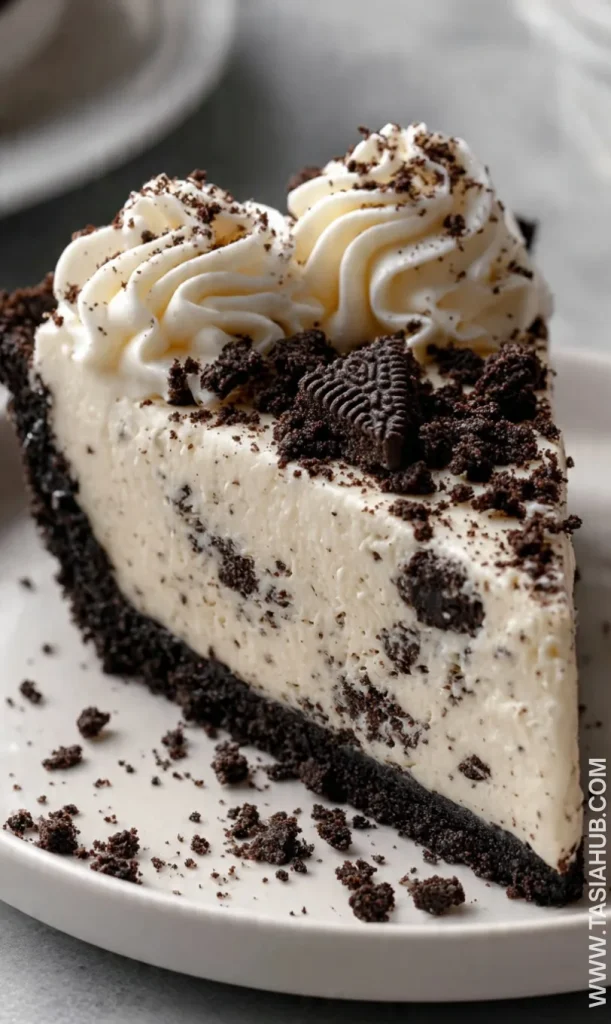
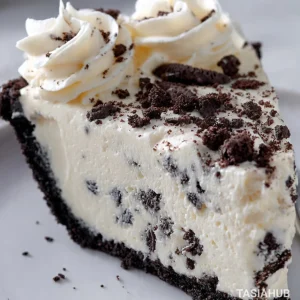
Oreo Cream Pie

Oreo lovers, get ready to meet your next favorite treat: a creamy, dreamy Oreo cream pie that’s surprisingly easy to make. This dessert combines the classic chocolate cookie crunch with a rich, fluffy filling that tastes like a slice of indulgence in every bite. Whether you’re planning a weekend treat or need a last-minute dessert for friends, this pie delivers all the chocolatey comfort you crave.
What makes this Oreo cream pie extra special is how effortlessly it comes together. No baking is required, which means you can enjoy a deliciously creamy dessert without heating up the kitchen. The filling is light, fluffy, and packed with crushed Oreo pieces, giving each bite a perfect balance of creaminess and crunch. It’s a dessert that looks impressive but is surprisingly easy to pull off—perfect for anyone who loves new desserts to make without spending hours in the kitchen.
This pie is also a fantastic way to explore easy Oreo desserts beyond the usual cookies and milk combo. By blending cream cheese with whipped cream and chocolate cookies, you create a smooth, luscious filling that works beautifully in this no bake Oreo pie. It’s ideal for those who enjoy a mix of textures in their desserts—the crisp cookie crust paired with the soft, airy filling is pure magic.
For anyone who loves Oreo desserts, this recipe is a must-try. It’s versatile enough to serve at casual family dinners, birthday parties, or even holiday gatherings. And because it’s an Oreo cream cheese dessert, it has that tangy-sweet depth that elevates it above a standard chocolate pie. Once you take a bite, you’ll understand why this easy Oreo pie has quickly become a favorite in so many homes.
Why You’ll Love It
- No baking required – This Oreo cream pie is perfect for days when you want a show-stopping dessert without turning on the oven. Just mix, chill, and enjoy!
- Perfect balance of textures – Crunchy Oreo crust meets smooth, creamy filling. Every bite has that satisfying contrast that keeps you coming back for more.
- Easy to make for any occasion – Whether it’s a birthday, family dinner, or a casual weekend treat, this pie is quick to whip up and impresses every time.
- Oreo lovers rejoice – Packed with crushed Oreos in the crust and throughout the creamy filling, it’s the ultimate Oreo dessert experience in one slice.
- Versatile and customizable – You can add chocolate drizzle, extra cookie pieces, or even a hint of coffee for a grown-up twist—making it a fun canvas for new desserts to make.
Ingredient List
For the Oreo Crust
- 24 Oreo cookies, crushed
- 6 tablespoons unsalted butter, melted
For the Cream Filling
- 8 oz cream cheese, softened
- 1 cup powdered sugar
- 1 teaspoon vanilla extract
- 2 cups heavy whipping cream, cold
- 6–8 Oreo cookies, chopped
For Topping (Optional)
- Whipped cream
- Extra Oreo pieces for garnish
Ingredient Notes
- I always use full-fat cream cheese for this—it makes the filling so rich and smooth.
- Don’t skip the cold heavy cream! It whips up light and fluffy, giving this no bake Oreo dessert that dreamy texture.
- Using crushed Oreos for the crust gives it the perfect crunch, but leaving a few chunks in the filling adds extra fun texture.
- Vanilla extract might seem small, but it really enhances the flavor and balances the sweetness.
- If you want your pie extra chocolatey, sprinkle a few more Oreo pieces on top—because, why not?
Kitchen Equipment Needed
- 9-inch pie pan – The perfect size for this easy Oreo pie. I love using a glass one so you can see the layers.
- Mixing bowls – One for the crust, one for the filling. I keep a set of sturdy glass bowls handy.
- Hand mixer or stand mixer – For whipping the cream and cream cheese smooth and fluffy. I personally use my hand mixer for quick clean-up.
- Spatula – Great for folding in chopped Oreos and scraping every bit of filling into the crust.
- Food processor or rolling pin – To crush the Oreos finely for the crust. I usually go with a rolling pin—it’s easier and no extra cleanup!
- Measuring cups and spoons – For precise measurements, especially the sugar and butter.
Instructions
1. Prepare the Oreo Crust
- Crush the 24 Oreo cookies until fine crumbs form. You can use a food processor or place them in a zip-top bag and crush with a rolling pin.
- Mix the crushed Oreos with the melted butter until the crumbs are evenly coated.
- Press the mixture firmly into the bottom of a 9-inch pie pan. Use the bottom of a glass or measuring cup to smooth it out evenly.
Pro Tip: Pressing the crust firmly helps it hold together when you slice the pie. Don’t skip this step! - Chill the crust in the refrigerator for at least 15–20 minutes while you make the filling.
2. Make the Cream Filling
- In a mixing bowl, beat the softened cream cheese with the powdered sugar and vanilla extract until smooth and creamy.
Pro Tip: Beat on medium speed and scrape the sides of the bowl to avoid any lumps. - In a separate bowl, whip the cold heavy cream until stiff peaks form.
- Gently fold the whipped cream into the cream cheese mixture until fully combined and light. Be careful not to deflate the whipped cream.
- Fold in the chopped Oreos, leaving a few chunks for texture.
3. Assemble the Pie
- Spoon the cream filling into the chilled Oreo crust. Use a spatula to smooth the top evenly.
- Cover the pie with plastic wrap and refrigerate for at least 2–3 hours, or until fully set.
4. Add the Topping
- Before serving, top the pie with additional whipped cream and sprinkle extra Oreo pieces on top for garnish.
- Slice with a sharp knife, wiping it clean between cuts for perfect slices.
Pro Tip: For clean slices, dip the knife in hot water and wipe it dry before each cut—it makes serving look effortless!

Tips and Tricks for Success
- Chill the crust and filling well—this helps the pie hold its shape when slicing.
- Use full-fat cream cheese and heavy cream for the richest, creamiest texture.
- Gently fold the whipped cream into the cream cheese mixture to keep it light and fluffy.
- Press the crust firmly into the pan to avoid crumbling when serving.
- For extra flavor, let the pie chill overnight; it allows the cookies to soften slightly and the flavors to meld.
Ingredient Substitutions and Variations
- Swap the Oreo crust with chocolate graham crackers for a slightly different crunch.
- Use low-fat cream cheese if you want a lighter version—though the texture will be a bit less rich.
- Add a layer of chocolate ganache on top for an extra decadent touch.
- Mix in peanut butter or Nutella with the cream filling for a twist on the classic Oreo cream cheese dessert.
- Top with fresh berries or caramel drizzle for a fun flavor variation and pretty presentation.
Serving Suggestions
- I love serving a slice of this Oreo cream pie with a scoop of vanilla ice cream—it takes the indulgence to the next level!
- Pair it with a hot cup of coffee or espresso for a perfect afternoon treat.
- Serve chilled at a summer barbecue; the cool, creamy filling is so refreshing alongside grilled favorites.
- Top with extra whipped cream and crushed Oreos for a fun, festive look when guests come over.
- Make mini versions in ramekins for individual servings—they’re adorable and perfect for parties!
Storage and Reheating Instructions
- Refrigerator: Store covered in the fridge for up to 4–5 days. It keeps the filling perfectly creamy.
- Freezer: Wrap tightly in plastic wrap and foil; freeze for up to 2 months. Thaw overnight in the fridge before serving.
- Avoid heat: This is a no bake Oreo pie, so don’t attempt to reheat—it’s best served chilled.
- Keep toppings separate: If storing for longer, add whipped cream or extra cookie pieces just before serving for the best texture.
Frequently Asked Questions
Can I make this pie ahead of time?
Absolutely! This no bake Oreo pie actually tastes even better if it chills for a few hours or overnight—it lets the flavors meld perfectly.
Can I use low-fat cream cheese?
Yes, you can, but the filling won’t be quite as rich and creamy. Full-fat cream cheese gives the best texture for this Oreo cream cheese dessert.
How do I prevent the crust from crumbling?
Press the Oreo crust firmly into the pan and chill it before adding the filling. This helps it stay intact when slicing.
Can I freeze the pie?
Yes! Wrap it tightly in plastic wrap and foil, and freeze for up to 2 months. Thaw in the fridge overnight before serving.
Can I use a different cookie instead of Oreos?
Definitely! Chocolate graham crackers or chocolate sandwich cookies work well, but the classic Oreo flavor is hard to beat.
How can I make mini Oreo cream pies?
Use small ramekins or muffin tins to portion the crust and filling. Chill them the same way as the full pie, and you’ll have perfect individual servings.
Did you try this recipe? Let me know in the comments how it turned out!
Oreo Cream Pie
Equipment
- 9-inch pie pan
- Mixing Bowls
- Hand mixer or stand mixer
- Spatula
- Food processor or rolling pin
- Measuring cups and spoons
Ingredients
For the Oreo Crust
- 24 Oreo cookies crushed
- 6 tablespoons unsalted butter melted
For the Cream Filling
- 8 oz cream cheese softened
- 1 cup powdered sugar
- 1 teaspoon vanilla extract
- 2 cups heavy whipping cream cold
- 6 –8 Oreo cookies chopped
For Topping (Optional)
- Whipped cream
- Extra Oreo pieces for garnish
Instructions
Prepare the Oreo Crust
- Crush the 24 Oreo cookies until fine crumbs form. You can use a food processor or place them in a zip-top bag and crush with a rolling pin.
- Mix the crushed Oreos with the melted butter until the crumbs are evenly coated.
- Press the mixture firmly into the bottom of a 9-inch pie pan. Use the bottom of a glass or measuring cup to smooth it out evenly.
- Pro Tip: Pressing the crust firmly helps it hold together when you slice the pie. Don’t skip this step!
- Chill the crust in the refrigerator for at least 15–20 minutes while you make the filling.
Make the Cream Filling
- In a mixing bowl, beat the softened cream cheese with the powdered sugar and vanilla extract until smooth and creamy.
- Pro Tip: Beat on medium speed and scrape the sides of the bowl to avoid any lumps.
- In a separate bowl, whip the cold heavy cream until stiff peaks form.
- Gently fold the whipped cream into the cream cheese mixture until fully combined and light. Be careful not to deflate the whipped cream.
- Fold in the chopped Oreos, leaving a few chunks for texture.
Assemble the Pie
- Spoon the cream filling into the chilled Oreo crust. Use a spatula to smooth the top evenly.
- Cover the pie with plastic wrap and refrigerate for at least 2–3 hours, or until fully set.
Add the Topping
- Before serving, top the pie with additional whipped cream and sprinkle extra Oreo pieces on top for garnish.
- Slice with a sharp knife, wiping it clean between cuts for perfect slices.
- Pro Tip: For clean slices, dip the knife in hot water and wipe it dry before each cut—it makes serving look effortless!
Notes
Nutritional Value (Per Serving – Approximate)
- Calories: 420
- Carbohydrates: 34g
- Protein: 3g
- Fat: 30g
- Saturated Fat: 17g
- Cholesterol: 70mg
- Sodium: 260mg
- Fiber: 1g
- Sugar: 24g