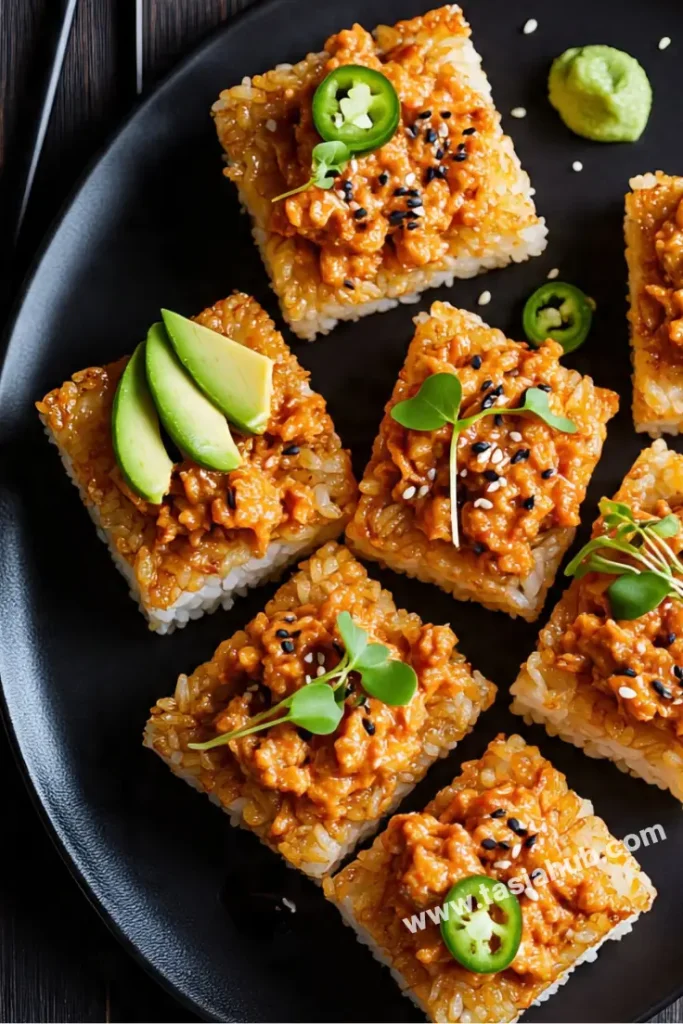
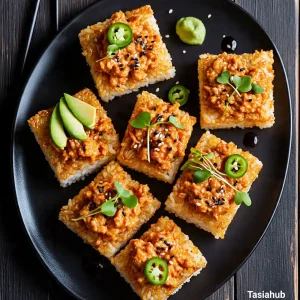
Nobu Copycat Crispy Rice with Spicy Tuna

Craving restaurant-style sushi but don’t want to leave the house? Let’s talk about one of the most iconic and addictive dishes you can recreate at home: crispy rice with spicy tuna — just like the one from Nobu. It’s that perfect bite-sized combo of crispy, golden rice topped with creamy, spicy tuna that instantly makes you feel fancy (even if you’re still in your pajamas).
The first time I tried it, I remember thinking, “How is something this simple so good?” It’s the textures — crunchy, soft, creamy, and a little spicy — that work so well together. And once you break down the components, it’s surprisingly doable in your own kitchen. All you really need is some leftover sushi rice, a hot pan, and a few pantry staples to whip up a spicy tuna mix that’ll rival your favorite sushi bar.
Making crispy rice might sound intimidating, but I promise — once you try it once, you’ll be hooked. It’s a fantastic way to use up extra rice, and the spicy tuna topping comes together in under 10 minutes. Plus, it’s fun to serve if you’re having friends over or just want to treat yourself to something a little special without ordering takeout.
If you’re already a sushi fan or just love experimenting with new flavors, this recipe is such a fun one to try. You’ll get that restaurant-style wow factor but with a cozy homemade touch — no reservations needed.
Why You’ll Love It
- Restaurant-quality at home – You get that upscale, Nobu-inspired flavor without the price tag or the hassle of dining out.
- Crispy, creamy, spicy perfection – The contrast between the golden rice and the spicy tuna is pure texture magic in every bite.
- Easy to prep ahead – Make the rice in advance, chill it, and pan-fry when you’re ready to assemble. Great for entertaining or quick weeknight indulgence.
- Customizable toppings – Don’t like it too spicy? Dial it down. Want to add avocado or drizzle with eel sauce? Go for it.
- Impressive but simple – It looks like a chef made it, but you can pull it off with basic kitchen skills and a little patience.
Ingredient List
For the Crispy Rice:
- 2 cups cooked sushi rice (short-grain, cooled)
- 1 tablespoon rice vinegar
- 1 teaspoon sugar
- ½ teaspoon salt
- Neutral oil (vegetable, canola, or avocado oil, for frying)
For the Spicy Tuna Topping:
- 6 oz sushi-grade tuna, finely chopped
- 2 tablespoons mayonnaise (preferably Kewpie)
- 1–2 teaspoons sriracha (adjust to heat preference)
- 1 teaspoon soy sauce
- 1 teaspoon sesame oil
- 1 teaspoon lemon juice
Optional for Garnish:
- Thinly sliced jalapeños
- Avocado slices or mash
- Toasted sesame seeds
- Chopped green onions
- Soy sauce or eel sauce (for drizzling)
Ingredient Notes
- Cooked sushi rice – Short-grain Japanese rice gives that signature sticky texture. Day-old rice works well because it firms up nicely for frying.
- Neutral oil – Go for something with a high smoke point like canola or avocado oil to get that crispy golden crust without burning.
- Sushi-grade tuna – Super important! Make sure it’s labeled “sushi grade” and kept chilled. You can also use sashimi-grade salmon if preferred.
- Kewpie mayo – This Japanese mayo is richer and slightly tangier than regular. It makes the spicy tuna extra creamy.
- Sriracha – Adjust based on your spice tolerance. Add a little more if you want a real kick!
- Sesame oil – Just a small splash adds so much nutty depth.
- Jalapeños + avocado – Optional, but they add a fresh contrast to the richness of the tuna and the crunch of the rice.
Kitchen Equipment Needed
- Non-stick skillet or cast iron pan – For frying the rice until it’s perfectly crispy. I love using a well-seasoned cast iron for even browning.
- Sharp knife – Essential for finely chopping the tuna and slicing garnishes like jalapeños or avocado.
- Mixing bowls – One for seasoning the rice and another for mixing the spicy tuna topping.
- Measuring spoons – To keep the sauce and spice ratios just right.
- Spatula or fish turner – Helps flip the rice cakes gently without breaking them.
- Plastic wrap or parchment – Great for shaping and chilling the rice before frying so it holds together well.
- Rice paddle or spoon – Makes mixing the seasoned rice easier without smashing the grains.
Instructions
Step 1: Season and Prep the Rice
- Add your cooked, cooled sushi rice to a mixing bowl.
- In a small bowl, mix together the rice vinegar, sugar, and salt until dissolved.
- Pour the vinegar mix over the rice and gently fold it in using a rice paddle or spoon. Try not to mash the rice — you want to keep the grains intact.
- Line a small baking dish or tray with plastic wrap. Press the seasoned rice into an even layer about ¾-inch thick. Cover and refrigerate for at least 1 hour, or until firm.
Pro Tip: Chilling helps the rice hold its shape when you cut and fry it later. You can even do this part a day ahead!
Step 2: Cut and Shape the Rice
- Once the rice is firm, lift it out of the dish using the plastic wrap.
- Use a sharp knife (lightly dampened with water to prevent sticking) to cut the rice into small rectangles or squares — about 2 inches long.
Pro Tip: Clean and wet your knife between cuts for smooth, clean slices that don’t fall apart.
Step 3: Fry the Rice
- Heat about ¼ inch of neutral oil in a skillet over medium heat.
- Carefully place the rice pieces in the hot oil, leaving space between each one. Don’t overcrowd the pan.
- Fry for 2–3 minutes per side, or until golden brown and crispy. Flip gently using a spatula.
- Transfer the crispy rice to a plate lined with paper towels to drain any excess oil. Let them cool slightly.
Pro Tip: Resist the urge to move them too early. Letting them sit undisturbed helps form that crisp golden crust.
Step 4: Make the Spicy Tuna Topping
- In a small bowl, combine the finely chopped sushi-grade tuna, Kewpie mayo, sriracha, soy sauce, sesame oil, and lemon juice.
- Mix well until smooth and creamy. Taste and adjust the heat level if you’d like more spice.
- Keep chilled until ready to assemble.
Step 5: Assemble and Garnish
- Spoon a generous amount of spicy tuna on top of each crispy rice piece.
- Garnish with your favorite toppings — thin jalapeño slices, avocado, sesame seeds, or a drizzle of eel sauce all work beautifully.
- Serve immediately while the rice is still warm and crispy underneath the creamy topping.
Pro Tip: If you’re making these for a crowd, keep the fried rice pieces warm in the oven (200°F) and assemble right before serving.
Tips and Tricks for Success
- Use day-old rice if possible – It’s drier and firmer, which makes it easier to shape and crisp without falling apart.
- Wet your hands or utensils – When shaping or cutting the rice, a little water prevents sticking and helps you get clean, neat pieces.
- Don’t rush the chill time – Cold, compacted rice holds its shape best during frying — don’t skip or shorten this step!
- Monitor oil temperature – Medium heat is key. Too hot and the rice will burn before the inside heats through; too low and it won’t get crispy.
- Serve immediately – The contrast of warm crispy rice and chilled spicy tuna is what makes this dish pop. Assemble right before serving for best texture.
Ingredient Substitutions and Variations
- No sushi-grade tuna? – Swap it for high-quality canned tuna in water or oil. Drain well and flake before mixing.
- Try salmon instead – Sashimi-grade salmon makes a delicious, buttery alternative to tuna.
- No Kewpie mayo? – Use regular mayo and add a pinch of sugar and rice vinegar to mimic the flavor.
- Spice it differently – Use gochujang or sambal oelek in place of sriracha for a unique heat profile.
- Make it vegetarian – Top the crispy rice with spicy mashed avocado or a chopped spicy tofu mix instead of tuna.
- Add texture – Sprinkle crispy fried onions, tempura flakes, or crushed nori on top for a fun crunch boost.
Serving Suggestions
- Appetizer-style bites – Serve them as fancy starters at dinner parties or date nights. They’re a total crowd-pleaser and look super impressive on a platter.
- Make it a sushi night – Pair with edamame, miso soup, and cucumber sunomono (Japanese salad) for a restaurant-style experience at home.
- Lunch for one – I love making 4–5 pieces and enjoying them with a side of seaweed salad or avocado slices for a quick, satisfying solo lunch.
- Top with variety – Make a crispy rice “bar” and offer a few toppings: spicy tuna, spicy salmon, avocado, or even cooked shrimp for fun mix-and-match bites.
- Light dinner with greens – Balance the richness with a crisp cabbage slaw or sesame-dressed arugula salad—it’s so refreshing with the spicy topping!

Storage and Reheating Instructions
- Store the components separately – Keep crispy rice in an airtight container at room temp for a few hours or refrigerate for up to 2 days. Store the tuna mix in the fridge, tightly covered, for up to 1 day.
- Reheat rice pieces in a pan – Use a dry skillet over medium heat for a few minutes per side to re-crisp them. Avoid microwaving—it makes them soggy.
- Don’t freeze – Freezing affects the texture of both the rice and the raw fish, so it’s best enjoyed fresh or refrigerated short term.
- Assemble fresh each time – Only top the rice with spicy tuna when ready to serve, so the crispy texture doesn’t get lost.
- Leftover tuna mix? – Spoon it onto cucumber slices, crackers, or inside a wrap for a quick snack the next day!
Frequently Asked Questions
Can I use regular rice instead of sushi rice?
Short answer: not really. Sushi rice (short-grain) is stickier and holds together much better for shaping and frying. Regular long-grain rice will likely fall apart or feel too dry.
What if I don’t eat raw fish?
No problem! Use cooked shrimp, canned tuna, spicy tofu, or even mashed avocado for a vegetarian version. Still delicious and super customizable.
How do I know if my tuna is sushi-grade?
Look for labels like “sushi-grade” or “sashimi-grade” at trusted fish markets or Asian grocers. If unsure, ask the seller directly. Freshness and safe handling are key.
Can I make this ahead of time?
You can! Prep the rice and spicy tuna separately, then assemble just before serving. Fried rice pieces can be reheated in a pan to get crispy again.
Is there a way to make it less spicy?
Absolutely. Just reduce the sriracha or skip it entirely for a milder tuna mix. You can even add a bit of honey or more mayo for a creamy, mild twist.
Can I bake the rice instead of frying?
Pan-frying gives the best texture, but you can try air-frying or lightly oiling and baking the rice at 400°F (200°C) until golden and crisp. It won’t be exactly the same but still tasty.
Did you try this recipe? Let me know in the comments how it turned out!
Don’t forget to share your photos on Instagram and tag me @tasiahub_ or use the hashtag #tasiahub. I’d love to see your creations!
Nobu Copycat Crispy Rice with Spicy Tuna
Equipment
- Non-stick skillet or cast iron pan
- Sharp Knife
- Mixing Bowls
- Measuring spoons
- Spatula or fish turner
- Plastic wrap or parchment
- Rice paddle or spoon
Ingredients
For the Crispy Rice:
- 2 cups cooked sushi rice short-grain, cooled
- 1 tablespoon rice vinegar
- 1 teaspoon sugar
- ½ teaspoon salt
- Neutral oil vegetable, canola, or avocado oil, for frying
For the Spicy Tuna Topping:
- 6 oz sushi-grade tuna finely chopped
- 2 tablespoons mayonnaise preferably Kewpie
- 1 –2 teaspoons sriracha adjust to heat preference
- 1 teaspoon soy sauce
- 1 teaspoon sesame oil
- 1 teaspoon lemon juice
Optional for Garnish:
- Thinly sliced jalapeños
- Avocado slices or mash
- Toasted sesame seeds
- Chopped green onions
- Soy sauce or eel sauce for drizzling
Instructions
Step 1: Season and Prep the Rice
- Add your cooked, cooled sushi rice to a mixing bowl.
- In a small bowl, mix together the rice vinegar, sugar, and salt until dissolved.
- Pour the vinegar mix over the rice and gently fold it in using a rice paddle or spoon. Try not to mash the rice — you want to keep the grains intact.
- Line a small baking dish or tray with plastic wrap. Press the seasoned rice into an even layer about ¾-inch thick. Cover and refrigerate for at least 1 hour, or until firm.
- Pro Tip: Chilling helps the rice hold its shape when you cut and fry it later. You can even do this part a day ahead!
Step 2: Cut and Shape the Rice
- Once the rice is firm, lift it out of the dish using the plastic wrap.
- Use a sharp knife (lightly dampened with water to prevent sticking) to cut the rice into small rectangles or squares — about 2 inches long.
- Pro Tip: Clean and wet your knife between cuts for smooth, clean slices that don’t fall apart.
Step 3: Fry the Rice
- Heat about ¼ inch of neutral oil in a skillet over medium heat.
- Carefully place the rice pieces in the hot oil, leaving space between each one. Don’t overcrowd the pan.
- Fry for 2–3 minutes per side, or until golden brown and crispy. Flip gently using a spatula.
- Transfer the crispy rice to a plate lined with paper towels to drain any excess oil. Let them cool slightly.
- Pro Tip: Resist the urge to move them too early. Letting them sit undisturbed helps form that crisp golden crust.
Step 4: Make the Spicy Tuna Topping
- In a small bowl, combine the finely chopped sushi-grade tuna, Kewpie mayo, sriracha, soy sauce, sesame oil, and lemon juice.
- Mix well until smooth and creamy. Taste and adjust the heat level if you’d like more spice.
- Keep chilled until ready to assemble.
Step 5: Assemble and Garnish
- Spoon a generous amount of spicy tuna on top of each crispy rice piece.
- Garnish with your favorite toppings — thin jalapeño slices, avocado, sesame seeds, or a drizzle of eel sauce all work beautifully.
- Serve immediately while the rice is still warm and crispy underneath the creamy topping.
- Pro Tip: If you’re making these for a crowd, keep the fried rice pieces warm in the oven (200°F) and assemble right before serving.
Notes
Nutritional Value (per serving)
- Calories: ~320
- Protein: ~14g
- Fat: ~18g
- Carbohydrates: ~25g
- Sugar: ~2g
- Sodium: ~400mg