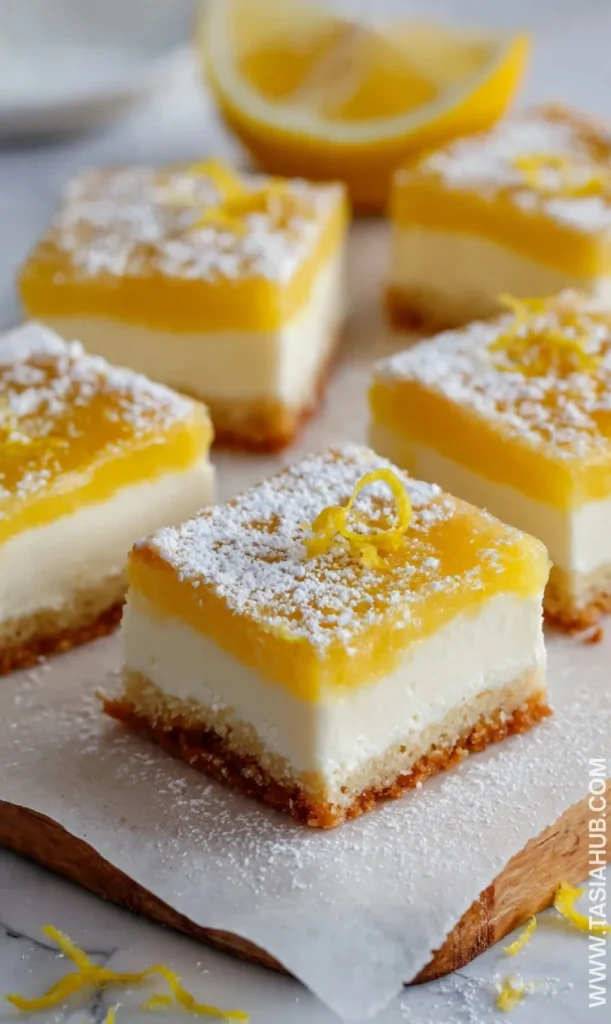
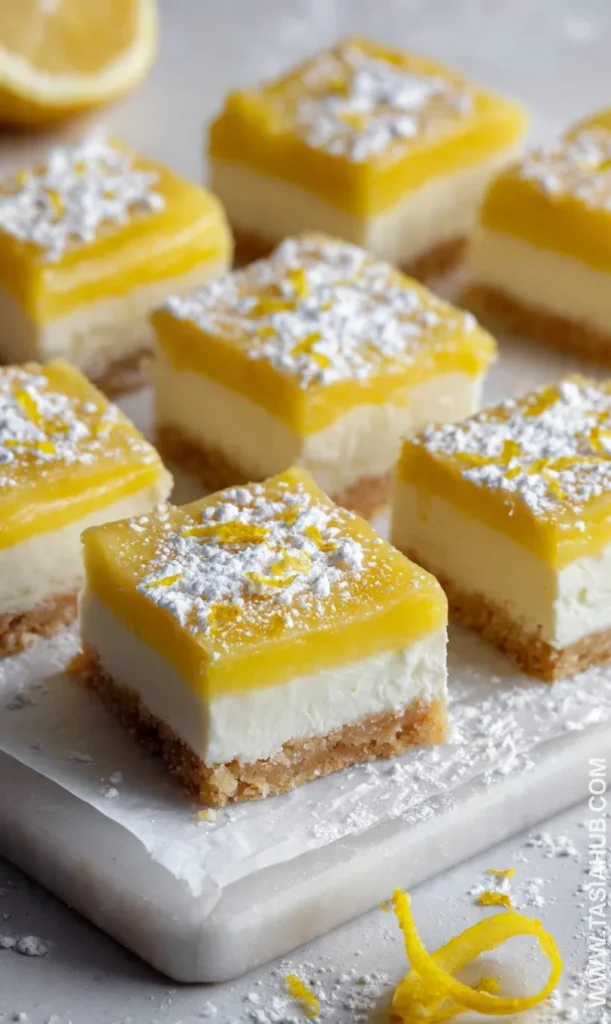
Lazy Day Lemon Cream Pie Bars

When you want a sweet treat that’s bright, creamy, and totally fuss-free, these lazy day lemon cream pie bars are the answer. They combine the tang of fresh lemon with the richness of cream cheese in a way that feels indulgent but surprisingly simple to make. Perfect for a quiet afternoon at home or an easy dessert to share with friends, these bars strike the ideal balance between sweet and tart.
The base is buttery and slightly crumbly, holding together just enough to give you that satisfying bite without being heavy. Topped with a silky layer of cream cheese and finished with a smooth, zesty lemon layer, each piece feels like a miniature slice of sunshine. I love keeping these in the fridge for a ready-to-go treat that can brighten any lazy day.
What makes these bars stand out is how effortlessly they come together. You don’t need a fancy mixer or a complicated baking technique. Just a few simple ingredients and a little patience, and you’ll have a tray of creamy lemon squares that taste like they belong in a bakery. They’re ideal for anyone who loves lemon desserts bars but doesn’t have hours to spend in the kitchen.
And while these bars are perfect for a quiet snack at home, they also shine at gatherings. Their refreshing desserts vibe makes them a hit at summer potlucks, afternoon teas, or casual weekend brunches. Whether you’re in the mood for the best lemon bars you’ve ever had or just craving a slice of sweet-tart bliss, these lemon cream cheese bars are guaranteed to deliver.
Why You’ll Love It
- Effortless yet impressive: These bars look and taste like a bakery creation, but they come together in just a fraction of the time. Perfect for those lazy afternoons when you want a treat without the fuss.
- Bright, refreshing flavor: The combination of tangy lemon and creamy cream cheese makes every bite lively and satisfying. They’re one of those lemon desserts bars that never feel too heavy.
- Versatile treat: Serve them chilled for a refreshing dessert, cut into small squares for parties, or enjoy a generous slice with your afternoon tea. They’re adaptable for any occasion.
- Perfectly balanced sweetness: Sweet but not overwhelming, tart but never sharp—these bars hit the sweet spot that keeps you coming back for more.
- Make-ahead friendly: You can prepare these lemon cream pie bars in advance, which makes them an ideal option for busy weeks or impromptu get-togethers.
Ingredients
For the Crust
- 1 ½ cups all-purpose flour
- ½ cup unsalted butter, softened
- ¼ cup granulated sugar
- ¼ teaspoon salt
For the Cream Cheese Layer
- 8 oz cream cheese, softened
- ¼ cup granulated sugar
- 1 teaspoon vanilla extract
For the Lemon Layer
- ½ cup freshly squeezed lemon juice (about 2–3 lemons)
- Zest of 1 lemon
- ½ cup granulated sugar
- 2 large eggs
- 2 tablespoons all-purpose flour
Ingredient Notes
- I always use real lemons for that fresh, bright flavor—it makes these lemon cream pie bars taste unbeatable.
- Don’t skip the cream cheese in the middle! It adds that rich, creamy layer that balances the tartness.
- Butter in the crust is key—softened, not melted—to get the perfect crumbly base.
- For extra zing, I like to add a little extra lemon zest on top before baking. It makes the bars pop visually and flavor-wise.
- Use fresh eggs for the lemon layer; they make the filling silky and smooth.
Kitchen Equipment Needed
- 8×8-inch baking pan – Perfect size for a tray of lemon cream pie bars; I love using a glass one for even baking.
- Mixing bowls – For keeping your crust, cream cheese layer, and lemon layer separate. I like using sturdy glass bowls.
- Hand mixer or stand mixer – Makes the cream cheese layer silky smooth without lumps.
- Whisk – Ideal for combining the lemon layer quickly and evenly.
- Spatula – For spreading layers gently and scraping every bit of delicious batter.
- Zester or microplane – Essential for getting that fragrant lemon zest.
- Parchment paper – Makes lifting the bars out of the pan a breeze and cleanup easier.
Instructions
Step 1: Prepare the Pan and Oven
- Preheat your oven to 350°F (175°C).
- Line an 8×8-inch baking pan with parchment paper, leaving an overhang on two sides for easy lifting later.
- Lightly grease the parchment with butter or nonstick spray to prevent sticking.
Pro Tip: Using parchment with an overhang makes removing the bars effortless—no crumbling at the edges!
Step 2: Make the Crust
- In a mixing bowl, combine 1 ½ cups flour, ¼ cup sugar, and ¼ teaspoon salt.
- Cut in the ½ cup softened butter using a fork or pastry cutter until the mixture resembles coarse crumbs.
- Press the mixture evenly into the prepared pan, forming a firm, even layer.
- Bake for 15–18 minutes, until lightly golden around the edges.
Pro Tip: Don’t overbake—the crust will firm up more as the bars cool.
Step 3: Prepare the Cream Cheese Layer
- In a clean bowl, beat the 8 oz softened cream cheese with ¼ cup sugar and 1 teaspoon vanilla until smooth and creamy.
- Spread this evenly over the slightly cooled crust, smoothing the top with a spatula.
Pro Tip: Make sure the crust isn’t too hot, or the cream cheese layer can melt and become runny.
Step 4: Make the Lemon Layer
- In a separate bowl, whisk together ½ cup lemon juice, zest of 1 lemon, ½ cup sugar, 2 eggs, and 2 tablespoons flour.
- Whisk continuously until fully combined and smooth.
Pro Tip: Whisk slowly at first, then increase speed to prevent bubbles and lumps in the lemon layer.
Step 5: Assemble and Bake
- Pour the lemon mixture gently over the cream cheese layer, spreading evenly with a spatula.
- Bake for 20–25 minutes, until the lemon layer is set but slightly jiggly in the center.
- Remove from the oven and let cool at room temperature for 30 minutes, then refrigerate for at least 2 hours before slicing.
Pro Tip: Chilling is key! It helps the bars hold their shape and makes slicing neat squares easy.
Step 6: Slice and Serve
- Use the parchment overhang to lift the bars out of the pan.
- Slice into 9–12 squares using a sharp knife, wiping the knife clean between cuts for perfect edges.
- Optional: Dust lightly with powdered sugar or garnish with extra lemon zest.
Pro Tip: For clean slices, chill overnight—this gives the lemon cream pie bars a firmer, creamier texture.
Tips and Tricks for Success
- Room temperature ingredients – Make sure your cream cheese and butter are softened; it makes mixing smoother and gives a creamier texture.
- Even layers – Press the crust firmly and spread the cream cheese layer evenly for uniform bars that hold together.
- Watch your oven – Baking times may vary; check the crust edges and lemon layer to avoid overbaking.
- Chill before slicing – Refrigerating for at least 2 hours helps the bars set perfectly and makes cutting easier.
- Use fresh lemons – Freshly squeezed juice and zest give the bars a bright, natural flavor that bottled juice can’t match.
Ingredient Substitutions and Variations
- Butter alternatives: Use coconut oil or plant-based butter for a dairy-free crust.
- Sugar swaps: Replace granulated sugar with coconut sugar or a sugar substitute for a lighter option.
- Cream cheese alternatives: Try mascarpone or Greek yogurt for a slightly different texture and flavor.
- Flavor twist: Add a teaspoon of lemon extract for extra zing or a few tablespoons of lime juice for a citrusy twist.
- Crust variations: Mix in a handful of finely chopped nuts or graham cracker crumbs for added texture and flavor.
Serving Suggestions
- I love serving these lazy day lemon cream bars chilled with a cup of hot tea—it’s the perfect balance of tangy and comforting.
- Pair a square with fresh berries or a few slices of kiwi for a colorful, refreshing dessert plate.
- These lemon cream pie bars are amazing alongside a scoop of vanilla ice cream for an extra indulgent treat.
- Cut into small squares for a party platter—they’re bite-sized, bright, and always a crowd-pleaser.
- Enjoy a single bar with sparkling lemonade on a warm afternoon; it doubles the citrusy refreshment!
Storage and Reheating Instructions
- Refrigerate: Store bars in an airtight container in the fridge for up to 5 days to keep them fresh and creamy.
- Freeze: Wrap individual bars in plastic wrap and place in a freezer-safe container for up to 2 months. Thaw in the fridge before serving.
- Slicing tip: Chill bars before cutting to avoid crumbling and ensure clean edges.
- No reheating needed: These bars are best served cold or at room temperature—the creamy lemon layer stays smooth and refreshing.
- Transporting: Keep chilled in a cooler or insulated bag for picnics or potlucks to maintain texture and flavor.
Frequently Asked Questions
Can I make these bars ahead of time?
Absolutely! These lazy day lemon cream bars actually taste even better after chilling overnight. It helps the layers set and makes slicing much easier.
Can I use bottled lemon juice instead of fresh lemons?
You can, but fresh lemons give the best flavor and brightness. Bottled juice works in a pinch, just reduce added sugar slightly if it’s sweetened.
How do I get clean slices?
Chill the bars completely before slicing and use a sharp knife. Wiping the knife clean between cuts makes perfect squares every time.
Can I freeze lemon cream pie bars?
Yes! Wrap individual bars tightly in plastic wrap and place them in a freezer-safe container. Thaw in the fridge before serving.
Can I make these dairy-free?
You can swap the butter for plant-based butter and cream cheese for a dairy-free cream cheese alternative. The texture will be slightly different but still delicious.
What’s the best way to serve these bars?
Serve chilled or at room temperature. Pair with fresh berries, a dusting of powdered sugar, or a scoop of ice cream for an extra special treat.
Did you try this recipe? Let me know in the comments how it turned out!
Lazy Day Lemon Cream Pie Bars
Equipment
- 8×8-inch baking pan
- Mixing Bowls
- Hand mixer or stand mixer
- Whisk
- Spatula
- Zester or microplane
- Parchment paper
Ingredients
For the Crust
- 1 ½ cups all-purpose flour
- ½ cup unsalted butter softened
- ¼ cup granulated sugar
- ¼ teaspoon salt
For the Cream Cheese Layer
- 8 oz cream cheese softened
- ¼ cup granulated sugar
- 1 teaspoon vanilla extract
For the Lemon Layer
- ½ cup freshly squeezed lemon juice about 2–3 lemons
- Zest of 1 lemon
- ½ cup granulated sugar
- 2 large eggs
- 2 tablespoons all-purpose flour
Instructions
Step 1: Prepare the Pan and Oven
- Preheat your oven to 350°F (175°C).
- Line an 8×8-inch baking pan with parchment paper, leaving an overhang on two sides for easy lifting later.
- Lightly grease the parchment with butter or nonstick spray to prevent sticking.
- Pro Tip: Using parchment with an overhang makes removing the bars effortless—no crumbling at the edges!
Step 2: Make the Crust
- In a mixing bowl, combine 1 ½ cups flour, ¼ cup sugar, and ¼ teaspoon salt.
- Cut in the ½ cup softened butter using a fork or pastry cutter until the mixture resembles coarse crumbs.
- Press the mixture evenly into the prepared pan, forming a firm, even layer.
- Bake for 15–18 minutes, until lightly golden around the edges.
- Pro Tip: Don’t overbake—the crust will firm up more as the bars cool.
Step 3: Prepare the Cream Cheese Layer
- In a clean bowl, beat the 8 oz softened cream cheese with ¼ cup sugar and 1 teaspoon vanilla until smooth and creamy.
- Spread this evenly over the slightly cooled crust, smoothing the top with a spatula.
- Pro Tip: Make sure the crust isn’t too hot, or the cream cheese layer can melt and become runny.
Step 4: Make the Lemon Layer
- In a separate bowl, whisk together ½ cup lemon juice, zest of 1 lemon, ½ cup sugar, 2 eggs, and 2 tablespoons flour.
- Whisk continuously until fully combined and smooth.
- Pro Tip: Whisk slowly at first, then increase speed to prevent bubbles and lumps in the lemon layer.
Step 5: Assemble and Bake
- Pour the lemon mixture gently over the cream cheese layer, spreading evenly with a spatula.
- Bake for 20–25 minutes, until the lemon layer is set but slightly jiggly in the center.
- Remove from the oven and let cool at room temperature for 30 minutes, then refrigerate for at least 2 hours before slicing.
- Pro Tip: Chilling is key! It helps the bars hold their shape and makes slicing neat squares easy.
Step 6: Slice and Serve
- Use the parchment overhang to lift the bars out of the pan.
- Slice into 9–12 squares using a sharp knife, wiping the knife clean between cuts for perfect edges.
- Optional: Dust lightly with powdered sugar or garnish with extra lemon zest.
- Pro Tip: For clean slices, chill overnight—this gives the lemon cream pie bars a firmer, creamier texture.
Notes
Nutritional Value (Per Bar — approximate)
- Calories: 210
- Carbohydrates: 26g
- Protein: 3g
- Fat: 11g
- Saturated Fat: 6g
- Sodium: 95mg
- Fiber: 0.5g
- Sugar: 18g
- Vitamin C: 6–10% DV
- Calcium: 2–3% DV