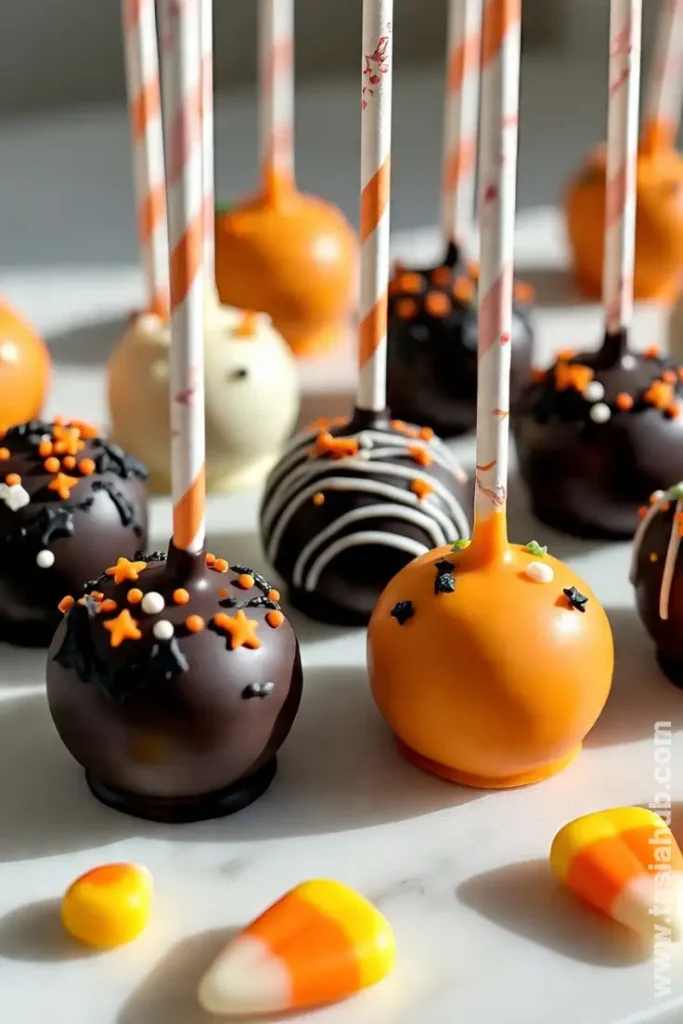
Halloween Oreo Cake Pops

Halloween is hands-down one of my favorite times of the year to get a little creative in the kitchen. And while I love a classic pumpkin spice treat, this year I wanted to make something that’s playful, sweet, and perfect for sharing—or sneaking a few when no one’s looking. Enter: Halloween Oreo cake pops. These little bite-sized goodies are as fun to make as they are to eat, and they’re packed with that irresistible Oreo flavor we all secretly crave.
I love how versatile these treats are. You can transform ordinary Halloween Oreos into spooky cake pops that look straight out of a Halloween party display, or keep them simple with a quick dip in candy melts and a few festive sprinkles. The best part? You don’t need a ton of fancy tools—just a little patience and a love for chocolatey, crunchy, creamy goodness.
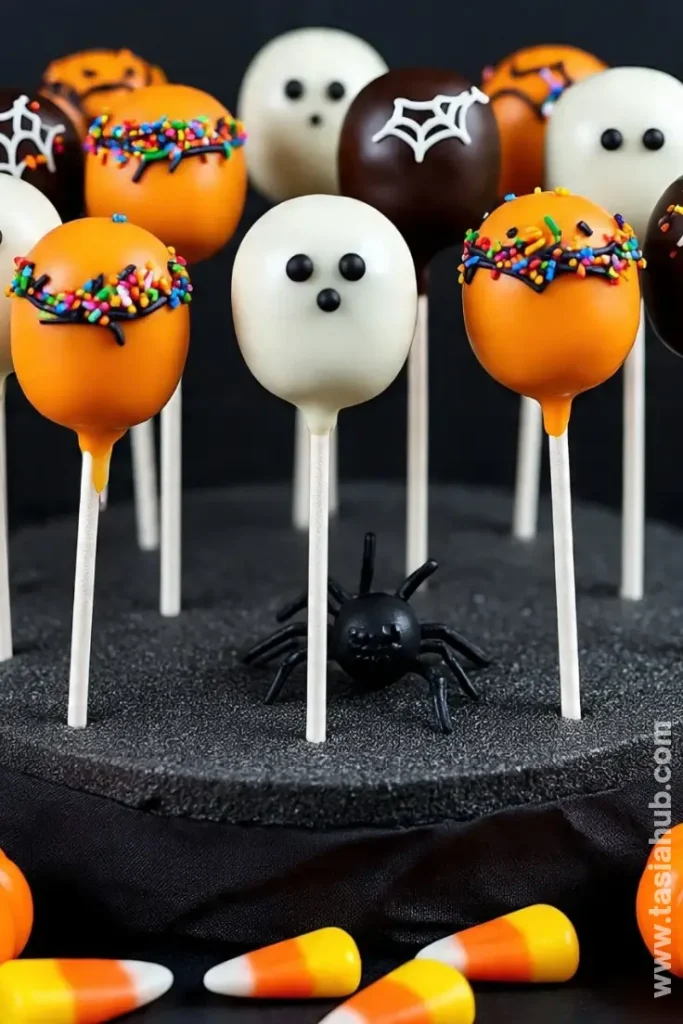
Making Halloween cake balls is a great activity to do with kids, friends, or even solo when you need a little treat-making therapy. Crushing the Oreos, mixing them with cream cheese, and rolling them into perfect little balls feels oddly satisfying. And the decorating part? That’s where the fun really begins. From ghostly white candy coating to dripping orange and black accents, these Oreo Halloween treats are totally Instagram-worthy.
Whether you’re planning a Halloween party, making treats for neighbors, or just indulging your own sweet tooth, these spooky cake pops hit the perfect balance of festive and delicious. If you’ve ever wondered how to turn Halloween Oreos into something extra special, this Halloween cake pops recipe is your answer. Stick around, because I’m sharing every step and tip to make your Halloween Oreo balls look amazing—and taste even better.
Why You’ll Love It
- Perfectly bite-sized fun: These Halloween Oreo balls are the ideal little snack—easy to pop in your mouth, share with friends, or hand out to trick-or-treaters without any mess.
- Super customizable: From spooky ghost designs to dripping chocolate “blood,” you can decorate your spooky cake pops any way you like. It’s a mini Halloween art project with a delicious reward.
- Rich, creamy, chocolatey goodness: Crushing Oreo cookies and mixing them with cream cheese creates a decadent, fudgy center that contrasts perfectly with a crisp candy coating.
- Kid-friendly activity: Making Halloween dipped Oreos into cake pops is as much fun for kids as it is for adults. Rolling, dipping, and decorating keeps little hands busy while teaching a bit of kitchen creativity.
- Show-stopping Halloween treat: Whether you’re adding them to a dessert table or gifting them to friends, these Halloween Oreo treats are bound to get oohs, aahs, and maybe even a few jealous looks.
Ingredient List
For the Oreo Cake Balls:
- 24 Oreo cookies (any classic flavor)
- 8 oz cream cheese, softened
For the Candy Coating & Decoration:
- 12 oz white candy melts
- 6 oz orange candy melts
- 6 oz black candy melts
- Sprinkles or edible decorations (optional)
- Lollipop sticks
Ingredient Notes
- I always use full-fat cream cheese—it makes the cake balls extra creamy and helps them hold together better.
- Don’t skip the Oreo cookies! The classic flavor is key to these Halloween Oreo balls tasting just right.
- Candy melts are your best friend here—they melt smoothly and set quickly, which is perfect for dipping and decorating.
- A little tip: if you can, use lollipop sticks instead of toothpicks. They make your spooky cake pops easier to dip and way more fun to display.
- Sprinkles or edible decorations are optional, but adding them turns simple Halloween dipped Oreos into a festive masterpiece.
Kitchen Equipment Needed
- Mixing bowl – To crush Oreos and mix with cream cheese. I love using a medium glass bowl; it makes stirring easier.
- Food processor or rolling pin – For crushing the Oreos finely. A food processor is fast, but a rolling pin works perfectly too.
- Spatula – To mix everything together without making a mess. I always use a silicone one—it’s flexible and easy to clean.
- Baking sheet – To place the cake balls before freezing. A non-stick sheet or one lined with parchment paper works best.
- Parchment paper – Keeps the cake pops from sticking while chilling. Trust me, it’s a game-changer.
- Microwave-safe bowls – For melting candy melts. I like glass bowls because they heat evenly.
- Lollipop sticks – For holding your Halloween cake pops. Makes dipping and serving much easier.
- Toothpicks (optional) – Handy for adding fine details or decorations.
Instructions
Step 1: Crush the Oreos
- Place all 24 Oreo cookies in a food processor. Pulse until they become fine crumbs.
- Pro tip: If you don’t have a food processor, place Oreos in a sealed plastic bag and crush them with a rolling pin. Make sure there are no large chunks left for smooth, uniform cake balls.
- Pour the crumbs into a large mixing bowl.
Step 2: Mix with Cream Cheese
- Add the softened 8 oz of cream cheese to the Oreo crumbs.
- Use a spatula or your hands to mix until fully combined and a sticky dough forms.
- Pro tip: Don’t overmix or the mixture can get too soft. Stop once everything is evenly combined.
Step 3: Form the Cake Balls
- Scoop out small portions of the mixture (about 1–1.5 tablespoons each).
- Roll each portion into a smooth ball between your palms.
- Place each ball on a baking sheet lined with parchment paper.
- Chill in the freezer for at least 15–20 minutes so they firm up.
Step 4: Prepare the Candy Coating
- Melt white candy melts in a microwave-safe bowl, stirring every 30 seconds until smooth.
- Do the same for orange and black candy melts in separate bowls if you plan to decorate with multiple colors.
- Pro tip: Add a tiny bit of vegetable oil to candy melts if they feel too thick; this helps with a smoother dip.
Step 5: Insert Sticks and Dip
- Dip the tip of a lollipop stick into the melted white candy, then insert it halfway into a chilled cake ball. This helps the stick stay in place.
- Dip the cake ball into the candy melt, gently tapping off any excess.
- Place the dipped cake pop back on the parchment-lined baking sheet.
Step 6: Decorate
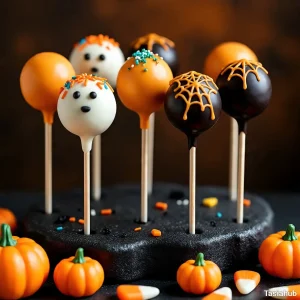
- Use the orange and black candy melts to drizzle or create spooky designs like ghosts, pumpkins, or spider webs.
- Add sprinkles or edible decorations while the candy coating is still wet.
- Pro tip: Work quickly—the coating sets fast, so have your decorations ready before dipping.
Step 7: Let Them Set
- Allow the cake pops to sit at room temperature or in the fridge until fully hardened.
- Once set, they’re ready to display, serve, or gift!
Tips and Tricks for Success
- Chill the Oreo balls before dipping to prevent them from falling apart in the candy coating.
- Work in small batches when dipping to keep candy melts smooth and easy to handle.
- Use a toothpick to fix any small cracks or imperfections in the coating.
- If candy melts start to harden, reheat them in short 10-second intervals in the microwave.
- Store cake pops in an airtight container at room temperature for up to 3 days or in the fridge for up to a week.
Ingredient Substitutions and Variations
- Oreo cookies: Swap with chocolate sandwich cookies or gluten-free Oreos for dietary needs.
- Cream cheese: Use mascarpone or a dairy-free cream cheese alternative for a slightly different flavor and texture.
- Candy melts: Substitute with white chocolate, colored chocolate melts, or chocolate bark.
- Decorations: Try crushed Halloween candies, edible glitter, or themed sprinkles instead of candy melt designs.
- Flavors: Add a teaspoon of vanilla extract, pumpkin spice, or even a dash of peppermint extract to the cake ball mixture for a festive twist.
Serving Suggestions
- I love arranging these Halloween Oreo balls on a festive platter for a party—they make the dessert table pop with color and spooky fun!
- Serve them alongside a cup of hot cocoa or coffee; the rich Oreo flavor pairs beautifully with a warm drink.
- Pack a few in a small treat bag for trick-or-treaters or as fun Halloween gifts for friends.
- Add them to a dessert board with cupcakes, cookies, and candy for a mix-and-match sweet spread.
- Enjoy one straight from the fridge as an indulgent, chocolatey snack while watching your favorite Halloween movie—it’s my personal favorite!
Storage and Reheating Instructions
- Store cake pops in an airtight container at room temperature for up to 3 days.
- Keep in the fridge for up to a week; allow them to come to room temperature before serving for the best texture.
- Do not microwave the dipped cake pops—they’ll melt the candy coating.
- For longer storage, you can freeze cake pops in an airtight container for up to 2 months. Thaw in the fridge before serving.
- If candy coating develops any condensation after refrigeration, let cake pops sit at room temperature for a few minutes before serving.
Frequently Asked Questions
Can I use store-bought Halloween Oreos?
Absolutely! Store-bought Halloween Oreos work perfectly for this recipe and add a festive touch without any extra effort.
Can I make these ahead of time?
Yes! You can make the Oreo cake balls a day or two in advance and store them in the fridge. Just decorate them the day you plan to serve for the freshest look.
How do I prevent the cake balls from falling off the sticks?
Chill the cake balls before inserting the sticks and dip the stick tip in melted candy before inserting—it acts like glue and keeps everything in place.
Can I use chocolate instead of candy melts?
Yes, you can use white or dark chocolate. Just melt slowly and stir well to avoid lumps, and consider adding a tiny bit of oil to make dipping smoother.
What if the candy coating cracks?
Don’t worry! You can smooth cracks with a little extra melted candy or cover them with sprinkles or drizzles. A little imperfection adds character!
Can these be frozen?
Yes, place them in an airtight container and freeze for up to 2 months. Thaw in the fridge before serving to keep the coating intact.
Did you try this recipe? Let me know in the comments how your Halloween Oreo cake pops turned out—I’d love to hear your decorating ideas and spooky creations!
Halloween Oreo Cake Pops
Equipment
- Mixing Bowl
- Food processor or rolling pin
- Spatula
- Baking Sheet
- Parchment paper
- Microwave-safe bowls
- Lollipop sticks
- Toothpicks (optional)
Ingredients
For the Oreo Cake Balls:
- 24 Oreo cookies any classic flavor
- 8 oz cream cheese softened
For the Candy Coating & Decoration:
- 12 oz white candy melts
- 6 oz orange candy melts
- 6 oz black candy melts
- Sprinkles or edible decorations optional
- Lollipop sticks
Instructions
Step 1: Crush the Oreos
- Place all 24 Oreo cookies in a food processor. Pulse until they become fine crumbs.
- Pro tip: If you don’t have a food processor, place Oreos in a sealed plastic bag and crush them with a rolling pin. Make sure there are no large chunks left for smooth, uniform cake balls.
- Pour the crumbs into a large mixing bowl.
Step 2: Mix with Cream Cheese
- Add the softened 8 oz of cream cheese to the Oreo crumbs.
- Use a spatula or your hands to mix until fully combined and a sticky dough forms.
- Pro tip: Don’t overmix or the mixture can get too soft. Stop once everything is evenly combined.
Step 3: Form the Cake Balls
- Scoop out small portions of the mixture (about 1–1.5 tablespoons each).
- Roll each portion into a smooth ball between your palms.
- Place each ball on a baking sheet lined with parchment paper.
- Chill in the freezer for at least 15–20 minutes so they firm up.
Step 4: Prepare the Candy Coating
- Melt white candy melts in a microwave-safe bowl, stirring every 30 seconds until smooth.
- Do the same for orange and black candy melts in separate bowls if you plan to decorate with multiple colors.
- Pro tip: Add a tiny bit of vegetable oil to candy melts if they feel too thick; this helps with a smoother dip.
Step 5: Insert Sticks and Dip
- Dip the tip of a lollipop stick into the melted white candy, then insert it halfway into a chilled cake ball. This helps the stick stay in place.
- Dip the cake ball into the candy melt, gently tapping off any excess.
- Place the dipped cake pop back on the parchment-lined baking sheet.
Step 6: Decorate
- Use the orange and black candy melts to drizzle or create spooky designs like ghosts, pumpkins, or spider webs.
- Add sprinkles or edible decorations while the candy coating is still wet.
- Pro tip: Work quickly—the coating sets fast, so have your decorations ready before dipping.
Step 7: Let Them Set
- Allow the cake pops to sit at room temperature or in the fridge until fully hardened.
- Once set, they’re ready to display, serve, or gift!
Notes
Nutritional Value (Per 1 cake pop)
- Calories: ~160
- Carbohydrates: ~18g
- Protein: ~2g
- Fat: ~9g
- Sugar: ~13g
- Fiber: ~1g
- Sodium: ~95mg