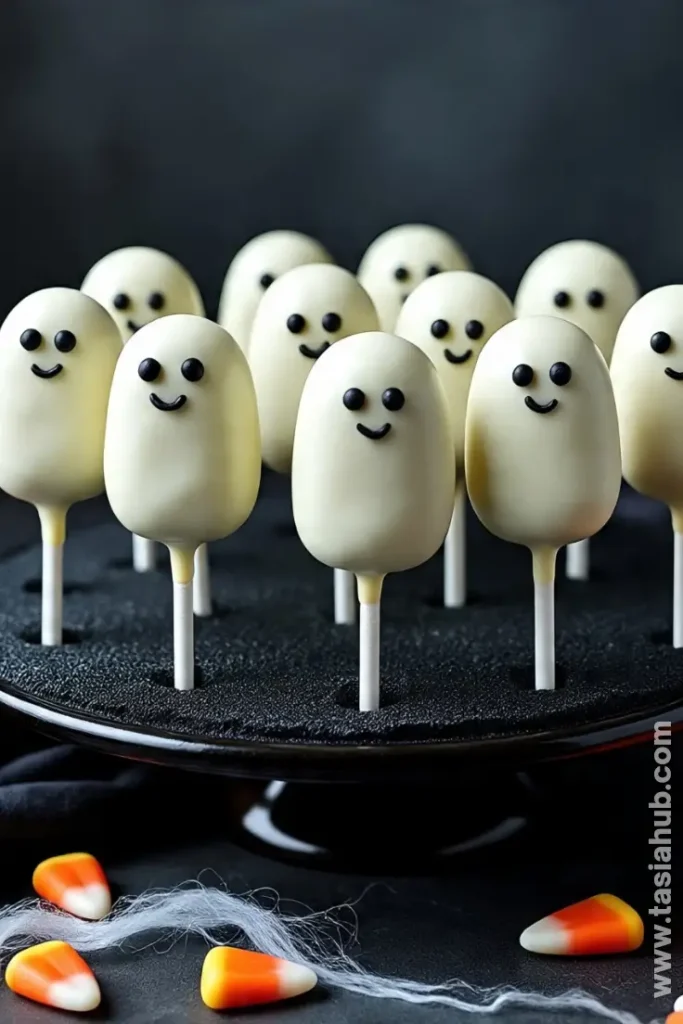
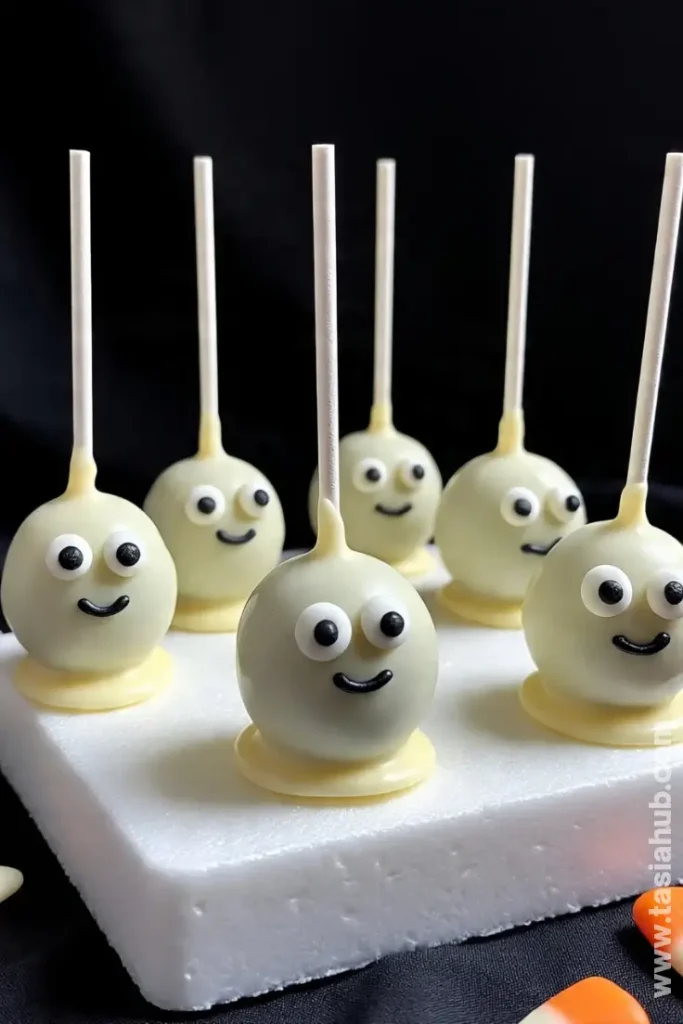
Halloween Ghost Cake Pops
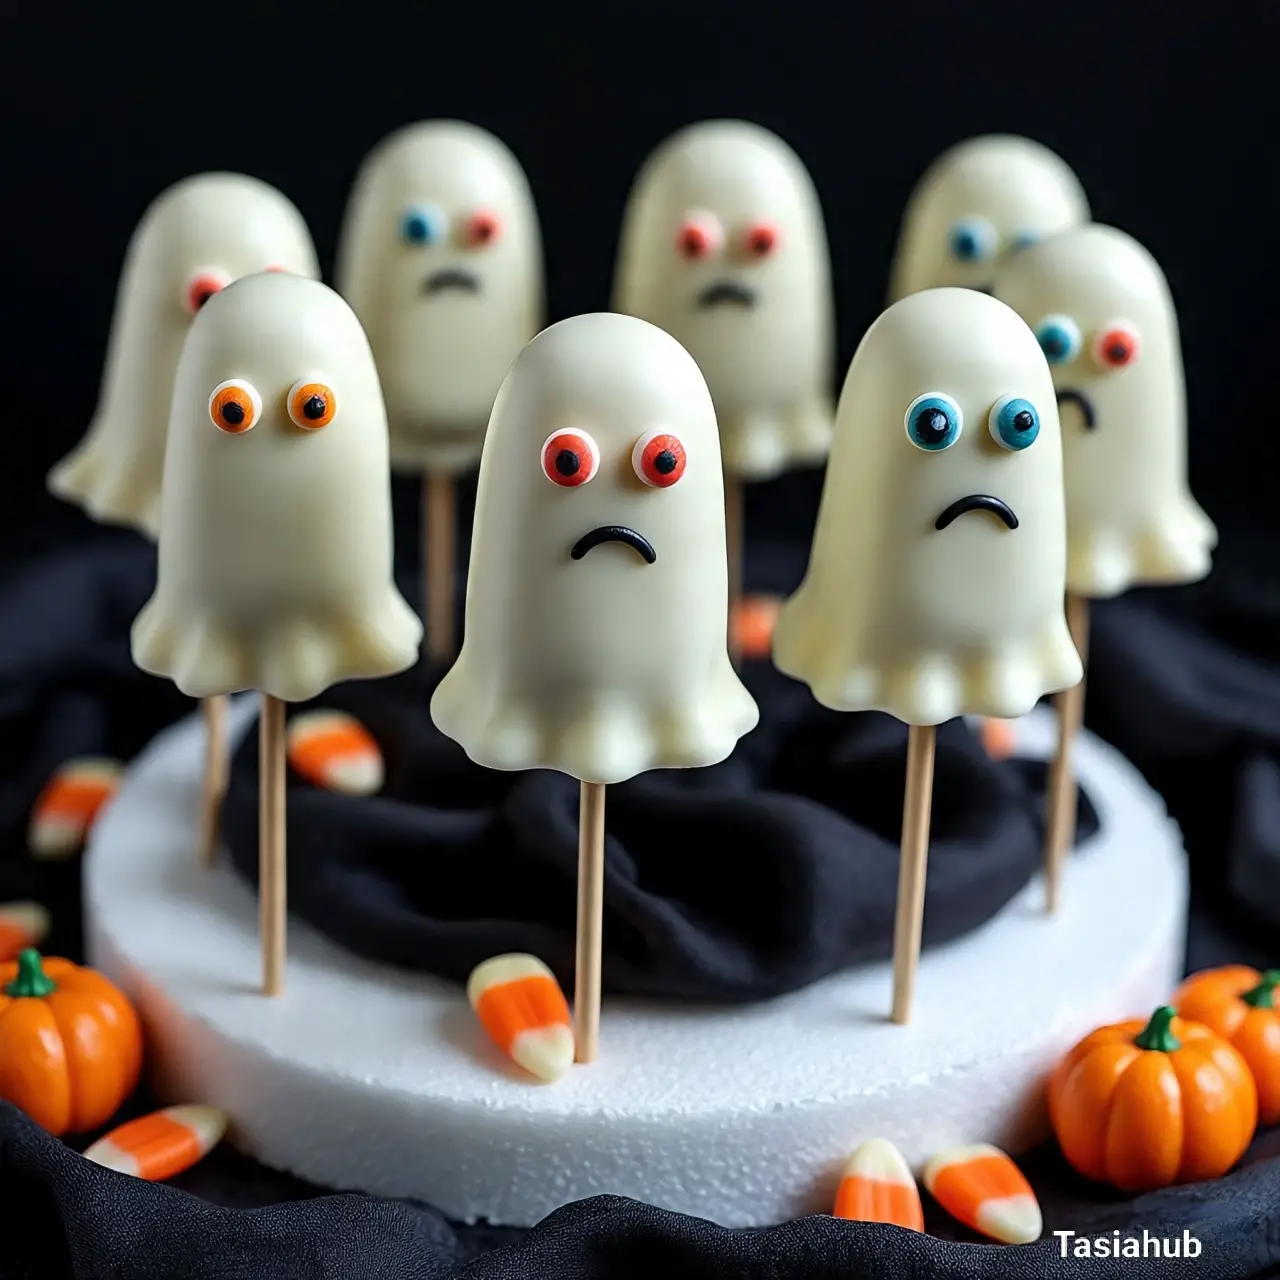
Halloween is the perfect excuse to get a little creative in the kitchen, and these Halloween ghost cake pops are a delight for both kids and adults alike. Picture tiny, spooky little ghosts perched on sticks, ready to haunt your dessert table in the cutest way possible. The best part? They’re surprisingly easy to make, even if you don’t consider yourself a baking pro.
I love how Halloween cake pops instantly bring a festive vibe to any party. You can dip them in white chocolate, add candy eyes, and maybe even a little drizzle of dark chocolate for extra personality. These ghost cake pops are not just adorable—they’re also packed with flavor, combining moist cake crumbs with creamy frosting to create a bite-sized treat that everyone will love.
One of the things I enjoy most about making Halloween cake balls is experimenting with fun designs. From classic ghosts to colorful, spooky cake pops, the possibilities are endless. You can really let your imagination run wild. I’ve tried so many Halloween cake pops ideas over the years, and these ghost-shaped treats have become a fast favorite because they’re simple but still super festive.
If you’re planning a Halloween party or just want a sweet treat to celebrate the season, these ghost cake pops are an absolute must. They’re playful, easy to share, and a creative twist on traditional Halloween desserts. Plus, they make the perfect centerpiece for a Halloween dessert table—you’ll get as many compliments on them as you do on the costumes!
Why You’ll Love It
- Cute and Festive: These ghost cake pops instantly add a playful Halloween vibe to any table. I love how just a few candy eyes and a white chocolate coating can turn simple cake crumbs into spooky little characters that everyone can’t stop talking about.
- Bite-Sized Fun: There’s something magical about having a dessert you can eat in one or two bites. These Halloween cake balls are perfectly portioned, making them ideal for parties, classroom treats, or even an afternoon snack with a spooky twist.
- Customizable Creations: You can get creative with colors, shapes, and decorations. From traditional ghost designs to glow-in-the-dark inspired cake pops, Halloween cake pops ideas are endless. Each batch can be completely unique!
- Kid-Friendly Activity: Making these ghost cake pops is just as fun as eating them. Kids can help roll the cake balls, dip them in chocolate, and stick on the eyes—turning a simple baking session into a memorable Halloween activity.
- Deliciously Moist: Beyond the cute factor, the combination of cake and frosting creates a rich, moist texture that’s truly satisfying. These ghost cake pops aren’t just pretty—they taste incredible too, making them one of the best Halloween desserts around.
Ingredient List
For the Cake Pops:
- 2 cups vanilla cake, crumbled (homemade or boxed)
- 1/2 cup cream cheese frosting (or any favorite frosting)
- 1 teaspoon vanilla extract
For the Coating and Decoration:
- 12 oz white chocolate melts or candy melts
- Candy eyes (small, store-bought)
- Black decorating gel or melted dark chocolate for mouths
Ingredient Notes
- I always use good-quality white chocolate melts—it makes dipping so smooth and shiny.
- Don’t skip the cream cheese frosting! It keeps the cake pops perfectly moist and easy to shape.
- Vanilla extract adds just a touch of warmth and depth—totally worth it.
- Candy eyes are optional, but they instantly turn your cake balls into spooky little ghosts.
- If you want the chocolate coating to be extra smooth, microwave in short bursts and stir between each burst—it makes a huge difference.
Kitchen Equipment Needed
- Mixing bowls – For combining the cake crumbs and frosting. I love using glass bowls because they’re easy to see into and clean.
- Spatula or spoon – To gently fold everything together without squishing the cake too much.
- Baking sheet – For placing the shaped cake balls before dipping. A nonstick one works best.
- Parchment paper – Keeps your cake pops from sticking and makes cleanup a breeze.
- Microwave-safe bowl or double boiler – For melting the white chocolate. I usually go with a microwave-safe bowl for speed.
- Lollipop sticks – To turn your cake balls into classic cake pops. I like sturdy ones that don’t bend.
- Toothpicks (optional) – Helpful for adding details or fixing small decorations.
- Cooling rack (optional) – Great for letting excess chocolate drip off and harden evenly.
Instructions
Step 1: Prepare the Cake Base
- Crumble your vanilla cake into a large mixing bowl. Make sure there are no large chunks—tiny crumbs help the pops stick together better.
- Add 1/2 cup cream cheese frosting and 1 teaspoon vanilla extract to the crumbs.
- Gently fold the frosting into the cake using a spatula until everything comes together like a dough.
Pro Tip: Don’t overmix! You want the mixture to be sticky, not mushy.
Step 2: Shape the Ghosts
- Scoop about 2 tablespoons of the cake mixture.
- Roll it gently into a ball, then taper the bottom slightly so it has a ghost-like shape.
- Place each shaped cake ball on a baking sheet lined with parchment paper.
Pro Tip: If the mixture is too soft to hold shape, chill it in the fridge for 10–15 minutes.
Step 3: Insert the Sticks
- Melt a small amount of white chocolate or use a dab of frosting.
- Dip the tip of a lollipop stick into the chocolate/frosting.
- Insert it halfway into each cake ball, twisting slightly to secure.
Pro Tip: This little trick helps the stick stay in place while dipping.
Step 4: Melt the Chocolate Coating
- Place your white chocolate melts in a microwave-safe bowl.
- Microwave in 30-second intervals, stirring each time until smooth.
Pro Tip: Whisk continuously to prevent lumps and make the coating shiny.
Step 5: Dip the Ghosts
- Hold a cake pop by the stick and dip it into the melted white chocolate, covering completely.
- Gently tap off excess chocolate.
- Place the dipped ghost back on parchment paper to set.
Pro Tip: If chocolate is too thick, stir in a teaspoon of vegetable oil to thin it slightly for smoother coverage.
Step 6: Add Eyes and Mouths
- While the chocolate is still soft, press candy eyes gently onto each ghost.
- Use black decorating gel or melted dark chocolate to draw tiny mouths.
- Let the cake pops sit until chocolate hardens completely—about 20–30 minutes.
Tips and Tricks for Success
- Chill the cake mixture – If your cake balls feel too soft, pop them in the fridge for 10–15 minutes before shaping. It makes dipping much easier.
- Use room-temperature chocolate – Cold chocolate can clump and crack, so make sure it’s smooth and glossy for a perfect coating.
- Work quickly when decorating – Add eyes and mouths while the coating is still soft for the best stick.
- Keep a damp paper towel handy – Wipe your fingers or sticks between dips to prevent smudges.
- Store properly – Keep your ghost cake pops in an airtight container at room temperature for up to 3 days, or refrigerate for longer.
Ingredient Substitutions and Variations
- Cake base: Use chocolate, pumpkin spice, or red velvet cake instead of vanilla for a festive twist.
- Frosting: Cream cheese can be swapped with buttercream or even marshmallow fluff for a sweeter option.
- Chocolate coating: White chocolate can be replaced with colored candy melts to create fun, colorful ghosts or other spooky shapes.
- Decorations: Skip candy eyes and draw faces entirely with decorating gel for a minimalist ghost look.
- Flavor add-ins: Stir in a pinch of cinnamon or pumpkin spice to the cake mixture for extra seasonal flavor.
Serving Suggestions
- I love arranging these ghost cake pops in a decorative Halloween mug or jar—it makes them feel like a fun centerpiece and doubles as easy party snacks.
- Pair them with a warm cup of spiced hot chocolate for a cozy, festive treat. The sweetness of the cake pops balances the rich cocoa perfectly.
- Serve alongside other Halloween desserts like pumpkin cupcakes or candy corn bark for a full, spooky dessert table.
- Stick a few in a small Halloween-themed favor bag for guests—it’s an easy and adorable party takeaway.
- For a playful twist, create a “haunted ghost forest” by placing cake pops in a foam base with edible green grass or shredded coconut dyed green.
Storage and Reheating Instructions
- Store cake pops in an airtight container at room temperature for up to 3 days.
- For longer storage, refrigerate for up to a week, but bring them to room temperature before serving to maintain the soft, moist texture.
- Avoid microwaving—they’re best enjoyed cold or at room temperature.
- If chocolate coating cracks in storage, gently smooth it with a warm fingertip or small brush of melted chocolate.
- Keep away from direct sunlight or heat to prevent melting or discoloration.
Frequently Asked Questions
How long do Halloween ghost cake pops last?
Stored in an airtight container at room temperature, they last about 3 days. Refrigerated, they can stay fresh up to a week.
Can I make these cake pops ahead of time?
Absolutely! You can shape and chill the cake balls a day in advance, then dip and decorate them the next day for a stress-free Halloween prep.
What if my cake pops fall off the sticks?
Try chilling the shaped cake balls for 10–15 minutes before inserting the sticks and dipping. A small dab of chocolate or frosting on the stick tip also helps hold them in place.
Can I use other types of cake?
Yes! Chocolate, pumpkin spice, or red velvet cakes all work beautifully. Feel free to experiment with flavors for different Halloween cake pops ideas.
How do I make the chocolate coating smooth?
Melt the chocolate slowly and whisk frequently. If it’s too thick, a teaspoon of vegetable oil can thin it out for a silky, glossy finish.
Can kids help make these?
Definitely! Ghost cake pops are fun for little hands. Kids can roll the cake balls, dip them, and even add candy eyes under supervision.
Did you try this recipe? Let me know in the comments how your ghost cake pops turned out—I’d love to hear which spooky designs you created!

Halloween Ghost Cake Pops
Equipment
- Mixing Bowls
- Spatula or spoon
- Baking Sheet
- Parchment paper
- Microwave-safe bowl or double boiler
- Lollipop sticks
- Toothpicks (optional)
- Cooling Rack (optional)
Ingredients
For the Cake Pops:
- 2 cups vanilla cake crumbled (homemade or boxed)
- 1/2 cup cream cheese frosting or any favorite frosting
- 1 teaspoon vanilla extract
For the Coating and Decoration:
- 12 oz white chocolate melts or candy melts
- Candy eyes small, store-bought
- Black decorating gel or melted dark chocolate for mouths
Instructions
Step 1: Prepare the Cake Base
- Crumble your vanilla cake into a large mixing bowl. Make sure there are no large chunks—tiny crumbs help the pops stick together better.
- Add 1/2 cup cream cheese frosting and 1 teaspoon vanilla extract to the crumbs.
- Gently fold the frosting into the cake using a spatula until everything comes together like a dough.
- Pro Tip: Don’t overmix! You want the mixture to be sticky, not mushy.
Step 2: Shape the Ghosts
- Scoop about 2 tablespoons of the cake mixture.
- Roll it gently into a ball, then taper the bottom slightly so it has a ghost-like shape.
- Place each shaped cake ball on a baking sheet lined with parchment paper.
- Pro Tip: If the mixture is too soft to hold shape, chill it in the fridge for 10–15 minutes.
Step 3: Insert the Sticks
- Melt a small amount of white chocolate or use a dab of frosting.
- Dip the tip of a lollipop stick into the chocolate/frosting.
- Insert it halfway into each cake ball, twisting slightly to secure.
- Pro Tip: This little trick helps the stick stay in place while dipping.
Step 4: Melt the Chocolate Coating
- Place your white chocolate melts in a microwave-safe bowl.
- Microwave in 30-second intervals, stirring each time until smooth.
- Pro Tip: Whisk continuously to prevent lumps and make the coating shiny.
Step 5: Dip the Ghosts
- Hold a cake pop by the stick and dip it into the melted white chocolate, covering completely.
- Gently tap off excess chocolate.
- Place the dipped ghost back on parchment paper to set.
- Pro Tip: If chocolate is too thick, stir in a teaspoon of vegetable oil to thin it slightly for smoother coverage.
Step 6: Add Eyes and Mouths
- While the chocolate is still soft, press candy eyes gently onto each ghost.
- Use black decorating gel or melted dark chocolate to draw tiny mouths.
- Let the cake pops sit until chocolate hardens completely—about 20–30 minutes.
Notes
Nutritional Value (per cake pop, approx.)
- Calories: 160
- Carbohydrates: 19g
- Sugars: 15g
- Fat: 8g
- Protein: 2g
- Fiber: 0.5g
- Sodium: 95mg