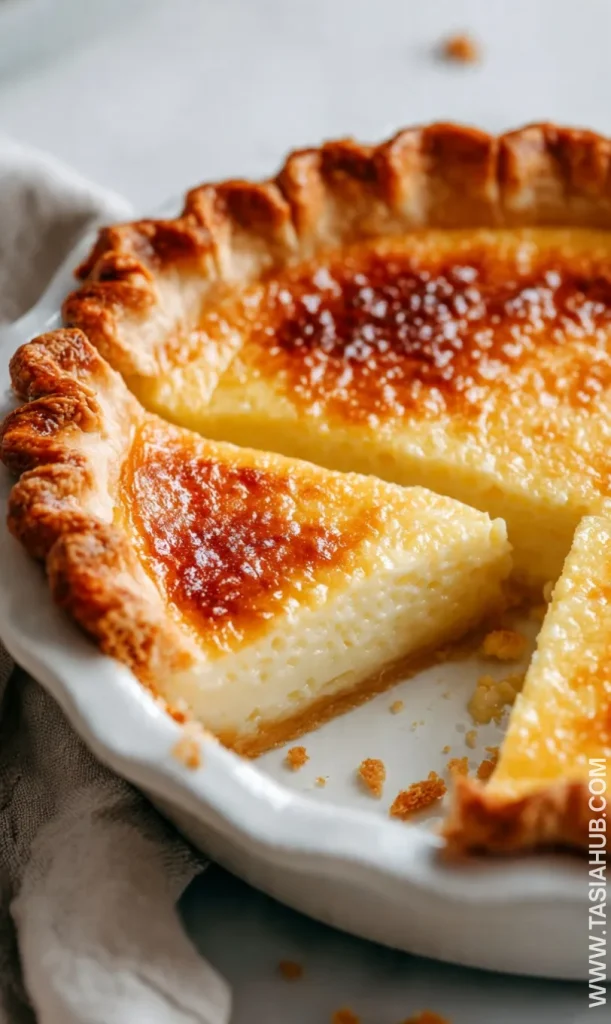
Easy Homemade Pie Crust

Making a pie from scratch can feel like a big undertaking, but starting with the crust doesn’t have to be complicated. In fact, mastering an easy homemade pie crust is one of those kitchen skills that instantly elevates any dessert—or even savory pie. With just a few simple ingredients and a little know-how, you can create a flaky, tender crust that tastes far better than store-bought versions.
I remember the first time I made a homemade crust; I was nervous about handling the dough and worried it would shrink or crack. But once I learned a few tricks, it became surprisingly simple—and kind of fun! The best part is that you can customize it to suit whatever filling you love, whether it’s a sweet fruit pie or a savory quiche.
Learning how to make pie crust is all about understanding the basics: flour, fat, liquid, and a gentle touch. When these elements come together just right, you get a crust that’s buttery, flaky, and golden brown. No fancy tools required, just a rolling pin, a bowl, and a bit of patience.
This DIY pie crust recipe is perfect for beginners and seasoned bakers alike. You can make it ahead of time and even freeze it for later, making it an incredibly versatile base for all kinds of pies. Once you try it, you might find yourself making homemade crust for every pie, big or small, because nothing beats the satisfaction of a perfectly flaky bottom and crisp edges.
Why You’ll Love It
- Flaky and buttery every time – This homemade pie crust comes out tender and perfectly layered, giving you that melt-in-your-mouth texture that makes every bite feel special.
- Totally customizable – You can tweak it for sweet or savory pies, add a touch of sugar for desserts, or a pinch of herbs for quiches. It’s your blank canvas.
- Simple ingredients, big payoff – No need for fancy pantry items. With basic ingredients you probably already have at home, you can whip up a crust that tastes far better than store-bought.
- Make ahead or freeze – One of the best perks of DIY pie crust is its flexibility. Roll it out ahead of time or freeze it for later, so you’re always ready for last-minute baking.
- Satisfying to make – There’s something truly rewarding about rolling out your own dough and seeing it transform into a golden, flaky pie. It’s a small effort that feels like a big accomplishment.
Ingredient List
For the Pie Crust:
- 2 ½ cups all-purpose flour
- 1 tsp salt
- 1 cup (2 sticks) unsalted butter, cold and cubed
- 6–8 tbsp ice water
Ingredient Notes
- Butter: I always use unsalted butter for the best control over flavor—it makes the crust rich and tender.
- Ice Water: Don’t skip the ice water! It keeps the butter cold and helps create those flaky layers we all love.
- Flour: All-purpose works perfectly here; no need for fancy blends. Just make sure it’s fresh.
- Salt: A little pinch brings out the buttery goodness, so don’t leave it out.
Kitchen Equipment Needed
- Mixing bowl – For combining your flour, salt, and butter; I love using a large glass bowl so it’s easy to see everything come together.
- Pastry cutter or fork – To cut the butter into the flour; makes the dough perfectly flaky.
- Measuring cups and spoons – Accuracy matters for a tender crust.
- Rolling pin – For rolling out the dough evenly; I always reach for my classic wooden one.
- Plastic wrap – To chill the dough and keep it from drying out.
- Pie pan – Essential for shaping your crust; I like a simple 9-inch glass pan for even baking.
Instructions
Step 1: Prepare the Ingredients
- Measure out all your ingredients so everything is ready to go.
- Cut the cold butter into small cubes if you haven’t already.
- Keep your ice water nearby; you’ll need it right away.
Pro Tip: Using very cold butter and water is key to a flaky crust. Warm butter will make the dough tough.
Step 2: Mix the Dry Ingredients
- In a large mixing bowl, combine the flour and salt.
- Give it a quick whisk to evenly distribute the salt.
- Make a small well in the center for the butter.
Step 3: Cut in the Butter
- Add the cold butter cubes into the flour.
- Using a pastry cutter or fork, cut the butter into the flour until the mixture resembles coarse crumbs with pea-sized pieces of butter.
Pro Tip: Don’t overmix! You want some chunks of butter to create that flaky texture.
Step 4: Add the Ice Water
- Sprinkle 1 tablespoon of ice water over the flour-butter mixture at a time.
- Gently mix with a fork or your hands after each addition until the dough just comes together.
- Stop adding water once the dough holds together without being sticky.
Pro Tip: If it feels too dry, add a tiny bit more water, one teaspoon at a time.
Step 5: Form the Dough
- Gather the dough into a ball, then gently flatten it into a disk.
- Wrap the disk in plastic wrap.
- Chill in the refrigerator for at least 1 hour before rolling.
Pro Tip: Chilling prevents shrinkage during baking and makes the dough easier to handle.
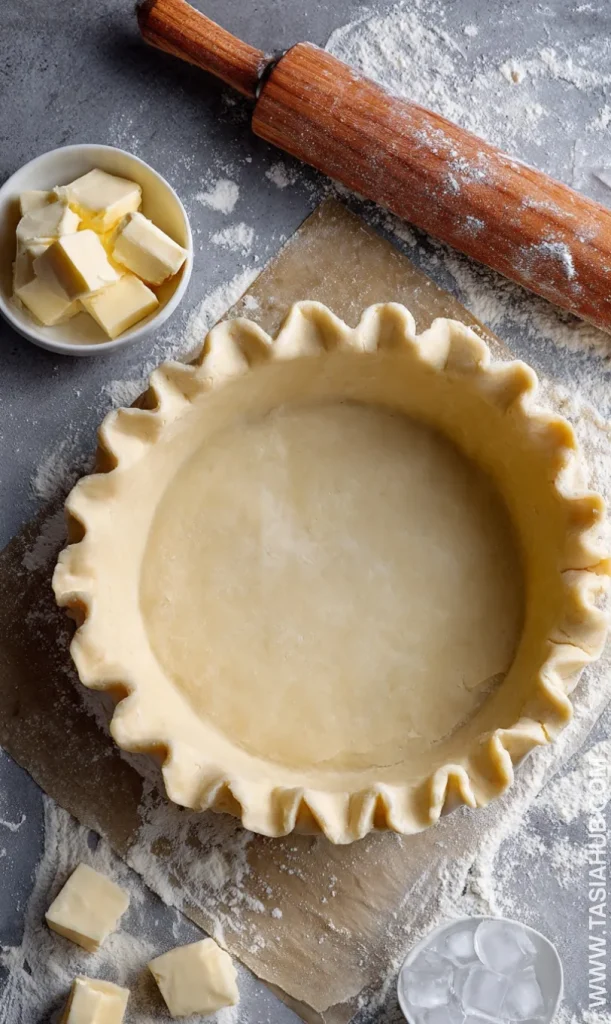
Step 6: Roll Out the Dough
- Lightly flour your surface and rolling pin.
- Roll the dough from the center outward, turning occasionally, until it’s about 12 inches in diameter for a 9-inch pie pan.
- Carefully transfer the dough to your pie pan and gently press it into place.
- Trim any excess dough and crimp the edges as desired.
Step 7: Blind Bake or Fill
- If your recipe calls for blind baking, poke the bottom with a fork and line with parchment paper and pie weights. Bake as directed.
- Otherwise, fill with your favorite pie filling and bake according to your recipe instructions.
Tips and Tricks for Success
- Keep everything cold – Butter, water, even your mixing bowl if possible. Cold ingredients = flaky crust.
- Don’t overwork the dough – Handle it gently to avoid a tough crust.
- Chill before rolling – Refrigerating the dough makes it easier to roll and reduces shrinkage.
- Flour lightly when rolling – Too much flour can dry out the crust; just dust enough to prevent sticking.
- Use a gentle touch with edges – Crimping or pressing too hard can make the edges dense; be light and even.
Ingredient Substitutions and Variations
- Butter substitute – You can use half butter and half shortening for an extra tender crust.
- Whole wheat flour – Swap ½ the all-purpose flour for whole wheat for a nuttier flavor.
- Gluten-free option – Use a gluten-free flour blend and add a touch more water if needed.
- Flavor boosts – Add 1–2 tsp sugar to the dough for a slightly sweet crust, or a pinch of cinnamon for autumn pies.
- Herb variation – Mix in finely chopped fresh herbs for savory pies, like rosemary or thyme.
Storage and Reheating Instructions
- Refrigerate baked pies – Store in an airtight container for up to 3–4 days.
- Freeze unbaked dough – Wrap tightly in plastic wrap and freeze for up to 2 months; thaw in the fridge before rolling.
- Freeze baked pies – Cool completely, then wrap in foil or plastic; freeze up to 2 months.
- Reheat slices – Warm individual slices in the microwave for 20–30 seconds or in the oven at 350°F (175°C) for 10–15 minutes.
- Re-crisp the crust – If your crust softens, pop it in a preheated oven at 350°F for 5–10 minutes to restore flakiness.
Frequently Asked Questions
How long can I keep homemade pie crust in the fridge?
You can store unbaked dough in the fridge for up to 2 days. Just keep it tightly wrapped in plastic to prevent it from drying out.
Can I make pie crust ahead of time?
Absolutely! You can make the dough and freeze it for up to 2 months. Thaw in the fridge before rolling it out.
Why is my pie crust tough?
Usually, it’s from overworking the dough or using warm butter. Handle the dough gently and keep ingredients cold for a tender, flaky crust.
Can I use a food processor to make the dough?
Yes! Pulse the flour and butter until pea-sized crumbs form, then add ice water gradually. It’s a quick way to make homemade crust without a lot of hands-on work.
How do I prevent the crust from shrinking?
Chill the dough before baking, avoid stretching it too much, and let it rest in the pan for a few minutes before baking.
Can I use this crust for savory pies?
Definitely! This homemade crust is versatile and works perfectly for quiches, pot pies, and other savory recipes.
Did you try this recipe? Let me know in the comments how it turned out!

Easy Homemade Pie Crust
Equipment
- Mixing Bowl
- Pastry cutter or fork
- Measuring cups and spoons
- Rolling Pin
- Plastic wrap
- Pie pan
Ingredients
For the Pie Crust:
- 2 ½ cups all-purpose flour
- 1 tsp salt
- 1 cup 2 sticks unsalted butter, cold and cubed
- 6 –8 tbsp ice water
Instructions
Step 1: Prepare the Ingredients
- Measure out all your ingredients so everything is ready to go.
- Cut the cold butter into small cubes if you haven’t already.
- Keep your ice water nearby; you’ll need it right away.
- Pro Tip: Using very cold butter and water is key to a flaky crust. Warm butter will make the dough tough.
Step 2: Mix the Dry Ingredients
- In a large mixing bowl, combine the flour and salt.
- Give it a quick whisk to evenly distribute the salt.
- Make a small well in the center for the butter.
Step 3: Cut in the Butter
- Add the cold butter cubes into the flour.
- Using a pastry cutter or fork, cut the butter into the flour until the mixture resembles coarse crumbs with pea-sized pieces of butter.
- Pro Tip: Don’t overmix! You want some chunks of butter to create that flaky texture.
Step 4: Add the Ice Water
- Sprinkle 1 tablespoon of ice water over the flour-butter mixture at a time.
- Gently mix with a fork or your hands after each addition until the dough just comes together.
- Stop adding water once the dough holds together without being sticky.
- Pro Tip: If it feels too dry, add a tiny bit more water, one teaspoon at a time.
Step 5: Form the Dough
- Gather the dough into a ball, then gently flatten it into a disk.
- Wrap the disk in plastic wrap.
- Chill in the refrigerator for at least 1 hour before rolling.
- Pro Tip: Chilling prevents shrinkage during baking and makes the dough easier to handle.
Step 6: Roll Out the Dough
- Lightly flour your surface and rolling pin.
- Roll the dough from the center outward, turning occasionally, until it’s about 12 inches in diameter for a 9-inch pie pan.
- Carefully transfer the dough to your pie pan and gently press it into place.
- Trim any excess dough and crimp the edges as desired.
Step 7: Blind Bake or Fill
- If your recipe calls for blind baking, poke the bottom with a fork and line with parchment paper and pie weights. Bake as directed.
- Otherwise, fill with your favorite pie filling and bake according to your recipe instructions.
Notes
Nutritional Value (Per Serving — based on 8 servings)
- Calories: ~245
- Fat: 17g
- Saturated Fat: 10g
- Carbohydrates: 20g
- Protein: 2g
- Fiber: 1g
- Sugar: 0g
- Sodium: 145mg