Dried Tart Cherry Granola

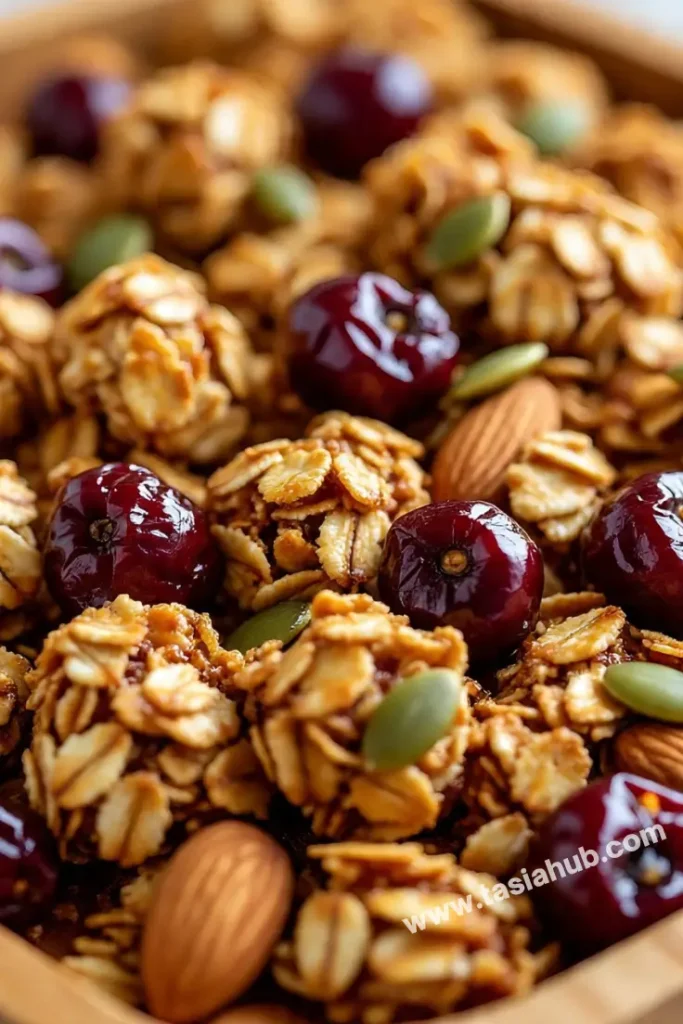
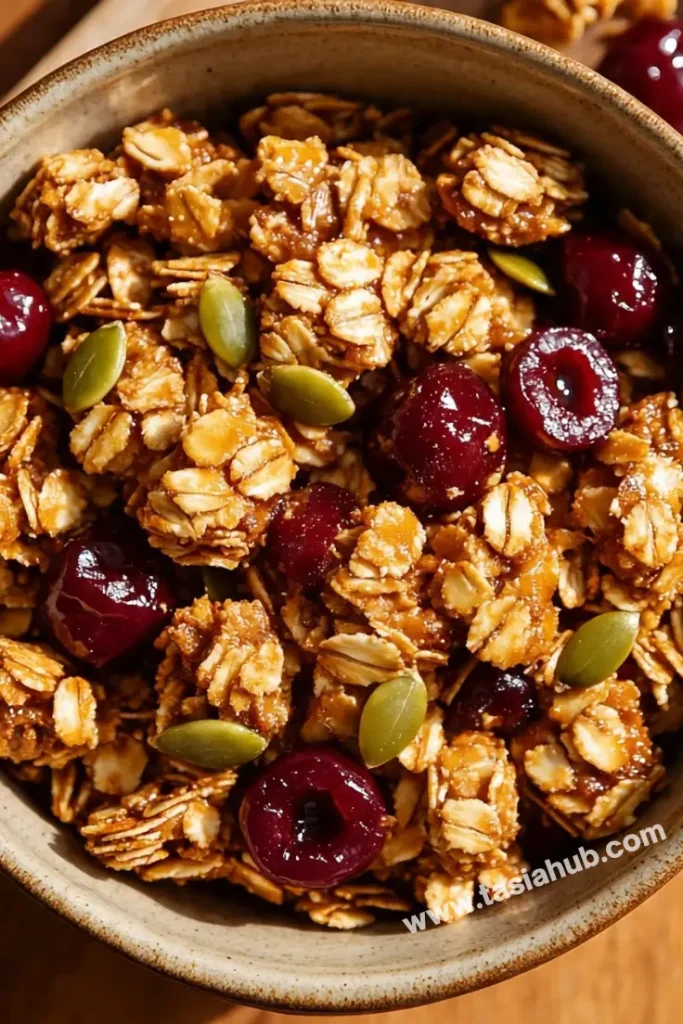
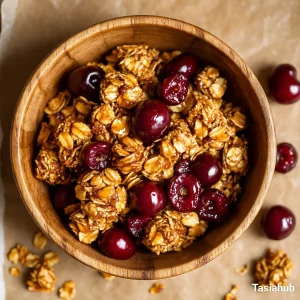
There are few things as satisfying as a crunchy, slightly sweet, slightly tart granola that actually makes you look forward to breakfast—or snack time. That’s exactly what dried tart cherry granola brings to the table. It’s a cozy mix of oats, nuts, seeds, and those beautifully chewy, slightly tangy dried cherries that wake up your taste buds in the best way. Whether you’re layering it over yogurt, pouring milk over it, or grabbing handfuls straight from the jar, this granola is endlessly versatile.
I first started making my own granola because store-bought versions were either way too sweet or missing that punchy flavor I love. Enter dried tart cherries. They’re not overly sugary like raisins or overly sour like some citrusy dried fruits—they’re just the right balance. Plus, they add this gorgeous pop of deep red color that makes the whole batch look a little extra special. I now keep a jar of this granola in the pantry pretty much at all times.
Another bonus? Making granola at home is so easy, and once you try it, it’s hard to go back. You get full control over the ingredients—swap out nuts, add in your favorite extras, dial the sweetness up or down—it’s totally customizable. And when it’s baking? The smell that fills the kitchen is reason enough to whip up a batch.
If you’ve never tried dried tart cherries in granola before, this recipe is your sign. It’s crisp, toasty, and full of those bold cherry bursts that take an everyday breakfast and make it feel just a little indulgent.
Why You’ll Love It
- The perfect sweet-tart balance – Dried tart cherries add just the right amount of tang to balance the sweetness of honey or maple syrup, making each bite pop with flavor.
- Crunchy, chewy texture combo – You get the best of both worlds: golden, toasty clusters of oats and nuts paired with chewy bursts of cherry goodness.
- Easy to make and meal prep-friendly – This granola comes together in one bowl and bakes in under 30 minutes. It stores well for weeks, making it a great grab-and-go breakfast or snack.
- Naturally customizable – You can swap the nuts, sweetener, or even add extras like dark chocolate chunks, shredded coconut, or flaxseeds to suit your preferences.
- Better than store-bought – No mystery ingredients or overly processed sugars—just wholesome, pantry staples you can feel good about.
Ingredient List
Dry Ingredients:
- 3 cups old-fashioned rolled oats
- 1 cup raw almonds, chopped
- ½ cup pumpkin seeds (pepitas)
- 1 cup dried tart cherries
- 1 tsp cinnamon
- ½ tsp salt
Wet Ingredients:
- ⅓ cup coconut oil (melted)
- ⅓ cup honey or maple syrup
- 1 tsp vanilla extract
Ingredient Notes
- Old-fashioned oats – Stick to rolled oats, not quick oats or steel-cut. They give the best crunch and hold their shape well.
- Raw almonds – I like to give them a rough chop so they distribute evenly throughout the granola. Toasted almonds also work if that’s what you have on hand.
- Pumpkin seeds (pepitas) – These add a subtle nuttiness and a nice green pop of color. You can swap with sunflower seeds if preferred.
- Dried tart cherries – I always use unsweetened Montmorency cherries for that bold, tangy flavor. Sweetened ones work too—just reduce the added sweetener slightly.
- Coconut oil – It helps the granola crisp up without overpowering the flavor. Olive oil can be used as a substitute.
- Honey or maple syrup – Both work beautifully; honey gives a stickier cluster, while maple syrup adds a richer depth. Use what you love!
Kitchen Equipment Needed
- Large mixing bowl – For combining all the oats, nuts, and wet ingredients. I love using a wide ceramic bowl for easier mixing.
- Silicone spatula or wooden spoon – Great for stirring everything together and spreading the granola on the pan without sticking.
- Rimmed baking sheet – Keeps everything contained while baking. I prefer using a half-sheet pan for even roasting.
- Parchment paper – Prevents sticking and makes cleanup way easier.
- Airtight storage jar or container – For keeping your granola fresh and crunchy. I’m a fan of large glass jars with clamp lids—they look cute on the counter, too!
Instructions
Step 1: Preheat your oven and prep the pan
- Preheat your oven to 325°F (163°C)—a moderate temperature helps the granola toast evenly without burning.
- Line a rimmed baking sheet with parchment paper to prevent sticking and make cleanup a breeze.
- Set the tray aside while you prep the granola mix.
Step 2: Combine the dry ingredients
- In a large mixing bowl, add:
- 3 cups rolled oats
- 1 cup chopped raw almonds
- ½ cup pumpkin seeds
- 1 tsp cinnamon
- ½ tsp salt
- Stir together with a wooden spoon or silicone spatula until everything is evenly distributed.
Pro Tip: If you like big clusters in your granola, avoid overmixing later when adding the wet ingredients—gentle folding helps!
Step 3: Mix the wet ingredients
- In a smaller bowl or measuring cup, whisk together:
- ⅓ cup melted coconut oil
- ⅓ cup honey or maple syrup
- 1 tsp vanilla extract
- Mix until fully blended and smooth—this helps coat the dry ingredients evenly.
Pro Tip: If your honey is thick, warm it slightly in the microwave (10–15 seconds) so it mixes more easily.
Step 4: Combine wet and dry
- Pour the wet mixture over the dry ingredients.
- Gently fold and stir using a spatula until everything is lightly coated—every oat and nut should have some shine to it.
Pro Tip: Press down gently with the spatula once mixed. This helps form clusters while baking.
Step 5: Bake until golden and crisp
- Spread the mixture evenly onto your prepared baking sheet.
- Pat it down gently with the back of your spatula into an even layer—try not to leave big gaps.
- Bake for 20 minutes, then remove from the oven, stir gently (especially around the edges), and press flat again.
- Bake for another 10–15 minutes, or until golden brown and fragrant.
Pro Tip: Granola crisps up as it cools, so don’t worry if it still feels a bit soft straight from the oven.
Step 6: Cool and add the cherries
- Let the granola cool completely on the pan—this can take 30–40 minutes.
- Once cooled, sprinkle in the dried tart cherries and mix gently to combine.
Pro Tip: Wait until the granola is fully cool before adding the cherries. This keeps them chewy and prevents them from drying out more or turning hard.
Step 7: Store and enjoy
- Transfer the cooled granola to an airtight jar or container.
- Store at room temperature for up to 2–3 weeks (though it rarely lasts that long around here!).
Now it’s ready for snacking, breakfast, or sprinkling on everything from yogurt bowls to baked apples!
Tips and Tricks for Success
- Use parchment paper for easy cleanup – It also helps prevent the granola from sticking and breaking apart when you remove it.
- Press the granola before baking and after stirring – This encourages those dreamy clusters to form instead of a loose, crumbly mix.
- Let it cool completely before touching – Don’t stir too early! Granola hardens as it cools and holds its shape better if left undisturbed.
- Chop your nuts to a similar size – This helps everything toast evenly and ensures you don’t get big bites of just one thing.
- Taste and adjust sweetness before baking – Want it sweeter? Drizzle a touch more honey or maple before it goes in the oven.
Ingredient Substitutions and Variations
- Swap almonds for walnuts, pecans, or cashews – Use your favorite or mix a few together for extra texture and flavor.
- Use sunflower seeds instead of pumpkin seeds – Great for those with nut allergies or if you just want to switch it up.
- Try cranberries or golden raisins instead of tart cherries – If you don’t have dried cherries, other dried fruits work too—just keep the tangy-sweet profile.
- Add shredded coconut or chia seeds – For extra texture, healthy fats, and a subtle tropical vibe.
- Mix in dark chocolate chunks after cooling – A little indulgence goes a long way, especially for snacky versions.
- Use olive oil instead of coconut oil – For a more savory, Mediterranean twist—it adds a unique depth without overwhelming the flavor.
Serving Suggestions
- Sprinkled over Greek yogurt with fresh berries – This is one of my go-to breakfasts! The creamy yogurt + crunchy granola + juicy berries = perfect bite every time.
- As a cereal with cold milk or a splash of oat milk – It’s simple, fast, and never gets boring thanks to those tart cherry pops.
- Layered in a parfait – I love making granola parfaits with layers of vanilla yogurt, sliced bananas, and a drizzle of honey. Great for brunch or meal prep!
- Topped on smoothie bowls – Adds crunch and staying power to any smoothie bowl. I especially love it over a cherry-banana combo.
- Eaten straight from the jar – Not even gonna lie, I do this all the time. It’s the ultimate snack when I need something crunchy and satisfying.
Storage and Reheating Instructions
- Store in an airtight jar or container – Keeps the granola fresh and crunchy for up to 2–3 weeks.
- Keep it in a cool, dry pantry – Avoid moisture and heat so it stays crisp.
- For longer storage, freeze it – Pop it in a freezer-safe bag and store for up to 3 months. Let it sit at room temperature for 15 minutes before serving.
- If it loses crunch, re-crisp in the oven – Spread it on a baking sheet and bake at 300°F (150°C) for 5–7 minutes, then cool completely. Good as new!
Frequently Asked Questions
Can I use quick oats instead of rolled oats?
Quick oats will technically work, but they create a softer, less crunchy granola. For that classic texture and nice clusters, stick with old-fashioned rolled oats if you can.
What’s the best way to get big granola clusters?
Gently press the granola into an even layer before and after stirring during baking. Then, don’t stir at all while it cools—this lets it harden into clusters naturally.
Are dried tart cherries and sweet cherries the same?
Not quite! Dried tart cherries (like Montmorency) have that tangy punch that balances the sweetness of the granola. Sweet cherries are milder and a little more sugary. Either works, but the tart ones really shine here.
Can I make this granola nut-free?
Yes! Just swap the almonds for more seeds like pumpkin or sunflower seeds, or try coconut flakes for crunch. It’s still delicious and allergen-friendly.
How long does homemade granola last?
When stored properly in an airtight container, it stays fresh and crunchy for up to 3 weeks. For even longer storage, freeze it for up to 3 months.
Is this recipe vegan?
It can be! Just use maple syrup instead of honey, and you’re good to go.
Did you try this recipe? Let me know in the comments how it turned out!
Don’t forget to share your photos on Instagram and tag me @tasiahub_ or use the hashtag #tasiahub. I’d love to see your creations!
Dried Tart Cherry Granola
Equipment
- Large mixing bowl
- Silicone Spatula or Wooden Spoon
- Rimmed baking sheet
- Parchment paper
- Airtight storage jar or container
Ingredients
Dry Ingredients:
- 3 cups old-fashioned rolled oats
- 1 cup raw almonds chopped
- ½ cup pumpkin seeds pepitas
- 1 cup dried tart cherries
- 1 tsp cinnamon
- ½ tsp salt
Wet Ingredients:
- ⅓ cup coconut oil melted
- ⅓ cup honey or maple syrup
- 1 tsp vanilla extract
Instructions
Step 1: Preheat your oven and prep the pan
- Preheat your oven to 325°F (163°C)—a moderate temperature helps the granola toast evenly without burning.
- Line a rimmed baking sheet with parchment paper to prevent sticking and make cleanup a breeze.
- Set the tray aside while you prep the granola mix.
Step 2: Combine the dry ingredients
- In a large mixing bowl, add:
- 3 cups rolled oats
- 1 cup chopped raw almonds
- ½ cup pumpkin seeds
- 1 tsp cinnamon
- ½ tsp salt
- Stir together with a wooden spoon or silicone spatula until everything is evenly distributed.
- Pro Tip: If you like big clusters in your granola, avoid overmixing later when adding the wet ingredients—gentle folding helps!
Step 3: Mix the wet ingredients
- In a smaller bowl or measuring cup, whisk together:
- ⅓ cup melted coconut oil
- ⅓ cup honey or maple syrup
- 1 tsp vanilla extract
- Mix until fully blended and smooth—this helps coat the dry ingredients evenly.
- Pro Tip: If your honey is thick, warm it slightly in the microwave (10–15 seconds) so it mixes more easily.
Step 4: Combine wet and dry
- Pour the wet mixture over the dry ingredients.
- Gently fold and stir using a spatula until everything is lightly coated—every oat and nut should have some shine to it.
- Pro Tip: Press down gently with the spatula once mixed. This helps form clusters while baking.
Step 5: Bake until golden and crisp
- Spread the mixture evenly onto your prepared baking sheet.
- Pat it down gently with the back of your spatula into an even layer—try not to leave big gaps.
- Bake for 20 minutes, then remove from the oven, stir gently (especially around the edges), and press flat again.
- Bake for another 10–15 minutes, or until golden brown and fragrant.
- Pro Tip: Granola crisps up as it cools, so don’t worry if it still feels a bit soft straight from the oven.
Step 6: Cool and add the cherries
- Let the granola cool completely on the pan—this can take 30–40 minutes.
- Once cooled, sprinkle in the dried tart cherries and mix gently to combine.
- Pro Tip: Wait until the granola is fully cool before adding the cherries. This keeps them chewy and prevents them from drying out more or turning hard.
Step 7: Store and enjoy
- Transfer the cooled granola to an airtight jar or container.
- Store at room temperature for up to 2–3 weeks (though it rarely lasts that long around here!).
Notes
Nutritional Value (per serving, approx.):
- Calories: 220
- Carbohydrates: 24g
- Protein: 5g
- Fat: 12g
- Fiber: 3g
- Sugar: 9g
- Sodium: 70mg