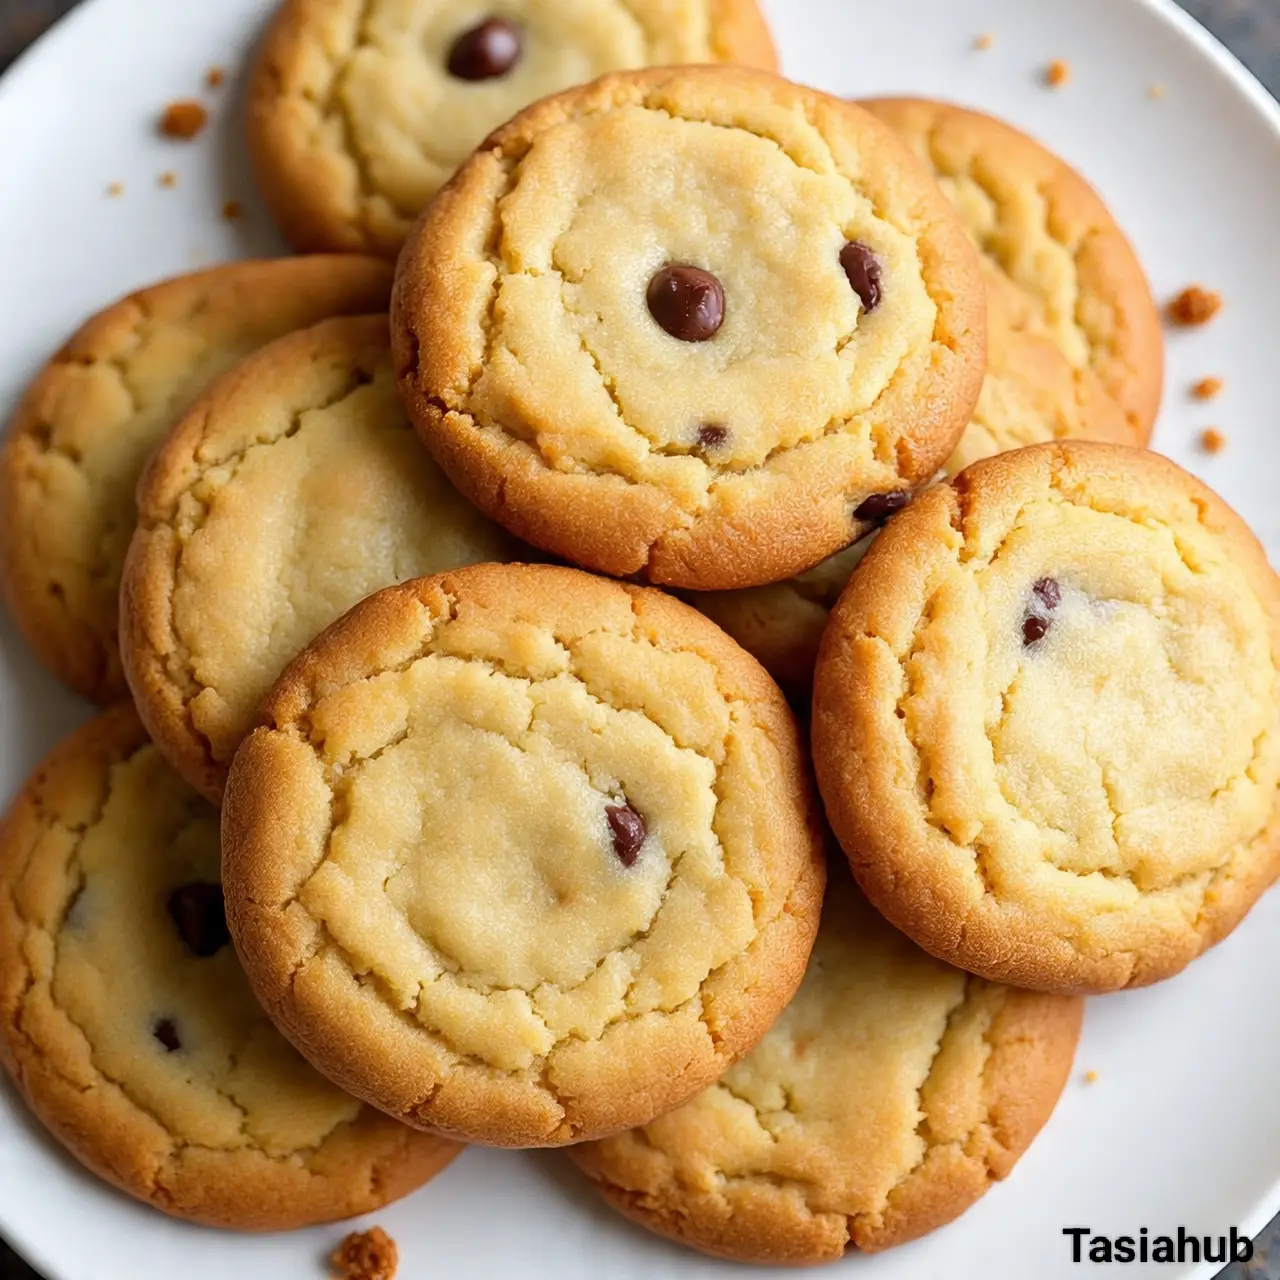
Condensed Milk Cookies
There’s something incredibly nostalgic about the smell of cookies baking in the oven—it instantly makes your kitchen feel like home. And when those cookies are made with sweet, creamy condensed milk? Oh, it’s a whole new level of magic.
Condensed milk cookies are one of those under-the-radar treats that don’t get nearly enough attention, but once you try them, you’ll wonder how you ever lived without them. They’re buttery, soft, and slightly chewy, with just the right touch of sweetness to make you reach for “just one more”—and then another.
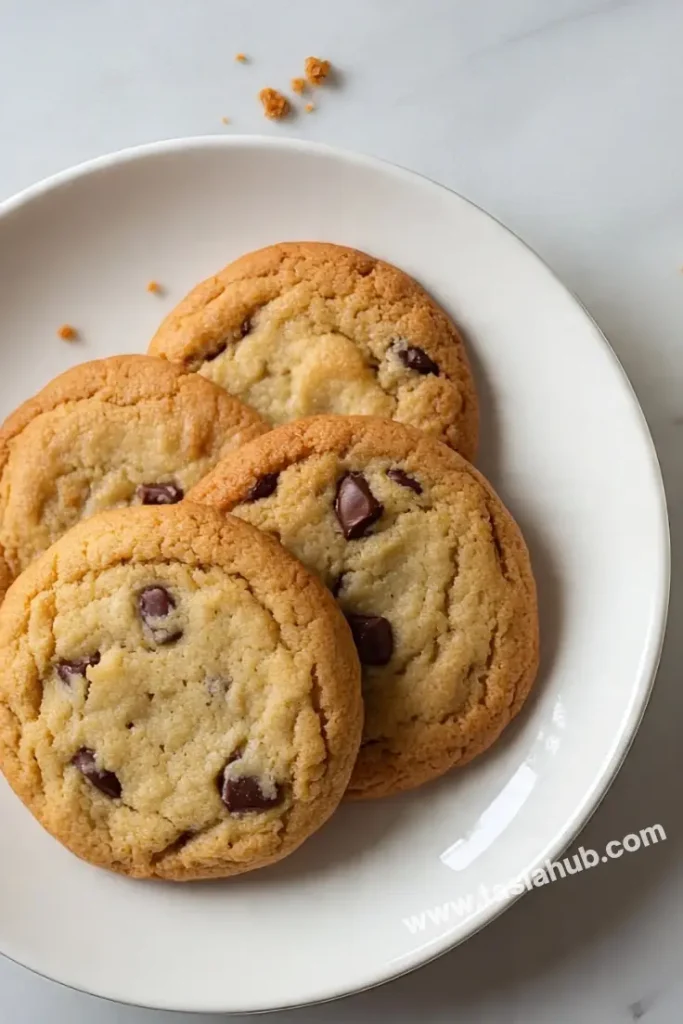
I tried this recipe during one of those “what can I make with what’s in my pantry” moments. I had a half-used can of condensed milk, some flour, and butter—and not much else. After a bit of experimenting and (let’s be honest) some trial and error, these cookies were born. They came out of the oven with a beautiful golden edge, a melt-in-your-mouth texture, and a rich, milky flavor that felt so cozy and satisfying. What I love most is how forgiving and adaptable this recipe is—you can keep it classic or jazz it up with add-ins like chocolate chips, coconut flakes, or a touch of cinnamon.
Another thing I adore about these cookies is how easy they are to make. No fancy mixers or complicated steps—just a simple dough that comes together in minutes. They’re perfect for those spontaneous baking sessions when you want a sweet treat without the fuss. Plus, they store beautifully, so you can keep a stash for tea time, late-night cravings, or to pack in lunchboxes. Honestly, they’re like a warm hug in cookie form.
So whether you’re new to baking or just looking to try something new and delicious, condensed milk cookies are a must. They’re the kind of simple, heartwarming treat that makes everyday moments feel a little more special. Grab a cup of tea or coffee, and let’s talk about how you can whip up a batch of these dreamy cookies today.
Why You’ll Love It
- Super Simple Ingredients – You only need a handful of pantry staples to make these cookies. If you’ve got condensed milk, butter, and flour, you’re already halfway there!
- Quick and Easy – No chilling time, no complicated steps—just mix, scoop, and bake. Perfect for busy days or spontaneous cravings.
- Rich, Buttery Flavor – The condensed milk gives these cookies a soft, melt-in-your-mouth texture with a subtle caramel-like sweetness.
- Customizable – Want to switch things up? Add chocolate chips, nuts, coconut, or even a sprinkle of sea salt on top. It’s a great base recipe you can make your own.
- Perfect for Sharing (or Not!) – These cookies are always a hit with friends and family, but fair warning: you might find yourself keeping the whole batch to yourself.
Ingredient List
- Butter – 1/2 cup (115g), softened
- Sweetened Condensed Milk – 1/2 cup (about 130g)
- All-Purpose Flour – 1 1/4 cups (160g)
- Baking Powder – 1/2 teaspoon
- Vanilla Extract – 1 teaspoon
- Salt – A pinch
Optional Add-ins:
- Chocolate chips – 1/3 cup (50g)
- Shredded coconut – 1/4 cup (25g)
- Chopped nuts – 1/4 cup (30g)
Ingredient Notes
- I always use unsalted butter for better control over saltiness, but salted butter works fine if that’s what you have.
- Don’t skip the baking powder! It helps the cookies rise just enough to stay soft and tender.
- Use good-quality vanilla extract — it really boosts the flavor.
- The condensed milk is key for that chewy, rich texture; don’t substitute it with evaporated milk or regular milk.
- If adding extras like chocolate chips or nuts, fold them gently into the dough at the end.
Kitchen Equipment Needed
- Mixing Bowl – To combine all your ingredients easily. I like using a large glass bowl for easy cleanup.
- Hand Mixer or Wooden Spoon – For creaming butter and mixing dough. A hand mixer makes it quicker, but a sturdy wooden spoon works great too.
- Measuring Cups and Spoons – For accurate measurements, baking is all about precision!
- Baking Sheet – To bake the cookies evenly. I prefer a heavy-duty, rimmed baking sheet for best results.
- Parchment Paper or Silicone Baking Mat – Prevents cookies from sticking and helps with even baking.
- Cookie Scoop or Tablespoon – For evenly sized cookies and easy portioning. A cookie scoop saves time and gives uniform cookies.
- Cooling Rack – To cool cookies evenly and prevent sogginess.
Instructions
Step 1: Prepare Your Ingredients and Equipment
- Remove the butter from the fridge and let it soften at room temperature for about 20–30 minutes. Soft butter blends better for a smooth dough.
- Preheat your oven to 350°F (175°C).
- Line your baking sheet with parchment paper or a silicone baking mat for easy cleanup and to prevent sticking.
Step 2: Cream the Butter and Condensed Milk
- In a large mixing bowl, add the softened butter.
- Using a hand mixer or wooden spoon, beat the butter until it’s smooth and creamy—about 1–2 minutes.
- Slowly pour in the condensed milk and continue mixing until fully combined and fluffy.
Pro Tip: If using a hand mixer, start on low speed to avoid splattering, then increase speed for a smooth mix.
Step 3: Add the Vanilla and Dry Ingredients
- Stir in the vanilla extract for flavor.
- In a separate small bowl, whisk together the flour, baking powder, and salt to evenly distribute the leavening.
- Gradually add the dry ingredients to the wet mixture, folding gently with a spatula or wooden spoon. Mix until just combined—don’t overmix!
Pro Tip: Overmixing can lead to tougher cookies, so stop as soon as the flour disappears into the dough.
Step 4: Incorporate Optional Add-ins
- If you’re using chocolate chips, nuts, or coconut, fold them gently into the dough now, ensuring even distribution without breaking up the mix.
Step 5: Portion and Shape the Cookies
- Use a cookie scoop or tablespoon to scoop dough onto your prepared baking sheet.
- Leave about 2 inches of space between each cookie to allow for spreading.
- For a neater look, gently press each cookie dough ball slightly with the back of a spoon or your fingers.
Step 6: Bake the Cookies
- Place the baking sheet in the preheated oven.
- Bake for 12–15 minutes, or until the edges are golden and the centers look set but still soft.
Pro Tip: Keep an eye on your first batch to find the perfect baking time for your oven—it may vary slightly!
Step 7: Cool and Enjoy
- Remove the baking sheet from the oven and let the cookies cool on the sheet for 5 minutes to firm up.
- Transfer cookies to a wire rack to cool completely. This prevents sogginess and helps them crisp up a bit on the outside.
- Serve with your favorite tea or coffee, or store in an airtight container for up to a week.
Tips and Tricks for Success
- Use room temperature butter to ensure it creams smoothly with the condensed milk.
- Don’t overmix once you add the flour—mix just until combined to keep cookies tender.
- If your dough feels too sticky, chill it for 15–20 minutes before baking to make scooping easier.
- Use parchment paper or a silicone mat to prevent sticking and promote even baking.
- Let cookies cool on the baking sheet before moving them to a wire rack to avoid breaking.
- Watch the cookies closely in the last few minutes of baking to avoid over-browning.
Ingredient Substitutions and Variations
- Butter: You can swap with margarine or coconut oil, but the flavor and texture may change slightly.
- All-Purpose Flour: Try whole wheat flour for a nuttier taste; just expect a denser cookie.
- Sweetened Condensed Milk: For a lighter version, try using half condensed milk and half evaporated milk, but the cookies will be less chewy.
- Vanilla Extract: Substitute with almond extract or citrus zest for a different flavor twist.
- Add-ins: Mix in dried fruits, white chocolate chips, or spices like cinnamon or nutmeg for extra depth.
- Vegan Version: Use plant-based butter and sweetened condensed coconut milk to make these cookies vegan-friendly.
Serving Suggestions
- I love enjoying these condensed milk cookies fresh out of the oven with a warm cup of chai or coffee — it’s the ultimate cozy combo.
- Serve alongside a scoop of vanilla ice cream for an easy, indulgent dessert that everyone will rave about.
- Pack them in lunchboxes for a sweet surprise during the day—they’re the perfect on-the-go treat.
- These cookies pair wonderfully with fresh fruit like strawberries or sliced apples to balance the sweetness.
- For a fun twist, sandwich two cookies together with a layer of Nutella or peanut butter for an irresistible treat.
Storage and Reheating Instructions
- Store cooled cookies in an airtight container at room temperature for up to one week.
- For longer storage, freeze cookies in a sealed freezer bag for up to 3 months.
- To thaw frozen cookies, leave them at room temperature for about an hour.
- Reheat cookies in a 300°F (150°C) oven for 5–7 minutes to regain that fresh-baked warmth and softness.
- Avoid microwaving for too long—cookies can dry out quickly in the microwave.
Frequently Asked Questions
Can I use evaporated milk instead of condensed milk?
Evaporated milk won’t give you the same sweetness or chewy texture because it’s unsweetened. Condensed milk is key for that rich, caramel-like flavor and soft bite!
How do I make these cookies vegan?
Swap the butter for a plant-based alternative and use sweetened condensed coconut milk. The texture will be similar, and the flavor still delicious!
Why are my cookies spreading too much?
This usually happens if the butter is too soft or the dough is too warm. Try chilling the dough for 15–20 minutes before baking to help cookies hold their shape.
Can I add chocolate chips or nuts?
Absolutely! Folding in chocolate chips, nuts, or coconut flakes adds great texture and flavor—feel free to get creative.
How long do these cookies stay fresh?
Stored properly in an airtight container, they stay fresh for up to one week at room temperature. For longer storage, freeze them!
Can I double the recipe?
Yes! Just double all ingredients and bake in batches. Make sure not to overcrowd your baking sheet for even baking.
Did you try this recipe? Let me know in the comments how it turned out!
Don’t forget to share your photos on Instagram and tag me (@tasiahub_) or use the hashtag (#tasiahub). I’d love to see your creations!

Condensed Milk Cookies
Equipment
- Mixing Bowl
- Hand Mixer or Wooden Spoon
- Measuring cups and spoons
- Baking Sheet
- Parchment paper or silicone baking mat
- Cookie scoop or tablespoon
- Cooling Rack
Ingredients
- Butter – 1/2 cup 115g, softened
- Sweetened Condensed Milk – 1/2 cup about 130g
- All-Purpose Flour – 1 1/4 cups 160g
- Baking Powder – 1/2 teaspoon
- Vanilla Extract – 1 teaspoon
- Salt – A pinch
Optional Add-ins:
- Chocolate chips – 1/3 cup 50g
- Shredded coconut – 1/4 cup 25g
- Chopped nuts – 1/4 cup 30g
Instructions
Step 1: Prepare Your Ingredients and Equipment
- Remove the butter from the fridge and let it soften at room temperature for about 20–30 minutes. Soft butter blends better for a smooth dough.
- Preheat your oven to 350°F (175°C).
- Line your baking sheet with parchment paper or a silicone baking mat for easy cleanup and to prevent sticking.
Step 2: Cream the Butter and Condensed Milk
- In a large mixing bowl, add the softened butter.
- Using a hand mixer or wooden spoon, beat the butter until it’s smooth and creamy—about 1–2 minutes.
- Slowly pour in the condensed milk and continue mixing until fully combined and fluffy.
- Pro Tip: If using a hand mixer, start on low speed to avoid splattering, then increase speed for a smooth mix.
Step 3: Add the Vanilla and Dry Ingredients
- Stir in the vanilla extract for flavor.
- In a separate small bowl, whisk together the flour, baking powder, and salt to evenly distribute the leavening.
- Gradually add the dry ingredients to the wet mixture, folding gently with a spatula or wooden spoon. Mix until just combined—don’t overmix!
- Pro Tip: Overmixing can lead to tougher cookies, so stop as soon as the flour disappears into the dough.
Step 4: Incorporate Optional Add-ins
- If you’re using chocolate chips, nuts, or coconut, fold them gently into the dough now, ensuring even distribution without breaking up the mix.
Step 5: Portion and Shape the Cookies
- Use a cookie scoop or tablespoon to scoop dough onto your prepared baking sheet.
- Leave about 2 inches of space between each cookie to allow for spreading.
- For a neater look, gently press each cookie dough ball slightly with the back of a spoon or your fingers.
Step 6: Bake the Cookies
- Place the baking sheet in the preheated oven.
- Bake for 12–15 minutes, or until the edges are golden and the centers look set but still soft.
- Pro Tip: Keep an eye on your first batch to find the perfect baking time for your oven—it may vary slightly!
Step 7: Cool and Enjoy
- Remove the baking sheet from the oven and let the cookies cool on the sheet for 5 minutes to firm up.
- Transfer cookies to a wire rack to cool completely. This prevents sogginess and helps them crisp up a bit on the outside.
- Serve with your favorite tea or coffee, or store in an airtight container for up to a week.
Notes
Nutritional Value (Per Cookie)
- Calories: 100–120
- Fat: 6g
- Carbohydrates: 13g
- Sugar: 7–8g
- Protein: 1–2g