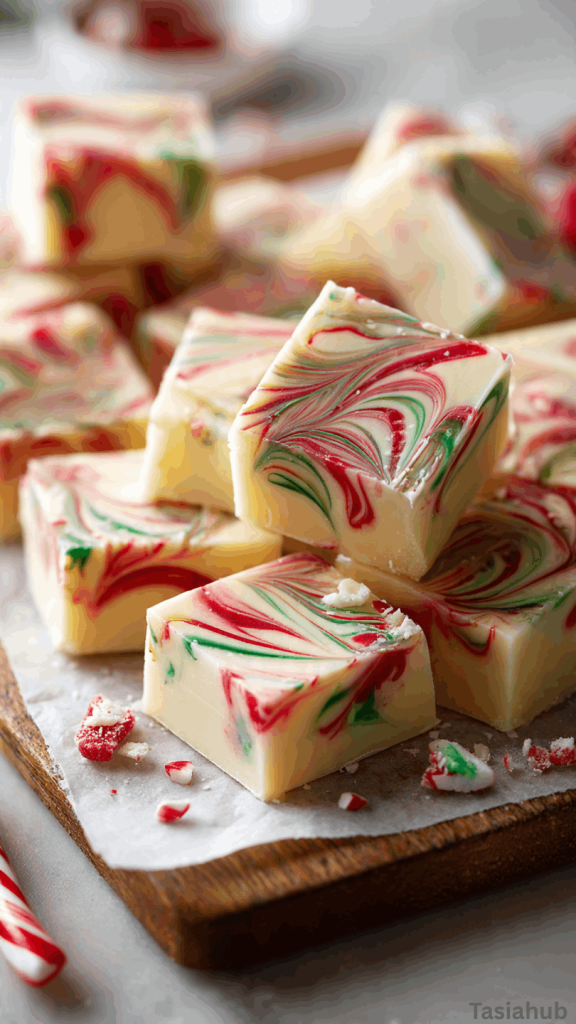
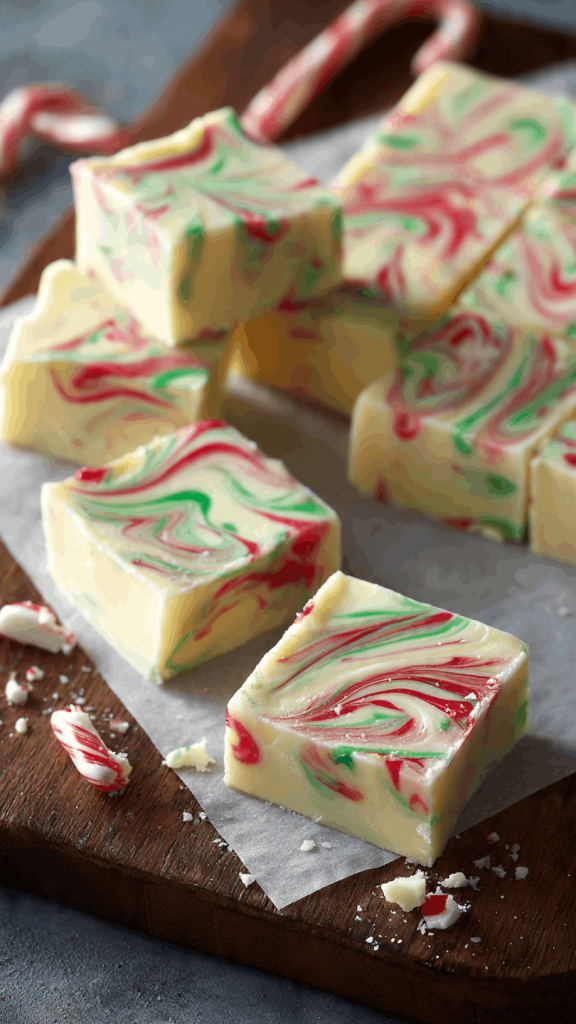
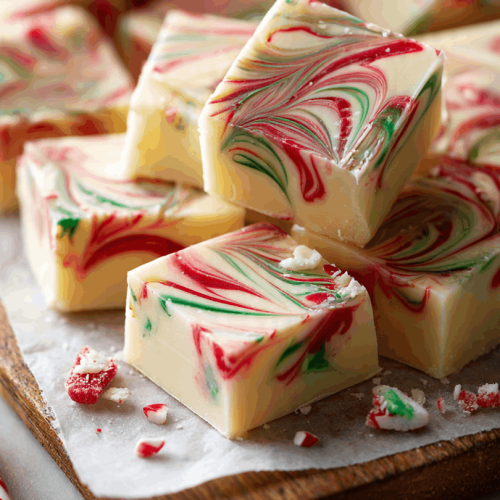
Christmas Swirl Fudge
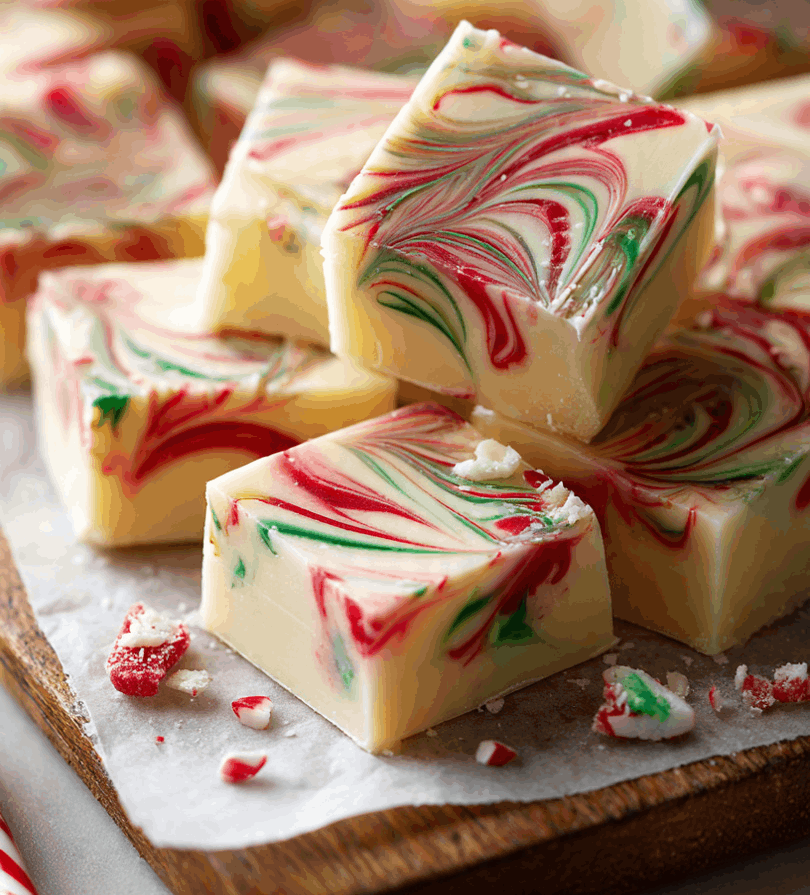
There’s nothing quite like a plate of rich, creamy fudge during the holidays. It’s one of those festive indulgences that instantly makes your dessert table feel complete. This Christmas swirl fudge is the perfect combination of sweetness, color, and nostalgia — a treat that’s as beautiful as it is delicious.
I love making fudge during the holiday season because it’s such a crowd-pleaser and surprisingly simple to prepare. You don’t need fancy tools or hours in the kitchen; just a few pantry staples and a little creativity. The colorful red and green swirls make it a fun and festive addition to your list of easy Christmas desserts, and it’s perfect for gifting or sharing with family and friends.
This easy Christmas fudge recipe is smooth, creamy, and melts in your mouth — the kind of treat that makes everyone think you spent much more time on it than you actually did. Whether you’re hosting a holiday party or assembling goodie boxes for neighbors, this fudge fits right in with the best fudge recipes of the season.
If you’re searching for new Christmas dessert ideas to brighten up your dessert spread, this one is a must-try. It’s simple enough for beginners but looks so festive that it steals the spotlight on any dessert table. Think of it as the perfect mix of elegance and ease — the ultimate holiday treat that brings a little magic to every bite.
With its vibrant swirls and decadent texture, this Christmas fudge recipe isn’t just delicious — it’s a showstopper. It captures the spirit of the season in each creamy, chocolatey layer and makes every moment feel just a bit sweeter. If you love easy Christmas treats that look impressive without the fuss, this fudge will definitely become one of your go-to holiday favorites.
Why You’ll Love It
- Festive and eye-catching: The vibrant red and green swirls make this fudge look like it came straight from Santa’s workshop — it’s guaranteed to stand out on your dessert table or gift platter.
- Quick and simple to make: No candy thermometer or complicated steps required! You can whip up this fudge in about 15 minutes, making it one of the easiest holiday treats you’ll ever make.
- Creamy, rich, and irresistible: Each bite is smooth and velvety with just the right amount of sweetness — the kind of melt-in-your-mouth texture that keeps you coming back for more.
- Perfect for gifting: Wrap a few squares in festive boxes or cellophane bags, and you’ve got a thoughtful homemade gift that everyone will love.
- Crowd-pleasing flavor: Whether you’re serving it at a holiday gathering or bringing it to a cookie swap, this fudge always disappears fast — it’s that good!
Ingredient List
For the Fudge Base:
- 3 cups white chocolate chips
- 1 can (14 ounces) sweetened condensed milk
- 1 teaspoon vanilla extract
- Pinch of salt
For the Swirl Design:
- Red gel food coloring
- Green gel food coloring
Ingredient Notes
- White chocolate chips: Use a good-quality brand like Ghirardelli or Nestlé — they melt smoothly and give that creamy, luxurious texture.
- Sweetened condensed milk: This is the secret to that rich, velvety base. Don’t substitute with evaporated milk; it won’t set the same way!
- Vanilla extract: A little goes a long way. I always use pure vanilla extract — it adds warmth and enhances the chocolate flavor beautifully.
- Gel food coloring: Stick to gel instead of liquid coloring; it gives those bold Christmas swirls without thinning the fudge mixture.
- Salt: Just a pinch balances the sweetness and makes every flavor pop — don’t skip it!
Kitchen Equipment Needed
- Medium saucepan: For melting the white chocolate and sweetened condensed milk together — I love using a nonstick one for easy cleanup.
- Heatproof spatula: Perfect for stirring the fudge mixture and scraping down the sides (a silicone spatula works best!).
- 8×8-inch baking pan: Ideal size for thick, rich fudge squares — line it with parchment paper for easy removal.
- Toothpick or skewer: For swirling the red and green colors into that beautiful Christmas design.
- Microwave-safe bowl (optional): If you prefer to melt your chocolate in the microwave instead of the stovetop, this works great.
- Sharp knife: To cut the fudge into clean, even squares once it’s fully set.
Instructions
1. Prep the pan and ingredients
- Line an 8×8-inch baking pan with parchment paper, leaving an overhang on two sides to lift the fudge out easily.
- Measure out your white chocolate chips and sweetened condensed milk so everything is ready to go — this recipe moves quickly once the chocolate starts melting.
- Have your gel food colorings and toothpick or skewer within arm’s reach.
Pro tip: Lining the pan and leaving an overhang is a tiny step that saves a lot of frustration when it’s time to remove the fudge.
2. Melt the chocolate and sweetened condensed milk
- Place the white chocolate chips and the sweetened condensed milk in a medium saucepan over very low heat.
- Stir gently and continuously with a heatproof spatula until the chocolate is fully melted and the mixture is glossy and smooth.
- Remove from heat and stir in the vanilla extract and pinch of salt until combined.
Pro tip: Keep the heat low and stir constantly to prevent the chocolate from seizing or developing grainy lumps. If you see any small bits, remove from heat and keep stirring — they’ll melt from residual warmth.
3. Divide and color the mixture
- Pour about two-thirds of the melted fudge into a large microwave-safe bowl or another heatproof container — this will be your white (base) layer.
- Transfer the remaining one-third into two small bowls (roughly equal parts) for coloring.
- Add a small amount of red gel to one bowl and green gel to the other. Stir each until the color is evenly distributed. Add a touch more gel if you want deeper, bolder swirls.
Pro tip: Use gel coloring sparingly — it’s concentrated. Add a little at a time until you reach the hue you like. Gel won’t thin the fudge, so you’ll keep the texture perfect.
4. Layer and create the swirls
- Pour the large white portion evenly into the prepared pan and smooth the top with your spatula.
- Spoon dollops of the red and green colored fudge across the white layer in a random pattern — think small mounds rather than long lines.
- Use a toothpick or skewer to drag through the dollops in gentle S-shapes and loops to create pretty, festive swirls. Don’t over-swirl — leave distinct colors and motion for the best visual effect.
Pro tip: Work quickly but gently when swirling. If the mixture cools too much it becomes harder to swirl; if it’s too hot the colors will blend too much.
5. Chill and set
- Refrigerate the pan for at least 2 hours, or until the fudge is completely firm to the touch. For best results, chill it overnight.
- Keep the fudge covered loosely with plastic wrap while it chills so it doesn’t absorb fridge smells.
Pro tip: For faster setting, place the pan on a flat surface in the fridge (not the freezer). The freezer can set the outside too quickly and cause small cracks.
6. Cut and serve
- Lift the fudge from the pan using the parchment overhang and place it on a cutting board. Warm a sharp knife under hot water, wipe it dry, and make clean, even cuts into squares. Reheat the knife between cuts for neat edges.
Pro tip: A warm, dry knife makes slicing smooth, photo-ready squares. If you prefer softer fudge, let refrigerated pieces sit at room temperature 10–15 minutes before serving.
Tips and Tricks for Success
- Use high-quality chocolate: The flavor and texture of your fudge depend heavily on the chocolate you use. Go for creamy, smooth-melting brands for the best results.
- Stir constantly while melting: White chocolate can burn easily — low heat and steady stirring keep it silky and lump-free.
- Don’t rush the chilling time: Let the fudge set completely in the fridge before cutting. Trying to slice it too early will make it soft and messy.
- Warm your knife for clean cuts: Dip the knife in hot water, wipe dry, and slice. It makes a world of difference in how neat your fudge looks.
- Avoid over-swirl: It’s tempting to mix the colors a lot, but a few gentle passes create prettier, more distinct Christmas patterns.
Ingredient Substitutions and Variations
- Chocolate swap: Try milk or dark chocolate instead of white for a deeper, richer flavor — it won’t be a swirl, but still delicious!
- Add crunch: Mix in crushed peppermint candies, chopped nuts, or holiday sprinkles for extra texture and color.
- Festive toppings: Sprinkle crushed candy canes or edible glitter on top before chilling for a fun, decorative finish.
- Flavor twist: Add a few drops of peppermint or almond extract along with the vanilla for a seasonal flavor upgrade.
- Color play: Use blue and silver swirls for a winter wonderland theme, or gold and red for an elegant holiday vibe.
Serving Suggestions
- Holiday Dessert Platters: Add a few squares to a mixed dessert tray with cookies and truffles — the colorful swirls make the whole plate pop.
- Gift Boxes & Goodie Bags: Wrap a handful in festive bags or small tins for a sweet homemade gift that always brings big smiles.
- Snack with Hot Cocoa: The creamy fudge paired with a steaming cup of hot chocolate creates the ultimate cozy holiday treat.
- After-Dinner Bite: Serve a small square or two alongside coffee after a holiday meal — it’s just the right amount of sweetness.
- Personal favorite: I love sneaking a square straight from the fridge while watching Christmas movies — it feels like a tiny celebration!
Storage and Reheating Instructions
- Room Temperature: Store in an airtight container for up to 5 days. Keep layers separated with parchment so they don’t stick.
- Refrigerator: Lasts up to 2 weeks when chilled. Let it sit at room temperature for a few minutes to soften before serving.
- Freezer: Freeze up to 3 months. Wrap tightly in plastic and place in a freezer-safe container to prevent freezer burn.
- Thawing: Transfer frozen fudge to the fridge overnight for the best texture.
- Avoid Heat: Fudge melts easily — keep away from warm spots or direct sunlight, especially during gatherings.
Frequently Asked Questions
How do I know when the fudge is fully set?
You’ll know it’s ready when it feels firm to the touch and doesn’t stick to your fingers. It usually takes about 2–3 hours in the fridge, but overnight chilling gives the best texture.
Can I make this fudge ahead of time?
Absolutely! This fudge stores beautifully. You can make it up to a week in advance and keep it refrigerated until you’re ready to serve or gift it.
What if my fudge turns grainy?
That usually happens if the chocolate overheats. Keep the heat low and stir constantly — slow and gentle melting is the secret to smooth, creamy fudge.
Can I use liquid food coloring instead of gel?
You can, but gel gives much brighter, cleaner swirls without changing the consistency. Liquid food coloring can make the fudge slightly softer.
How long does homemade fudge last?
At room temperature, it stays fresh for about 5 days. In the fridge, it lasts up to 2 weeks, and in the freezer, up to 3 months. Just be sure to store it in an airtight container!
Can I use different colors for other holidays?
Definitely! Swap red and green for pastel pinks and purples at Easter or red and white for Valentine’s Day — it’s a super versatile recipe.
Did you try this Christmas swirl fudge recipe? Let me know in the comments how it turned out — and how you added your own festive twist!
Christmas Swirl Fudge
Equipment
- Medium saucepan
- Heatproof spatula
- 8×8-inch baking pan
- Toothpick or Skewer
- Microwave-safe bowl (optional)
- Sharp Knife
Ingredients
For the Fudge Base:
- 3 cups white chocolate chips
- 1 can 14 ounces sweetened condensed milk
- 1 teaspoon vanilla extract
- Pinch of salt
For the Swirl Design:
- Red gel food coloring
- Green gel food coloring
Instructions
Prep the pan and ingredients
- Line an 8×8-inch baking pan with parchment paper, leaving an overhang on two sides to lift the fudge out easily.
- Measure out your white chocolate chips and sweetened condensed milk so everything is ready to go — this recipe moves quickly once the chocolate starts melting.
- Have your gel food colorings and toothpick or skewer within arm’s reach.
- Pro tip: Lining the pan and leaving an overhang is a tiny step that saves a lot of frustration when it’s time to remove the fudge.
Melt the chocolate and sweetened condensed milk
- Place the white chocolate chips and the sweetened condensed milk in a medium saucepan over very low heat.
- Stir gently and continuously with a heatproof spatula until the chocolate is fully melted and the mixture is glossy and smooth.
- Remove from heat and stir in the vanilla extract and pinch of salt until combined.
- Pro tip: Keep the heat low and stir constantly to prevent the chocolate from seizing or developing grainy lumps. If you see any small bits, remove from heat and keep stirring — they’ll melt from residual warmth.
Divide and color the mixture
- Pour about two-thirds of the melted fudge into a large microwave-safe bowl or another heatproof container — this will be your white (base) layer.
- Transfer the remaining one-third into two small bowls (roughly equal parts) for coloring.
- Add a small amount of red gel to one bowl and green gel to the other. Stir each until the color is evenly distributed. Add a touch more gel if you want deeper, bolder swirls.
- Pro tip: Use gel coloring sparingly — it’s concentrated. Add a little at a time until you reach the hue you like. Gel won’t thin the fudge, so you’ll keep the texture perfect.
Layer and create the swirls
- Pour the large white portion evenly into the prepared pan and smooth the top with your spatula.
- Spoon dollops of the red and green colored fudge across the white layer in a random pattern — think small mounds rather than long lines.
- Use a toothpick or skewer to drag through the dollops in gentle S-shapes and loops to create pretty, festive swirls. Don’t over-swirl — leave distinct colors and motion for the best visual effect.
- Pro tip: Work quickly but gently when swirling. If the mixture cools too much it becomes harder to swirl; if it’s too hot the colors will blend too much.
Chill and set
- Refrigerate the pan for at least 2 hours, or until the fudge is completely firm to the touch. For best results, chill it overnight.
- Keep the fudge covered loosely with plastic wrap while it chills so it doesn’t absorb fridge smells.
- Pro tip: For faster setting, place the pan on a flat surface in the fridge (not the freezer). The freezer can set the outside too quickly and cause small cracks.
Cut and store
- Lift the fudge from the pan using the parchment overhang and place it on a cutting board. Warm a sharp knife under hot water, wipe it dry, and make clean, even cuts into squares. Reheat the knife between cuts for neat edges.
- Store fudge in an airtight container at room temperature for up to 5 days, or in the refrigerator for up to 2 weeks. Layer with parchment paper to prevent sticking.
- Pro tip: A warm, dry knife makes slicing smooth, photo-ready squares. If you prefer softer fudge, let refrigerated pieces sit at room temperature 10–15 minutes before serving.
Notes
Nutritional Value (per square, approximate):
- Calories: 180 kcal
- Fat: 9 g
- Saturated Fat: 5 g
- Carbohydrates: 24 g
- Sugars: 22 g
- Protein: 1 g
- Fiber: 0.5 g
- Sodium: 35 mg