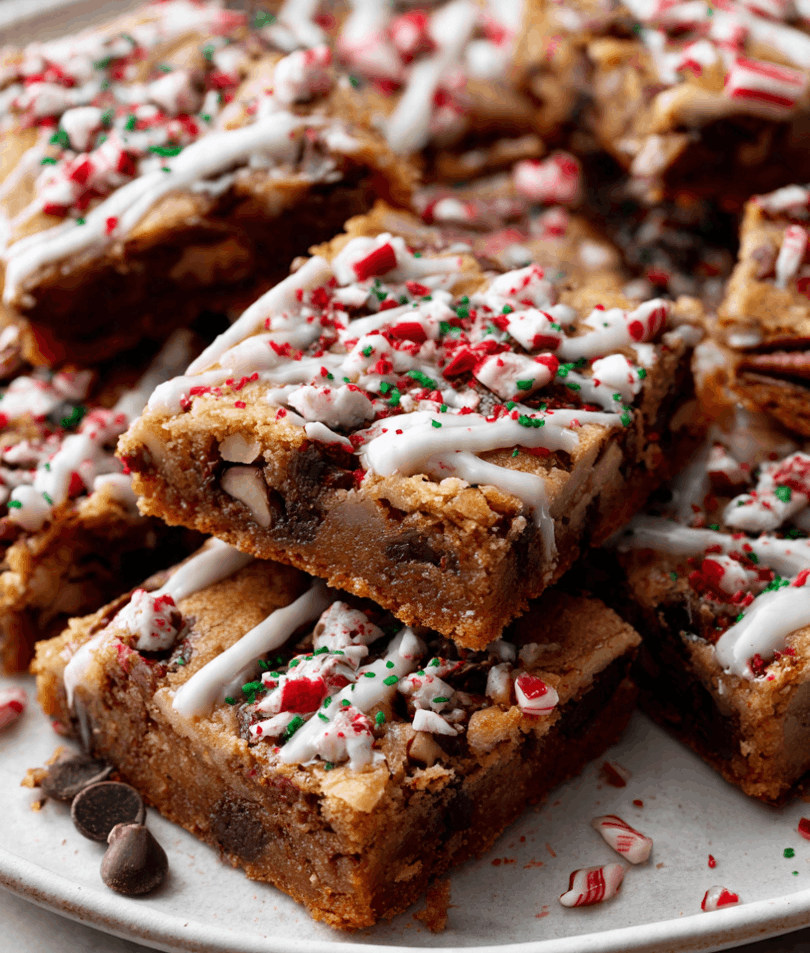
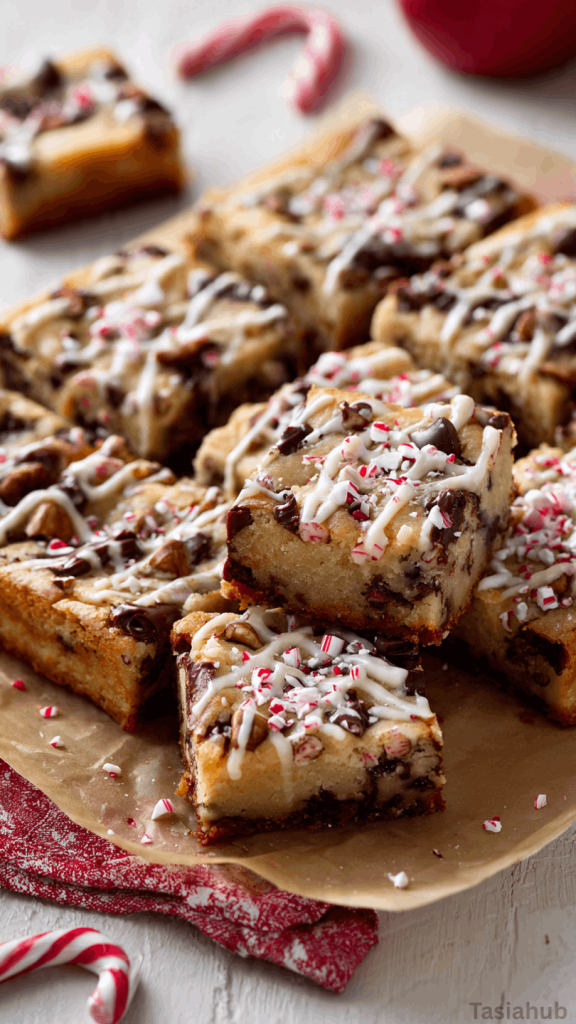
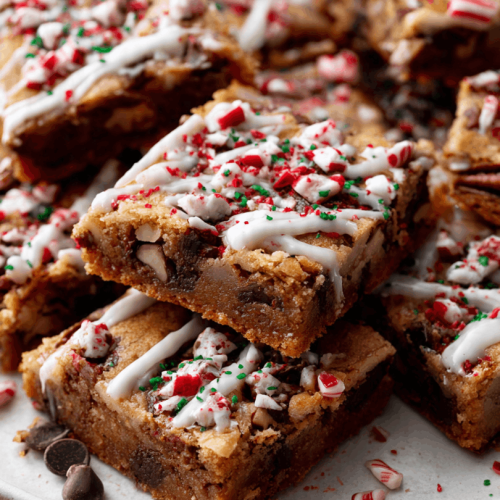
Christmas Cookie Bars
The holiday season is the perfect time to gather in the kitchen, mix up some sugar and spice, and create treats that fill the house with warmth. Christmas cookie bars are a fantastic way to enjoy all the flavors of the season without the fuss of rolling, cutting, or shaping individual cookies. From chewy chocolate chunks to festive sprinkles, these bars bring together everything we love about holiday desserts in one easy, slice-and-serve format.
I’ve always loved holiday bars because they’re so versatile. You can make a batch in the morning, and by afternoon, you’ve got a plate of simple Christmas cookies ready to share with friends, family, or even coworkers. They’re perfect for parties, gift boxes, or just a cozy night by the fire with a mug of cocoa. What’s great is that they often require fewer steps than traditional cookies but deliver just as much flavor and festive cheer.
For anyone pressed for time—or simply wanting a stress-free baking experience—easy holiday cookies in bar form are a lifesaver. Whether you’re experimenting with chocolate, nuts, caramel, or classic sugar cookie flavors, holiday bars make it simple to create something that feels homemade and indulgent without taking all day in the kitchen.
Plus, these Christmas dessert bars are great for layering flavors and textures. Imagine a soft, buttery base topped with chocolate chips, peppermint pieces, or drizzled with icing. It’s a sweet, colorful treat that looks as good as it tastes. If you’re craving the best holiday cookies but want to keep things simple, Christmas bars and squares might just become your go-to festive recipe this season.
Why You’ll Love It
- Quick and fuss-free: Unlike traditional cookies, these Christmas cookie bars come together in one pan—mix, bake, and slice. Perfect for busy holiday days when you want delicious treats without spending hours in the kitchen.
- Endless flavor possibilities: From chocolate chip and peppermint to caramel and nuts, these holiday bars let you get creative. You can customize them to match your favorite holiday flavors or keep it classic with simple Christmas cookies everyone loves.
- Perfect for sharing: Whether you’re hosting a party, packing a festive gift box, or just bringing a little cheer to neighbors, these Christmas bars and squares are easy to transport and sure to impress.
- Family-friendly baking: Kids love helping make these holiday treats. They can sprinkle, stir, and even taste test along the way, making baking an interactive, fun part of your holiday tradition.
- Lasts longer than traditional cookies: Christmas cookie bars stay soft, chewy, and delicious for several days, so you can enjoy them throughout the season without worrying about them going stale too quickly.
Ingredient List
For the Cookie Base:
- 1 cup unsalted butter, melted
- 1 cup brown sugar, packed
- 1/2 cup granulated sugar
- 2 large eggs
- 2 teaspoons vanilla extract
- 2 1/2 cups all-purpose flour
- 1 teaspoon baking soda
- 1/2 teaspoon salt
For the Mix-Ins:
- 1 1/2 cups chocolate chips (semi-sweet or milk chocolate)
- 1 cup chopped nuts (optional—walnuts or pecans work great)
- 1/2 cup crushed peppermint candies or holiday sprinkles
For the Topping (Optional):
- 1/2 cup white chocolate chips, for drizzling
- Extra holiday sprinkles, for garnish
Ingredient Notes
- I always use unsalted butter for the base—it lets you control the sweetness perfectly.
- Don’t skip the vanilla extract! It makes a big difference in depth of flavor.
- Brown sugar is key for that soft, chewy texture—trust me, it’s worth it.
- If you like a little crunch, chopped nuts add texture, but you can leave them out for nut-free Xmas cookies.
- Chocolate chips and peppermint are my favorite festive combo—it instantly says “holiday treats!”
Kitchen Equipment Needed
- 9×13-inch baking pan – Perfect for baking cookie bars evenly; I love using a glass pan so I can see the edges browning.
- Mixing bowls – One for wet ingredients, one for dry; I keep a set of colorful bowls—it makes baking more fun!
- Hand mixer or stand mixer – Makes combining butter and sugars effortless.
- Spatula – For folding in chocolate chips and nuts without overmixing.
- Measuring cups and spoons – Accurate measurements are key for the best holiday cookies.
- Parchment paper – Prevents sticking and makes removing bars super easy.
- Wire cooling rack – Helps bars cool evenly and keeps the bottoms from getting soggy.
Instructions
Step 1: Preheat and Prep
- Preheat your oven to 350°F (175°C).
- Line a 9×13-inch baking pan with parchment paper, letting the edges hang over for easy lifting.
- Lightly grease the parchment paper with butter or nonstick spray.
Pro Tip: Lining the pan with parchment makes it super easy to lift the bars out without breaking them.
Step 2: Mix the Wet Ingredients
- In a large mixing bowl, combine the melted butter, brown sugar, and granulated sugar.
- Whisk together until smooth and well combined.
- Add the eggs, one at a time, mixing thoroughly after each addition.
- Stir in the vanilla extract.
Pro Tip: Whisk continuously when adding eggs to avoid curdling and to keep the batter silky smooth.
Step 3: Combine the Dry Ingredients
- In a separate bowl, whisk together the flour, baking soda, and salt.
- Make sure there are no clumps—it ensures a smooth, even cookie bar texture.
Step 4: Bring Wet and Dry Together
- Gradually add the dry ingredients to the wet ingredients.
- Fold gently with a spatula until just combined—don’t overmix.
- Stir in chocolate chips, nuts (if using), and crushed peppermint or sprinkles.
Pro Tip: Fold in mix-ins gently to keep the batter light and the bars soft.
Step 5: Bake the Bars
- Spread the batter evenly into the prepared baking pan.
- Bake for 25–30 minutes, or until the edges are golden and a toothpick in the center comes out mostly clean.
- Remove from oven and let cool in the pan for at least 15 minutes.
Pro Tip: The bars continue to set as they cool, so avoid overbaking—they should be slightly soft in the center.
Step 6: Add Optional Toppings
- Once slightly cooled, drizzle with melted white chocolate.
- Sprinkle extra holiday sprinkles on top for a festive touch.
- Let the topping set before slicing.
Step 7: Slice and Serve
- Use the parchment overhang to lift the bars from the pan.
- Cut into squares or rectangles with a sharp knife.
- Serve on a festive plate or package in holiday boxes to gift!
Tips and Tricks for Success
- Don’t skip chilling the butter (if not using melted): It helps create a chewier, more tender texture in your Christmas bars.
- Measure flour carefully: Spoon and level for the most accurate amount—it keeps your bars soft instead of dense.
- Keep an eye on the edges: They brown faster than the center, so remove from the oven when edges are golden but centers are slightly soft.
- Use a sharp knife for slicing: It prevents crumbly edges and keeps your holiday bars looking neat.
- Let the bars cool completely before storing: Warm bars can stick together, so patience pays off.
Ingredient Substitutions and Variations
- Butter: Swap with coconut oil or vegan butter for dairy-free holiday treats.
- Flour: Use a gluten-free all-purpose blend to make simple Christmas cookies everyone can enjoy.
- Chocolate chips: Try white chocolate, peanut butter chips, or a mix for a festive twist.
- Nuts: Omit for nut-free bars or substitute with seeds like pumpkin or sunflower seeds.
- Peppermint: Replace with crushed candy canes, holiday sprinkles, or even dried cranberries for different flavors.
- Extra sweetness: Drizzle caramel or a simple glaze over the bars for decadent Christmas dessert bars.
Serving Suggestions
- I love serving these Christmas cookie bars with a hot cup of cocoa—it’s the ultimate cozy holiday treat!
- Pair holiday bars with a scoop of vanilla ice cream for a festive twist on a classic dessert.
- Slice into smaller squares and serve on a platter at parties—these holiday treats disappear fast!
- Wrap individual Christmas bars in parchment and ribbon for thoughtful DIY gifts for friends and neighbors.
- Enjoy a warm Christmas bar with your morning coffee or tea—it’s my little holiday indulgence before the day begins.

Storage and Reheating Instructions
- Room temperature: Store bars in an airtight container for up to 5 days—keeps them soft and chewy.
- Refrigerator: Place in an airtight container for up to 1 week if your kitchen is warm or humid.
- Freezer: Wrap bars individually in parchment and place in a freezer-safe bag for up to 3 months.
- Reheating: Warm in the microwave for 10–15 seconds or in the oven at 300°F (150°C) for 5–7 minutes to revive that fresh-baked taste.
- Serving from freezer: Let bars thaw at room temperature for 30–60 minutes before enjoying—they taste almost as good as freshly baked!
Frequently Asked Questions
Can I make these Christmas cookie bars ahead of time?
Absolutely! You can bake them a day or two in advance and store at room temperature in an airtight container. They actually taste even better the next day as the flavors meld.
Can I freeze Christmas bars?
Yes! Wrap them individually in parchment and store in a freezer-safe bag for up to 3 months. Thaw at room temperature or warm briefly in the microwave before serving.
Can I make these bars nut-free?
Definitely! Simply omit the nuts or swap them for seeds like pumpkin or sunflower. You’ll still get that chewy, festive texture.
What mix-ins work best for holiday bars?
Chocolate chips, peppermint pieces, and holiday sprinkles are classic, but you can also add dried cranberries, caramel bits, or white chocolate chunks for extra festive flair.
How do I keep my bars soft and chewy?
Avoid overbaking—take them out when the edges are golden but the center is still slightly soft. Let them cool completely before slicing.
Can I make these bars gluten-free?
Yes! Use a gluten-free all-purpose flour blend. The bars will still be soft, chewy, and perfect for holiday treats.
Did you try this recipe? Let me know in the comments how your Christmas cookie bars turned out!
Christmas Cookie Bars
Equipment
- 9×13-inch Baking Pan
- Mixing Bowls
- Hand mixer or stand mixer
- Spatula
- Measuring cups and spoons
- Parchment paper
- Wire Cooling Rack
Ingredients
For the Cookie Base:
- 1 cup unsalted butter melted
- 1 cup brown sugar packed
- 1/2 cup granulated sugar
- 2 large eggs
- 2 teaspoons vanilla extract
- 2 1/2 cups all-purpose flour
- 1 teaspoon baking soda
- 1/2 teaspoon salt
For the Mix-Ins:
- 1 1/2 cups chocolate chips semi-sweet or milk chocolate
- 1 cup chopped nuts optional—walnuts or pecans work great
- 1/2 cup crushed peppermint candies or holiday sprinkles
For the Topping (Optional):
- 1/2 cup white chocolate chips for drizzling
- Extra holiday sprinkles for garnish
Instructions
Step 1: Preheat and Prep
- Preheat your oven to 350°F (175°C).
- Line a 9×13-inch baking pan with parchment paper, letting the edges hang over for easy lifting.
- Lightly grease the parchment paper with butter or nonstick spray.
- Pro Tip: Lining the pan with parchment makes it super easy to lift the bars out without breaking them.
Step 2: Mix the Wet Ingredients
- In a large mixing bowl, combine the melted butter, brown sugar, and granulated sugar.
- Whisk together until smooth and well combined.
- Add the eggs, one at a time, mixing thoroughly after each addition.
- Stir in the vanilla extract.
- Pro Tip: Whisk continuously when adding eggs to avoid curdling and to keep the batter silky smooth.
Step 3: Combine the Dry Ingredients
- In a separate bowl, whisk together the flour, baking soda, and salt.
- Make sure there are no clumps—it ensures a smooth, even cookie bar texture.
Step 4: Bring Wet and Dry Together
- Gradually add the dry ingredients to the wet ingredients.
- Fold gently with a spatula until just combined—don’t overmix.
- Stir in chocolate chips, nuts (if using), and crushed peppermint or sprinkles.
- Pro Tip: Fold in mix-ins gently to keep the batter light and the bars soft.
Step 5: Bake the Bars
- Spread the batter evenly into the prepared baking pan.
- Bake for 25–30 minutes, or until the edges are golden and a toothpick in the center comes out mostly clean.
- Remove from oven and let cool in the pan for at least 15 minutes.
- Pro Tip: The bars continue to set as they cool, so avoid overbaking—they should be slightly soft in the center.
Step 6: Add Optional Toppings
- Once slightly cooled, drizzle with melted white chocolate.
- Sprinkle extra holiday sprinkles on top for a festive touch.
- Let the topping set before slicing.
Step 7: Slice and Serve
- Use the parchment overhang to lift the bars from the pan.
- Cut into squares or rectangles with a sharp knife.
- Serve on a festive plate or package in holiday boxes to gift!
Notes
Nutritional Value (Per Serving – Approximate)
- Calories: 260–280 kcal
- Carbohydrates: 35 g
- Protein: 3 g
- Fat: 13 g
- Saturated Fat: 8 g
- Cholesterol: 40 mg
- Sodium: 120 mg
- Sugar: 22 g
- Fiber: 1 g