Christmas Chex Mix Recipe
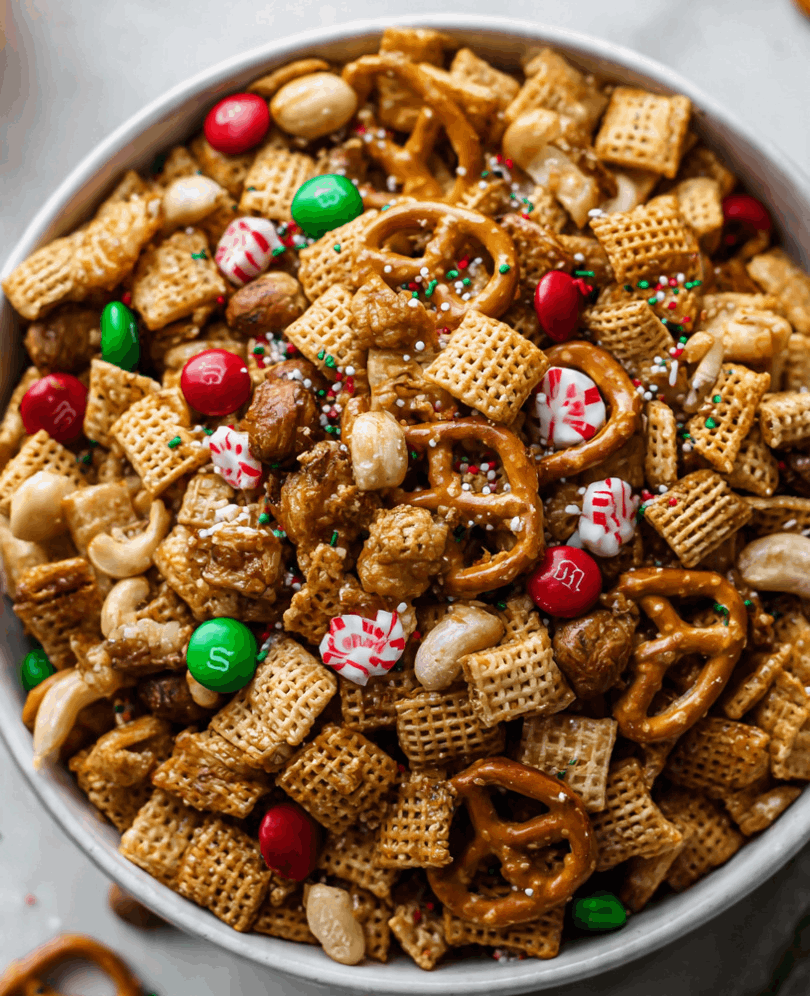
The holiday season is filled with cozy nights, festive lights, and irresistible snacks that bring everyone together—and this Christmas Chex Mix recipe is one of those must-have holiday treats that never lasts long in the bowl. It’s sweet, crunchy, and coated in that perfect mix of holiday flavors that make it impossible to stop snacking on.
What I love about this recipe is how easy it is to throw together. You don’t need to be an expert in the kitchen to make it—just a few pantry staples, some creativity, and a few minutes in the oven (or microwave) are all it takes. It’s the kind of easy Chex mix recipe that comes to the rescue when you need a quick holiday snack for a party, a gift idea for neighbors, or something munch-worthy for movie night.
This mix is also a great example of how DIY Chex mix can be completely personalized. Whether you prefer sweet, salty, or a little of both, you can tweak it to fit your taste. Add in pretzels, M&Ms, nuts, or festive sprinkles—it’s all about making it fun and flavorful. That’s what makes it one of the best Chex mix recipe ideas to keep on hand for the holidays.
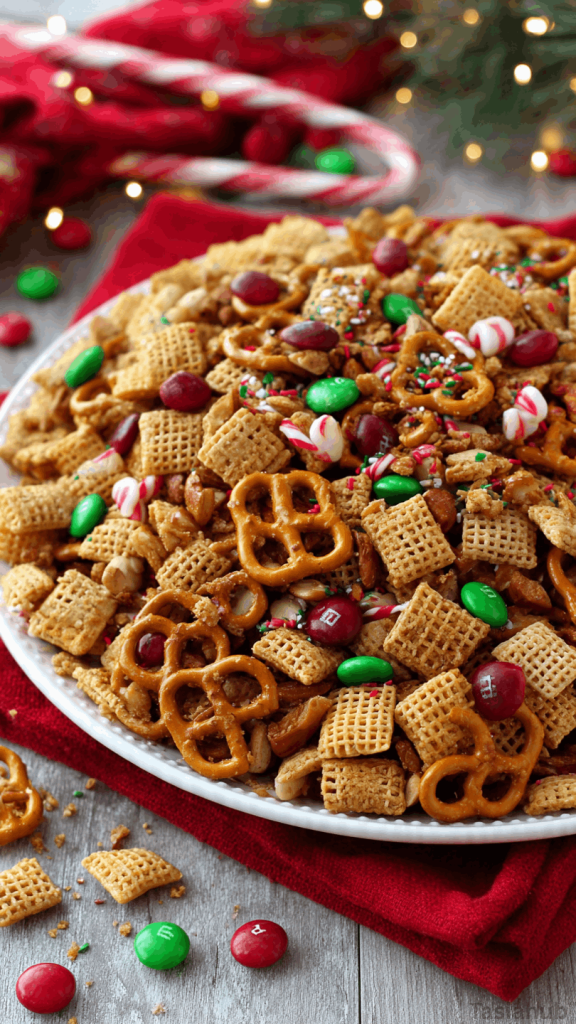
When I make this, I like to package it in small jars or treat bags tied with a red ribbon. It’s one of my favorite holiday snack mix ideas because it doubles as a gift that feels both homemade and heartfelt. Plus, it keeps really well, meaning you can make a big batch ahead of time and always have some on hand for guests or a late-night craving.
This holiday Chex mix isn’t just about snacking—it’s about spreading cheer. A big bowl of it on the table during Christmas movie nights or family gatherings instantly puts everyone in a festive mood. And honestly, once you try it, it’s hard not to make it part of your yearly holiday routine. Among all the holiday Chex mix recipes out there, this one strikes that perfect balance of sweet and salty, crunchy and light—making it an instant favorite for both kids and adults alike.
Why You’ll Love It
- Super Easy to Make: This recipe comes together in no time, using simple ingredients you probably already have at home. Perfect for last-minute holiday prep!
- Customizable Flavors: Want it sweeter, saltier, or with a little extra crunch? You can easily swap ingredients or add festive extras like chocolate chips, candy canes, or nuts to make it your own.
- Perfect for Gifting: Package it in cute jars, tins, or treat bags, and you have an instant holiday gift that everyone will love—homemade charm included.
- Crowd-Pleaser: Whether it’s a family gathering, office party, or a cozy night with friends, this mix disappears fast—trust me, everyone keeps coming back for more.
- Keeps Well: Make a big batch ahead of time, and it stays fresh for snacking throughout the holiday season. No need to stress about last-minute treats!
Ingredient List
For the Mix:
- 3 cups Rice Chex cereal
- 3 cups Corn Chex cereal
- 3 cups Wheat Chex cereal
- 2 cups mini pretzels
- 1 cup holiday-themed M&Ms or chocolate candies
- 1 cup roasted nuts (pecans, almonds, or peanuts)
- 1 cup candy cane pieces or festive sprinkles
For the Coating:
- 1/2 cup unsalted butter
- 1/4 cup brown sugar
- 1/4 cup corn syrup
- 1 tsp vanilla extract
- 1/2 tsp salt
- 1/4 tsp cinnamon (optional, for a warm holiday touch)
Ingredient Notes
- I always use unsalted butter for better control over the sweetness—adds so much flavor without overpowering the mix.
- Don’t skip the corn syrup! It helps the coating stick and gives that perfect chewy crunch.
- Candy canes or sprinkles are optional but they instantly make it festive and colorful.
- M&Ms or chocolate candies are my go-to because they add a sweet pop of holiday cheer, but you can swap them for white chocolate chips too.
- Nuts are totally optional if you’re making a kid-friendly version—but I find roasted pecans give the best flavor boost.
Kitchen Equipment Needed
- Large mixing bowl – For combining all the cereals, pretzels, and nuts. I love using a big glass bowl so I can see everything clearly.
- Medium saucepan – To melt butter and mix the sugar coating. A heavy-bottomed pan works best for even heat.
- Wooden spoon or silicone spatula – For stirring the buttery mixture without scratching your pan.
- Baking sheet – To spread the mix for baking. I always line mine with parchment paper for easy cleanup.
- Measuring cups and spoons – Accurate measurements make the difference in the coating and overall taste.
- Large airtight container or treat bags – For storing or gifting your finished mix. Keeps it fresh and crunchy!
Instructions
Step 1: Preheat and Prep
- Preheat your oven to 250°F (120°C).
- Line a large baking sheet with parchment paper or a silicone baking mat. This makes cleanup a breeze and prevents sticking.
- Measure out all your cereals, pretzels, and nuts so everything is ready to go.
Pro Tip: Having everything measured before you start makes the process smooth—no scrambling mid-way!
Step 2: Mix the Dry Ingredients
- In a large mixing bowl, combine the Rice Chex, Corn Chex, Wheat Chex, pretzels, and nuts.
- Gently toss them together until evenly mixed.
Pro Tip: Be gentle when stirring—these cereals are delicate and can break easily.
Step 3: Make the Coating
- In a medium saucepan over medium heat, melt the butter.
- Stir in the brown sugar and corn syrup until fully combined.
- Bring to a gentle boil, stirring constantly.
- Remove from heat and stir in the vanilla extract, salt, and cinnamon (if using).
Pro Tip: Whisk continuously while heating the butter and sugar to prevent lumps and ensure a smooth, glossy coating.
Step 4: Coat the Mix
- Pour the warm butter mixture over the dry cereal mix.
- Use a wooden spoon or silicone spatula to fold everything together until all pieces are evenly coated.
Pro Tip: Work quickly while the coating is warm—it spreads more easily and sticks better to every piece.
Step 5: Bake the Mix
- Spread the coated mix evenly on the prepared baking sheet.
- Bake for 45 minutes, stirring every 15 minutes to ensure even baking and coating.
Pro Tip: Stirring periodically prevents clumps and gives that perfect crunchy texture we all love.
Step 6: Cool and Add Festive Touches
- Remove from the oven and let the mix cool completely on the baking sheet.
- Once cooled, fold in M&Ms, candy cane pieces, or sprinkles.
Pro Tip: Make sure the mix is completely cool before adding chocolate candies—they’ll melt if added too soon.
Step 7: Store or Serve
- Transfer your Christmas Chex Mix into an airtight container for snacking or into cute treat bags for gifting.
- Enjoy immediately, or let it sit for a day to allow flavors to meld beautifully.
Pro Tip: This mix stays crunchy for up to two weeks if stored in a cool, dry place.
Tips and Tricks for Success
- Use fresh cereals: Stale Chex can make the mix less crunchy, so always check your box before baking.
- Even coating is key: Pour the butter mixture slowly and fold gently to ensure every piece is covered.
- Don’t skip stirring while baking: It keeps the mix from clumping and helps it bake evenly.
- Cool completely before storing: Warm mix can make candy or chocolate melt and stick together.
- Make it festive: Add red and green sprinkles, candy cane pieces, or white chocolate drizzle for extra holiday cheer.
Ingredient Substitutions and Variations
- Cereal: Swap any Chex variety with Cheerios, Crispix, or a gluten-free cereal for a different texture.
- Nuts: Use cashews, walnuts, or omit nuts for a nut-free version.
- Candy: Swap M&Ms for chocolate chips, Reese’s Pieces, or white chocolate chips.
- Sweetener: Honey or maple syrup can replace corn syrup in a pinch, though the texture will be slightly different.
- Spices: Add a pinch of nutmeg or ginger for a warmer holiday flavor.
- Mix-ins: Pretzels can be swapped for bagel chips, Goldfish, or even holiday-shaped crackers for a fun twist.
Serving Suggestions
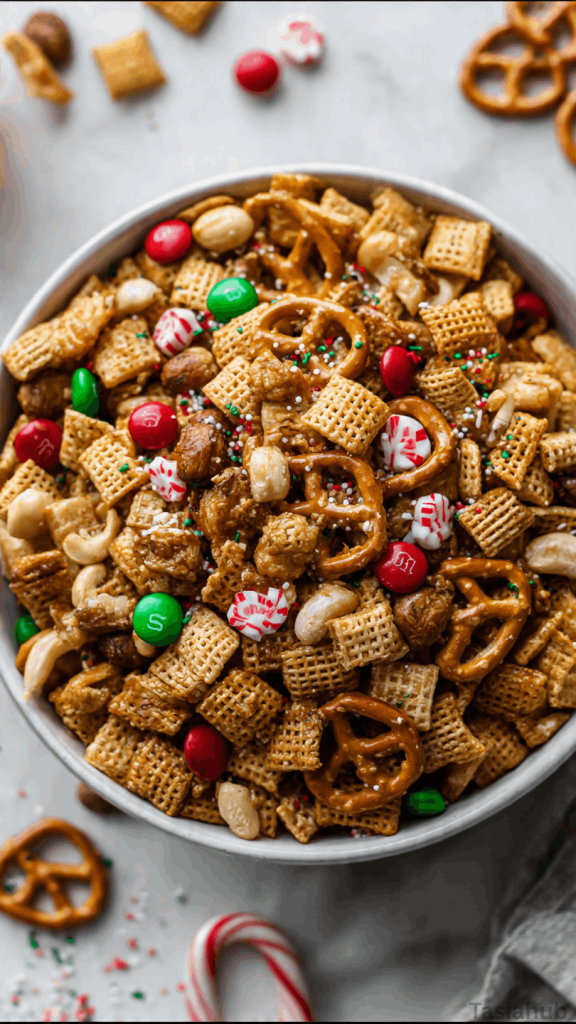
- I love serving this Christmas Chex Mix in a large festive bowl during movie night—it’s perfect for grazing while everyone gets cozy.
- Portion it into small treat bags or jars for neighbors or coworkers—it’s an easy, homemade gift that always impresses.
- Sprinkle some on top of holiday cupcakes or brownies for a crunchy, colorful topping.
- Serve it alongside a hot chocolate bar—it pairs perfectly with marshmallows and whipped cream.
- Add a handful to a party snack table alongside cookies, popcorn, and other holiday treats for a fun, mix-and-match option.
Storage and Reheating Instructions
- Store in an airtight container at room temperature for up to 2 weeks to keep it fresh and crunchy.
- For gifting, use festive jars or treat bags and seal tightly to preserve the crunch.
- If the mix softens, spread it on a baking sheet and warm in the oven at 250°F (120°C) for 5–10 minutes to crisp it back up.
- Avoid storing in the fridge—humidity can make the mix soggy.
- Once cooled completely, chocolate and candy pieces can be gently folded in to prevent melting during storage.
Frequently Asked Questions
Can I make this Chex mix nut-free?
Absolutely! Simply omit the nuts or replace them with extra pretzels or cereal to keep it crunchy and kid-friendly.
Can I make this ahead of time?
Yes! You can make it a few days in advance and store it in an airtight container. The flavors actually meld together nicely when it sits for a day or two.
Can I use different cereals?
Definitely! Any crunchy cereal works—Cheerios, Crispix, or even gluten-free cereals are great swaps for a fun twist.
How long does it stay fresh?
Stored in an airtight container at room temperature, this Chex mix stays crunchy for up to 2 weeks. Just avoid the fridge to prevent sogginess.
Can I add chocolate or candy?
Yes! Wait until the mix is completely cool before adding chocolate candies, M&Ms, or candy cane pieces so they don’t melt.
Can I make it spicier or add other flavors?
Sure! A pinch of cinnamon, nutmeg, or even a touch of cayenne can add a unique holiday twist. Adjust according to your taste.
Did you try this recipe? Let me know in the comments how it turned out!
Christmas Chex Mix Recipe
Equipment
- Large mixing bowl
- Medium saucepan
- Wooden Spoon or Silicone Spatula
- Baking Sheet
- Measuring cups and spoons
- Large airtight container or treat bags
Ingredients
For the Mix:
- 3 cups Rice Chex cereal
- 3 cups Corn Chex cereal
- 3 cups Wheat Chex cereal
- 2 cups mini pretzels
- 1 cup holiday-themed M&Ms or chocolate candies
- 1 cup roasted nuts pecans, almonds, or peanuts
- 1 cup candy cane pieces or festive sprinkles
For the Coating:
- 1/2 cup unsalted butter
- 1/4 cup brown sugar
- 1/4 cup corn syrup
- 1 tsp vanilla extract
- 1/2 tsp salt
- 1/4 tsp cinnamon optional, for a warm holiday touch
Instructions
Step 1: Preheat and Prep
- Preheat your oven to 250°F (120°C).
- Line a large baking sheet with parchment paper or a silicone baking mat. This makes cleanup a breeze and prevents sticking.
- Measure out all your cereals, pretzels, and nuts so everything is ready to go.
- Pro Tip: Having everything measured before you start makes the process smooth—no scrambling mid-way!
Step 2: Mix the Dry Ingredients
- In a large mixing bowl, combine the Rice Chex, Corn Chex, Wheat Chex, pretzels, and nuts.
- Gently toss them together until evenly mixed.
- Pro Tip: Be gentle when stirring—these cereals are delicate and can break easily.
Step 3: Make the Coating
- In a medium saucepan over medium heat, melt the butter.
- Stir in the brown sugar and corn syrup until fully combined.
- Bring to a gentle boil, stirring constantly.
- Remove from heat and stir in the vanilla extract, salt, and cinnamon (if using).
- Pro Tip: Whisk continuously while heating the butter and sugar to prevent lumps and ensure a smooth, glossy coating.
Step 4: Coat the Mix
- Pour the warm butter mixture over the dry cereal mix.
- Use a wooden spoon or silicone spatula to fold everything together until all pieces are evenly coated.
- Pro Tip: Work quickly while the coating is warm—it spreads more easily and sticks better to every piece.
Step 5: Bake the Mix
- Spread the coated mix evenly on the prepared baking sheet.
- Bake for 45 minutes, stirring every 15 minutes to ensure even baking and coating.
- Pro Tip: Stirring periodically prevents clumps and gives that perfect crunchy texture we all love.
Step 6: Cool and Add Festive Touches
- Remove from the oven and let the mix cool completely on the baking sheet.
- Once cooled, fold in M&Ms, candy cane pieces, or sprinkles.
- Pro Tip: Make sure the mix is completely cool before adding chocolate candies—they’ll melt if added too soon.
Step 7: Store or Serve
- Transfer your Christmas Chex Mix into an airtight container for snacking or into cute treat bags for gifting.
- Enjoy immediately, or let it sit for a day to allow flavors to meld beautifully.
- Pro Tip: This mix stays crunchy for up to two weeks if stored in a cool, dry place.
Notes
Nutritional Value (Per Serving)
- Calories: ~210 kcal
- Carbohydrates: 28g
- Protein: 3g
- Fat: 10g
- Saturated Fat: 4g
- Cholesterol: 10mg
- Sodium: 150mg
- Fiber: 1g
- Sugars: 12g