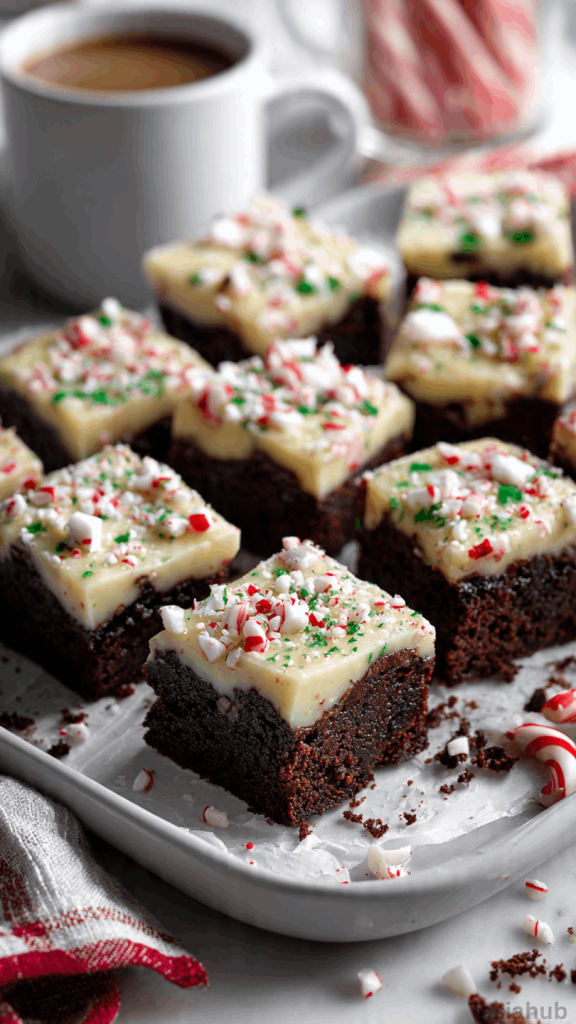
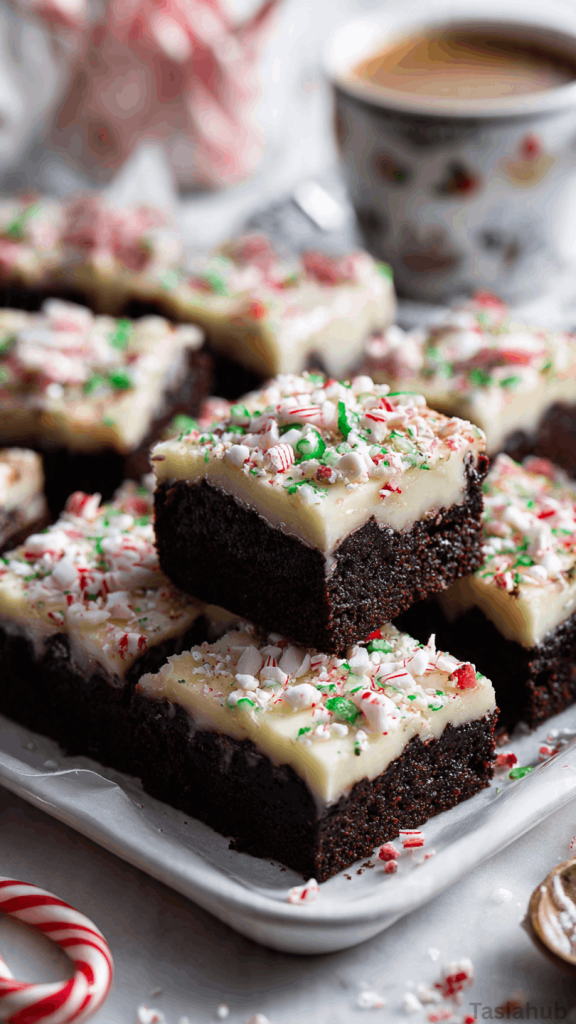
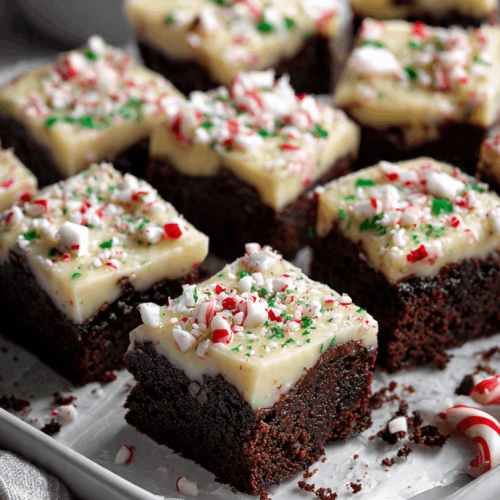
Christmas Brownies
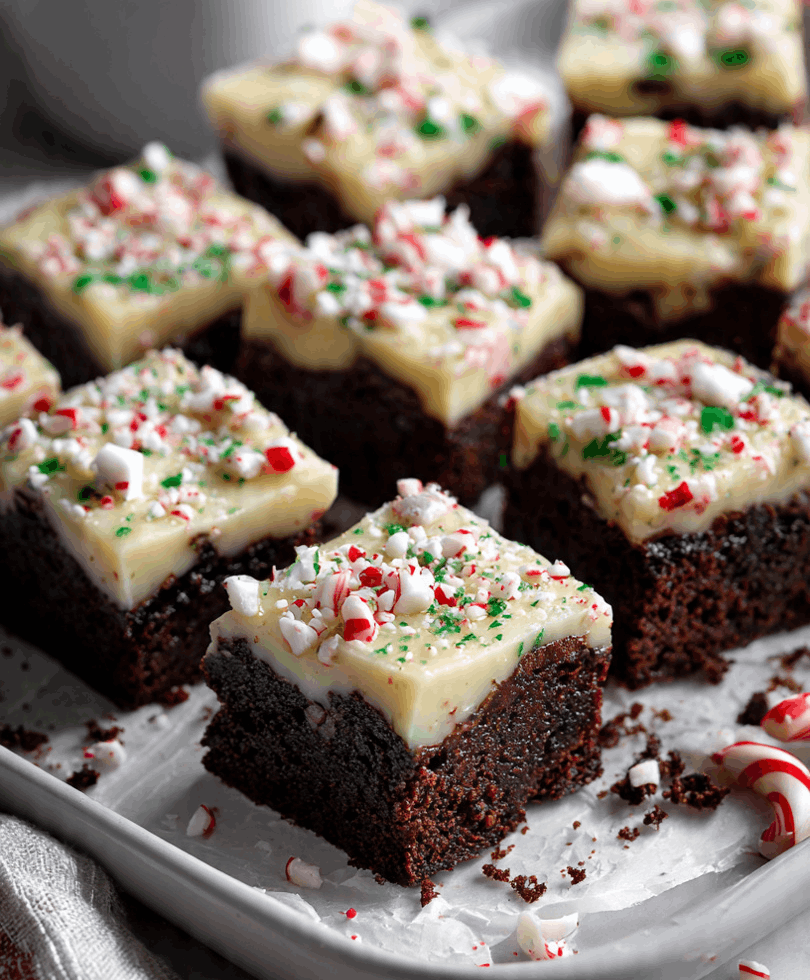
When it comes to holiday baking, few desserts steal the spotlight like a rich, fudgy brownie dressed up for Christmas. These Christmas brownies are everything you love about the classic treat — gooey, chocolatey, and perfectly chewy — but with a festive twist that makes them shine on any dessert table. Imagine warm bites of chocolatey goodness topped with a swirl of frosting, crushed candy canes, or a sprinkle of red and green M&Ms — pure holiday magic.
Baking during the holidays always feels extra special. The house fills with the scent of melting chocolate and sugar, the lights twinkle in the background, and for a moment, everything feels cozy and joyful. These brownies are more than just a dessert — they’re a small, delicious way to slow down and savor the season. Whether you’re baking with family or making a last-minute treat for a Christmas party, this recipe delivers big flavor with minimal fuss.
They’re also one of the best simple Christmas desserts to make when you want something both impressive and easy. You don’t need fancy ingredients or hours of prep time. Just a handful of pantry staples, a little mixing, and a few festive toppings turn ordinary brownies into the kind of holiday treats that disappear faster than you can set them down.
So, if you’re gathering ideas for Christmas desserts this year, these brownies deserve a spot on your list. From casual get-togethers to elegant dinner parties, they fit right in — cozy, classic, and loaded with holiday cheer. These holiday brownies are guaranteed to satisfy your sweet tooth and bring a little sparkle to your dessert spread. Whether you call them Xmas brownies, holiday brownies, or just your new favorite Xmas desserts, they’re bound to become a go-to favorite for years to come.
Perfect for cookie exchanges, potlucks, or cozy nights in, these easy Christmas desserts ideas are sure to bring smiles all around. Bake a batch, wrap them up in festive paper, and share them with friends — because nothing says “Merry Christmas” quite like homemade brownies fresh from the oven.
Why You’ll Love It
- Fudgy, rich, and festive: These brownies are everything you crave in a classic chocolate dessert — gooey in the center with crisp, chewy edges — all dressed up in their Christmas best.
- Effortlessly impressive: No need for complicated steps or fancy tools. A simple batter, a dash of creativity, and you’ve got a dessert that looks like it came from a bakery window.
- Perfect for gifting: Wrapped in a little holiday tin or clear bag tied with ribbon, these brownies make thoughtful, homemade gifts that everyone will actually want to receive.
- Customizable toppings: From crushed candy canes to white chocolate drizzle or sprinkles, you can decorate them any way you like — every batch feels new and fun.
- Crowd-pleaser status guaranteed: Whether served warm at a family gathering or chilled at a holiday party, these brownies never fail to disappear first from the dessert table.
Ingredient List
For the Brownies:
- 1 cup unsalted butter (melted)
- 1 ¼ cups granulated sugar
- ¾ cup brown sugar (packed)
- 3 large eggs
- 2 teaspoons vanilla extract
- 1 cup all-purpose flour
- ¾ cup unsweetened cocoa powder
- ½ teaspoon salt
- ½ teaspoon baking powder
For the Topping:
- 1 cup white chocolate chips or melted white chocolate
- ½ cup crushed candy canes or peppermint pieces
- ¼ cup holiday sprinkles (red, green, and white mix)
Ingredient Notes
- Butter: I always use real unsalted butter for that rich, melt-in-your-mouth texture. It gives these brownies that signature fudgy bite.
- Brown sugar: Don’t skip it! It adds moisture and a slight caramel note that makes every bite extra decadent.
- Cocoa powder: Go for a good-quality unsweetened cocoa — I love using Dutch-process cocoa for a deeper chocolate flavor and darker color.
- Vanilla extract: Pure vanilla makes a difference here. It balances the chocolate beautifully and enhances the sweetness.
- Candy canes: A little crunch and minty pop on top make these brownies taste so festive. If you’re not into peppermint, swap them for crushed cookies or M&Ms.
- White chocolate topping: Drizzle or spread it over the cooled brownies — it’s that final festive touch that makes them look (and taste) like a Christmas bakery treat.
Kitchen Equipment Needed
- Mixing bowls: You’ll need one for wet ingredients and another for dry — I like using glass bowls so I can easily see when everything’s fully mixed.
- Whisk & spatula: The whisk helps blend the sugars and eggs smoothly, while the spatula is perfect for folding in the dry ingredients without overmixing.
- 8×8 or 9×9-inch baking pan: Either size works, but I personally prefer a metal pan — it gives those perfectly chewy edges and an even bake.
- Parchment paper: Makes removing the brownies so much easier (plus, no messy cleanup).
- Measuring cups & spoons: Accuracy matters in baking — my stainless steel set has lasted for years and never warps.
- Microwave-safe bowl or saucepan: For melting butter and chocolate smoothly without scorching.
- Cooling rack: Helps the brownies cool evenly before adding toppings — trust me, patience pays off for the best texture!
Instructions
Step 1 — Prep your pan and oven
- Preheat the oven to 350°F (175°C).
- Line an 8×8 or 9×9-inch baking pan with parchment paper, leaving a little overhang on two sides so you can lift the brownies out easily.
- Lightly spray the parchment with nonstick spray or brush with a tiny bit of melted butter.
Pro tip: let the parchment hang over the edges — it makes lifting and slicing the brownies so much cleaner.
Step 2 — Combine the wet ingredients
- In a medium bowl, add melted butter and both granulated and brown sugar. Whisk until the mixture is smooth and the sugars begin to dissolve.
- Add the eggs one at a time, whisking well after each addition so the batter becomes glossy.
- Stir in the vanilla extract.
Pro tip: whisk briskly after each egg so the batter gets a little air and becomes shiny — that helps create a lovely brownie crust.
Step 3 — Mix the dry ingredients
- In a separate bowl, sift (or stir) together the all-purpose flour, unsweetened cocoa powder, salt, and baking powder.
- Give the dry ingredients a quick whisk so there are no lumps and everything is evenly distributed.
Step 4 — Combine wet + dry for the batter
- Pour the dry ingredients into the wet mixture in two additions. Fold gently with a spatula after each addition until just combined.
- Scrape the sides and bottom of the bowl to make sure there are no pockets of flour. The batter should be thick and glossy — not overmixed.
Pro tip: fold, don’t beat — overmixing will develop the gluten and can make brownies cakier instead of fudgy.
Step 5 — Bake the brownies
- Pour the batter into the prepared pan and smooth the top with an offset spatula or the back of a spoon.
- Bake in the preheated oven for 22–28 minutes. Start checking at 22 minutes — a toothpick inserted into the center should come out with a few moist crumbs (not dry batter).
- Rotate the pan halfway through baking if your oven has hot spots.
Pro tip: aim for slightly underbaked rather than overbaked for that perfect fudgy center — carryover heat will finish them as they cool.
Step 6 — Cool and add the topping
- Remove the pan from the oven and let it cool on a cooling rack for 15–20 minutes.
- If using melted white chocolate: gently melt the white chocolate chips in a microwave-safe bowl in 20-second bursts, stirring between bursts until smooth. Drizzle or spread over the slightly cooled brownies.
- Sprinkle the crushed candy canes and holiday sprinkles over the white chocolate while it’s still tacky so they stick.
Pro tip: if your white chocolate seizes or gets grainy, stir in a teaspoon of neutral oil or a small splash of cream to smooth it out.
Step 7 — Chill, lift, and slice
- For clean slices, chill the pan in the fridge for 20–30 minutes after the topping sets.
- Use the parchment overhang to lift the whole slab out of the pan. Place on a cutting board and use a sharp knife to cut into squares. Wipe the knife clean between cuts for neat edges.
Step 8 — Serve
- Serve slightly warmed with a scoop of vanilla ice cream or simply as-is with a hot cup of coffee or cocoa.
Tips and Tricks for Success
- Don’t overbake: The secret to fudgy holiday brownies is pulling them out while they still look slightly underdone — they’ll firm up as they cool.
- Use room-temperature eggs: Cold eggs can make your batter seize or thicken unevenly. Let them sit out for about 15 minutes before mixing.
- Line your pan properly: Parchment paper is your best friend here — it keeps the edges from sticking and ensures a smooth lift every time.
- Cool completely before slicing: Patience pays off! Warm brownies tend to crumble, but once they’ve cooled, you’ll get perfect, clean squares.
- Decorate after cooling: If you add the white chocolate or sprinkles while the brownies are too hot, everything melts and slides off. Wait until they’re warm but no longer steaming.
- Use quality cocoa powder: A rich cocoa adds depth to your brownies and makes them taste like something straight from a bakery.
Ingredient Substitutions and Variations
- Gluten-free option: Swap the all-purpose flour for a 1:1 gluten-free baking blend. It works beautifully and keeps the same texture.
- Dairy-free brownies: Use plant-based butter or coconut oil in place of regular butter, and dairy-free chocolate for topping.
- Add-ins for texture: Stir in chocolate chips, crushed Oreos, or chopped nuts for extra crunch and richness.
- Flavor twist: Replace vanilla extract with peppermint or orange extract for a festive flavor upgrade.
- Topping alternatives: Instead of candy canes, try drizzling caramel sauce, topping with mini marshmallows, or scattering red and green M&Ms.
- Festive swirl: Drop spoonfuls of red and green tinted cream cheese mixture onto the brownie batter before baking and swirl for a marbled Christmas look.
- Extra gooey brownies: Add an extra egg yolk or a tablespoon of espresso powder to intensify the flavor and create a denser texture.
Serving Suggestions
- Warm with ice cream: I love serving these brownies slightly warmed with a scoop of vanilla or peppermint ice cream — the hot-and-cold combo is irresistible!
- Holiday platter favorite: Cut them into bite-sized squares and arrange them with cookies, fudge, and truffles for a festive dessert board.
- Drizzled delight: Add a light drizzle of chocolate or caramel sauce just before serving for a glossy, bakery-style finish.
- Paired with a cozy drink: These brownies taste amazing with a mug of hot cocoa, spiced chai, or even peppermint mocha — pure holiday comfort.
- Gift-worthy treat: Wrap individual squares in parchment and tie them with red ribbon — perfect for gifting to friends, coworkers, or neighbors.
Storage and Reheating Instructions
- Room temperature: Store brownies in an airtight container at room temp for up to 3 days. Keep them between layers of parchment to prevent sticking.
- Refrigeration: For longer storage, refrigerate for up to a week. The flavor actually deepens after a day or two!
- Freezing: Wrap individual brownies tightly in plastic wrap, then in foil, and freeze for up to 3 months. Thaw at room temp before serving.
- Reheating: Warm in the microwave for 10–15 seconds for that just-baked texture — the chocolate gets melty and the edges soften beautifully.
- Refreshing leftovers: If they’ve dried out a little, place a slice of bread in the storage container overnight — it helps keep the brownies moist again.
Frequently Asked Questions
Can I make these brownies ahead of time?
Absolutely! These brownies actually taste better the next day once the flavors settle. Just bake, cool completely, and store them in an airtight container until you’re ready to serve.
How do I know when the brownies are done?
Check them around the 22-minute mark. A toothpick inserted into the center should come out with a few moist crumbs — not wet batter. Remember, they’ll keep cooking a little after coming out of the oven!
Can I double this recipe?
Yes, definitely. Just use a 9×13-inch pan and bake for about 30–35 minutes, keeping an eye on the edges. It’s perfect for parties or cookie exchanges.
What can I use instead of candy canes for topping?
You can swap them with red and green M&Ms, crushed cookies, mini marshmallows, or even dried cranberries for a pretty and delicious twist.
Can I make these brownies without eggs?
Yes — replace each egg with a “flax egg” (1 tablespoon ground flaxseed + 3 tablespoons water). It keeps the brownies moist and fudgy, though the texture will be a bit denser.
How do I cut brownies neatly?
For clean, bakery-style edges, chill the brownies first, then use a sharp knife wiped clean between each slice. A plastic knife also works surprisingly well for sticky brownies!
Did you try these Christmas brownies? Let me know in the comments how they turned out — and if you added your own fun twist! I’d love to see how you made them part of your holiday celebrations.
Christmas Brownies
Equipment
- Mixing Bowls
- Whisk & spatula
- 8×8 or 9×9 inch baking pan
- Parchment paper
- Measuring Cups & Spoons
- Microwave-safe bowl or saucepan
- Cooling Rack
Ingredients
For the Brownies:
- 1 cup unsalted butter melted
- 1 ¼ cups granulated sugar
- ¾ cup brown sugar packed
- 3 large eggs
- 2 teaspoons vanilla extract
- 1 cup all-purpose flour
- ¾ cup unsweetened cocoa powder
- ½ teaspoon salt
- ½ teaspoon baking powder
For the Topping:
- 1 cup white chocolate chips or melted white chocolate
- ½ cup crushed candy canes or peppermint pieces
- ¼ cup holiday sprinkles red, green, and white mix
Instructions
Step 1 — Prep your pan and oven
- Preheat the oven to 350°F (175°C).
- Line an 8×8 or 9×9-inch baking pan with parchment paper, leaving a little overhang on two sides so you can lift the brownies out easily.
- Lightly spray the parchment with nonstick spray or brush with a tiny bit of melted butter.
- Pro tip: let the parchment hang over the edges — it makes lifting and slicing the brownies so much cleaner.
Step 2 — Combine the wet ingredients
- In a medium bowl, add melted butter and both granulated and brown sugar. Whisk until the mixture is smooth and the sugars begin to dissolve.
- Add the eggs one at a time, whisking well after each addition so the batter becomes glossy.
- Stir in the vanilla extract.
- Pro tip: whisk briskly after each egg so the batter gets a little air and becomes shiny — that helps create a lovely brownie crust.
Step 3 — Mix the dry ingredients
- In a separate bowl, sift (or stir) together the all-purpose flour, unsweetened cocoa powder, salt, and baking powder.
- Give the dry ingredients a quick whisk so there are no lumps and everything is evenly distributed.
Step 4 — Combine wet + dry for the batter
- Pour the dry ingredients into the wet mixture in two additions. Fold gently with a spatula after each addition until just combined.
- Scrape the sides and bottom of the bowl to make sure there are no pockets of flour. The batter should be thick and glossy — not overmixed.
- Pro tip: fold, don’t beat — overmixing will develop the gluten and can make brownies cakier instead of fudgy.
Step 5 — Bake the brownies
- Pour the batter into the prepared pan and smooth the top with an offset spatula or the back of a spoon.
- Bake in the preheated oven for 22–28 minutes. Start checking at 22 minutes — a toothpick inserted into the center should come out with a few moist crumbs (not dry batter).
- Rotate the pan halfway through baking if your oven has hot spots.
- Pro tip: aim for slightly underbaked rather than overbaked for that perfect fudgy center — carryover heat will finish them as they cool.
Step 6 — Cool and add the topping
- Remove the pan from the oven and let it cool on a cooling rack for 15–20 minutes.
- If using melted white chocolate: gently melt the white chocolate chips in a microwave-safe bowl in 20-second bursts, stirring between bursts until smooth. Drizzle or spread over the slightly cooled brownies.
- Sprinkle the crushed candy canes and holiday sprinkles over the white chocolate while it’s still tacky so they stick.
- Pro tip: if your white chocolate seizes or gets grainy, stir in a teaspoon of neutral oil or a small splash of cream to smooth it out.
Step 7 — Chill, lift, and slice
- For clean slices, chill the pan in the fridge for 20–30 minutes after the topping sets.
- Use the parchment overhang to lift the whole slab out of the pan. Place on a cutting board and use a sharp knife to cut into squares. Wipe the knife clean between cuts for neat edges.
Step 8 — Serve and store
- Serve slightly warmed with a scoop of vanilla ice cream or simply as-is with a hot cup of coffee or cocoa.
- Store leftover brownies in an airtight container at room temperature for up to 3 days, or in the fridge for up to 7 days. Freeze for longer storage — tightly wrapped, they keep well for up to 3 months.
Notes
Nutritional Value (per brownie, approx.):
- Calories: 220 kcal
- Fat: 12 g
- Saturated Fat: 7 g
- Carbohydrates: 28 g
- Sugars: 20 g
- Protein: 3 g
- Fiber: 2 g
- Sodium: 90 mg